
Expanding your online WooCommerce store with a point-of-sale (POS) system to sell in person is a great way to capture more revenue – but figuring out the right hardware first can feel confusing. What equipment do you actually need to handle sales seamlessly while keeping costs in check?
In this guide, we’ll break down essential WooCommerce POS hardware like card readers, barcode scanners, and printers and show you how Jovvie makes it all work together effortlessly. With Jovvie’s flexibility, setting up your POS system – whether in-store or on-the-go – has never been easier.
What is a WooCommerce POS system and why should you use one?
A WooCommerce POS system helps you connect your physical and online stores into one seamless platform. You can manage inventory, process orders, and accept payments all in one place.
WooCommerce POS systems are ideal for businesses expanding their online operations to sell in person, whether in a retail store or during events like craft fairs and farmers’ markets. Using a POS system ensures your inventory stays synchronized across all locations, avoiding mistakes from manual entries, enhancing inventory tracking, and empowering smarter restocking decisions.
Jovvie stands out with its seamless integration, helping businesses streamline in-person and online sales efficiently.
What WooCommerce POS hardware do I need?
The hardware you’ll need depends on your chosen POS plugin. With Jovvie, a lightweight, flexible solution, you can start selling both in-store and on the go quickly without requiring extensive hardware. Here’s a breakdown of what you’ll need:
Checkout hardware
Most WooCommerce POS solutions are cloud-based, so you may not need expensive hardware. Jovvie works seamlessly on any computer browser and has dedicated apps for iOS and Android. This flexibility eliminates the need for costly physical checkout terminals and allows for sales anytime, anywhere.
Card reader
For card payments, you’ll need a card reader compatible with your POS system. Jovvie integrates natively with Stripe Terminal, Stripe’s physical payment solution. Supported hardware includes the Stripe M2 reader (USA) or BBPOS WisePad 3 (worldwide). Jovvie is also compatible with Square’s contactless reader or your existing readers.
For smaller businesses, Jovvie’s ‘Pay by WC’ feature enables card payments without physical readers. Simply input customer card details directly into the POS.
Barcode scanner
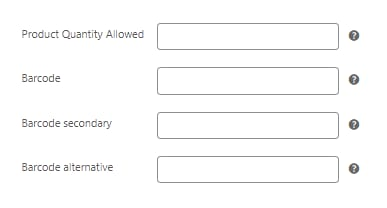
Efficient checkouts often require barcode scanning. Jovvie supports barcode scanning using your device’s built-in camera or third-party scanners paired via USB or Bluetooth. You can store up to three barcodes per product in Jovvie. For businesses needing to generate barcodes, plugins like the A4 Barcode Generator work seamlessly with WooCommerce.
Printer
Printers streamline checkout by providing physical receipts. Jovvie integrates smoothly with the BizPrint plugin to auto-print receipts. It supports all printer types, with thermal printers ideal for high-volume receipt printing.
Jovvie’s versatile integration ensures you can leverage your existing hardware or start selling with minimal upfront costs.
★★★★★ RATED 4.9/5 BY 5,000+ WOOCOMMERCE STORES
Sell anywhere. Sync to WooCommerce instantly.
Your retail counter, your tradeshow booth, your next pop-up — Jovvie is the only POS built natively for WooCommerce. No duplicate inventory, no failed syncs, no middleware.
How do I integrate my WooCommerce POS system with hardware?
Integrating your WooCommerce POS system with hardware is simple when using Jovvie. Here’s an easy guide to setting up a mobile system, configuring payments, and connecting hardware like barcode scanners and printers.
Step 1: Install and configure Jovvie
Jovvie is available as a cloud-hosted service or self-hosted plugin.
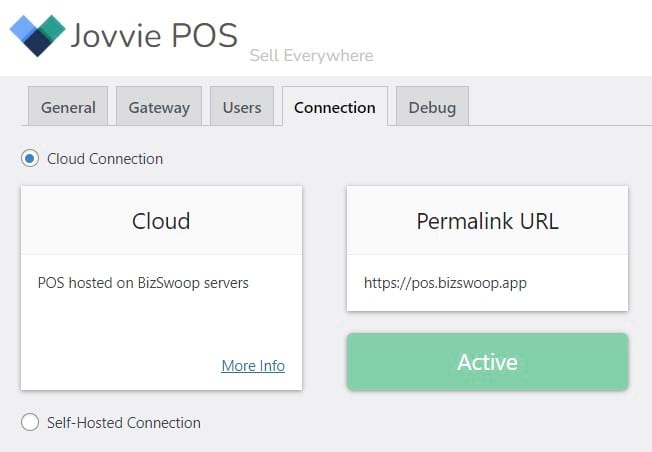
The cloud version ensures real-time data synchronization, while self-hosting requires sufficient server capacity. Follow these steps to get started:
- Download the plugins: Get the POS API connector plugin and (if self-hosting) the POS WP UI self-hosted plugin.
- Upload and activate: In your WordPress dashboard, navigate to “Plugins” > “Upload Plugin,” then install and activate them.
- Connect your device: Use the BizSwoop POS app for iOS or Android, or access the POS via browser.
- Sync inventory and data: All products, orders, customers, and stock sync seamlessly between the WooCommerce store and Jovvie POS. Updates happen in real time for multiple storefronts.
Step 2: Enable Stripe Terminal payments
Jovvie integrates easily with Stripe Terminal, a powerful payment solution. Follow these steps:
- Install and activate the WooCommerce Stripe payment gateway plugin on your site.
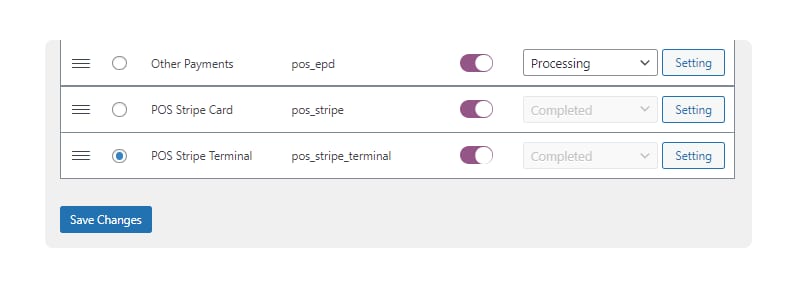
- Navigate to “POS > Settings > Gateways” and enable Stripe Terminal as a payment method.
- Open BizSwoop’s app to enter specific server settings:
- Default POS Station: yoururl.com/pos
- API Server URL: yoururl.com
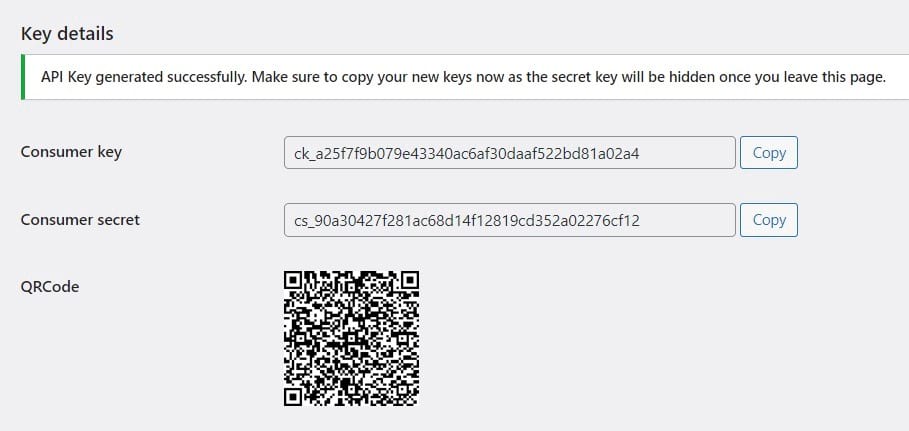
- Generate API keys from WooCommerce > Settings > Advanced > REST API.
- Add a description (e.g., “Stripe Terminal”) and select permissions (Read/Write). Copy these keys to your BizSwoop app.
Copy the API Consumer Key and Consumer Secret from WooCommerce into the BizSwoop app settings.
- In the BizSwoop app, activate the Credit Card Gateway. Set the provider to Stripe Terminal, and ensure “Stripe Terminal Device” is selected as the connection type.
- Generate a location ID from your Stripe dashboard by creating a new address location. Copy and paste this ID into the BizSwoop app.
- POS Stripe Terminal will now appear as a payment option in your WooCommerce POS interface, ready to accept card transactions seamlessly.
Step 3: Integrate barcode scanners
Barcode scanners make the checkout process faster and more accurate by eliminating manual product entry. Here’s how you can integrate Jovvie with barcode scanning hardware:
- Use pre-existing barcodes: If your products already have barcodes, store up to three barcode options per product directly in WooCommerce’s backend. This ensures easy lookup with Jovvie during checkout.
- Generate product barcodes: Need barcodes? Install the A4 Barcode Generator plugin to create barcodes. For additional functionality, you can pair these with a solution like BizPrint for printing product labels with barcodes alongside receipts.
- Scanning options: Jovvie supports flexible barcode integration:
- Use your device’s camera (such as on a smartphone or tablet) for scanning directly.
- Connect external barcode readers via USB or Bluetooth to your device (i.e., phone, tablet, desktop, or laptop).
- Pair registered barcode readers with Jovvie through supported partner devices.
- Open the POS interface, select the “barcode search” option, and start scanning your products using the connected or built-in device. The corresponding product will instantly populate on the order screen in your Jovvie POS system.
By offering versatile integration, Jovvie ensures smoother, faster checkouts, no matter your available hardware.
Step 4: Printer integration for automatic receipts
Printing receipts directly from your POS system can significantly speed up checkout processes and improve customer experience. With Jovvie’s built-in integration with BizPrint, setting up auto-printing for your WooCommerce POS system is easy.
Follow these steps to enable receipt printing:
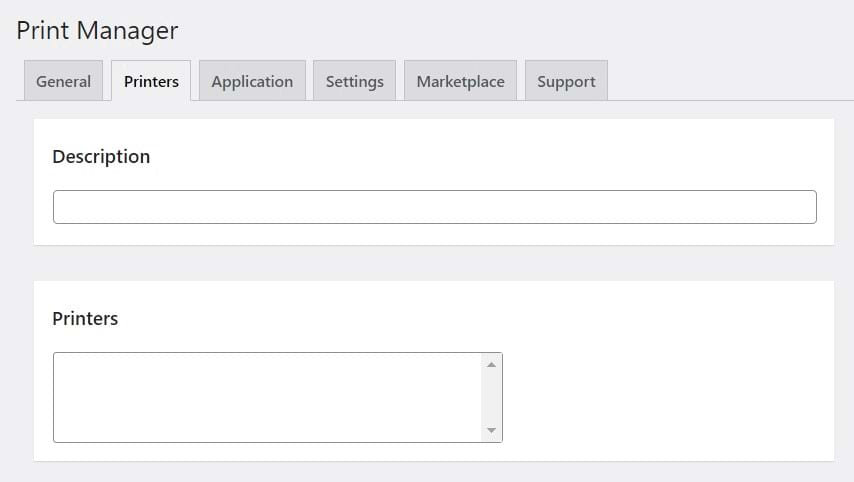
- Install and activate BizPrint: Download BizPrint and follow the quick-start guide to integrate it with your WooCommerce store.
- Add your printer: Pair your printer with the BizPrint plugin, whether it’s a standard inkjet printer or a thermal printer ideal for high-volume receipting. BizPrint supports all major printer models.
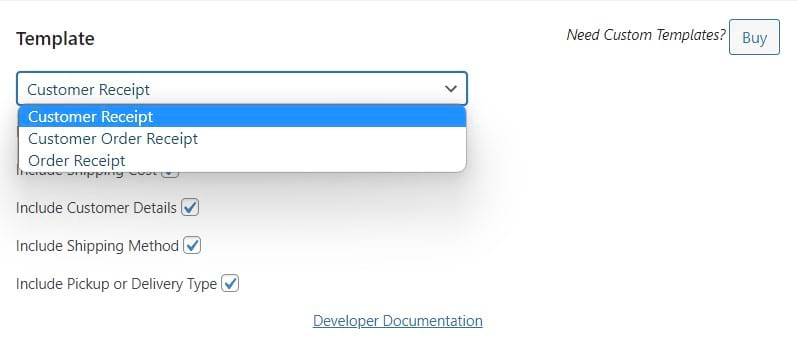
- Set up receipt templates: Use one of several customizable templates to create and format printed receipts according to your needs. BizPrint is highly versatile, supporting multi-language and custom branding preferences.
- Auto-print receipts: After receiving an order, receipts will print automatically to hand over to customers. This feature helps with bookkeeping, builds customer trust, and keeps workflows efficient.
With BizPrint and Jovvie’s seamless integration, there’s no need for expensive, locked-in hardware. Use your existing printer system or explore thermal printers for speedier operations.
Create a fully operational point of sale with WooCommerce POS hardware
A WooCommerce POS system lets you expand into in-person sales with ease, ensuring seamless synchronization of orders, customers, and inventory. Here’s a quick recap of the essential WooCommerce POS hardware:
- Checkout hardware: Flexible options with no need for expensive terminals when using Jovvie.
- Card reader: A choice of native Stripe Terminal, Square readers, or existing devices – even a ‘Pay by WC’ option without a physical reader.
- Barcode scanner: Scanning capabilities via device cameras or compatible external readers to streamline sales.
- Printer: Automatic receipt printing with BizPrint integration, supporting a wide variety of printers.
By integrating robust software and compatible hardware, Jovvie simplifies every aspect of in-person sales. With real-time sync and compatibility with existing WooCommerce infrastructure, you’ll avoid overselling, maintain better inventory control, and gain valuable business insights.
Join the 25,000+ businesses that trust Jovvie as their partner in WooCommerce POS operations. Its lightweight, versatile setup accommodates differing needs and requires minimal technical experience. Take advantage of Jovvie’s 30-day free trial for straightforward, expert guidance and dedicated support.
★★★★★ RATED 4.9/5 BY 5,000+ WOOCOMMERCE STORES
Sell anywhere. Sync to WooCommerce instantly.
Your retail counter, your tradeshow booth, your next pop-up — Jovvie is the only POS built natively for WooCommerce. No duplicate inventory, no failed syncs, no middleware.