
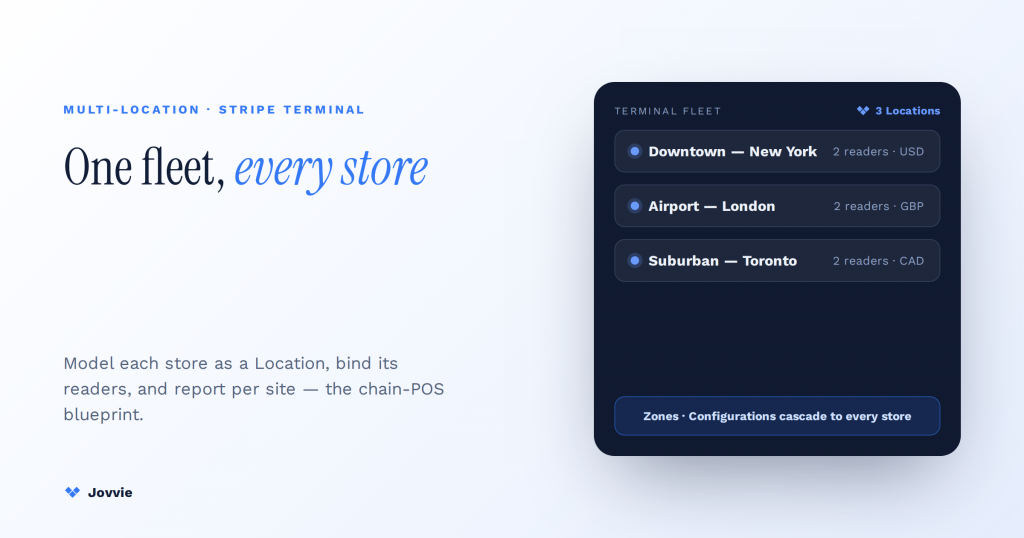
You run a multi-location POS on Stripe Terminal by modeling each store as its own Location. Register that store’s readers to its Location, apply per-location settings through hierarchical Configurations, group stores into Zones for regional or sub-brand organization, and attribute every sale back to its Location for per-store reporting. The Location is the keystone — it is required for every reader, it carries the address that drives regional and tax behavior, and your reporting hangs off it. This guide assembles the whole chain-POS blueprint, in order, the way an operator actually builds it.
Key Takeaways
- One Location per store is the keystone. Model each physical store as a Stripe Location; every reader must be registered to a Location before it can take a payment.
- Readers bind to Locations. The reader-to-Location binding set at registration is what attributes each sale to the right store automatically.
- Configurations cascade. Set chain-wide defaults once and override per store (tips, currency context, branding); settings apply account → Zone → Location.
- Zones are Dashboard-only. You can script Location creation with the Locations API, but Zones cannot be created or edited via API — design your Zone structure up front.
- Currency follows the address; tax is your POS’s job. A Location’s country drives presentment currency, while WooCommerce tax settings compute the actual tax — align both per store.
- Reporting falls out of the structure. Because attribution rides on the Location, per-store revenue, reconciliation, and regional roll-ups become filters, not data projects.
We have built WooCommerce point-of-sale on Stripe Terminal for eight years — for single boutiques through multi-region retailers across more than 30 countries — and Jovvie is an official Stripe Partner, so this is written from chains we have actually provisioned, not from the API reference alone. The difference between a one-store setup and a multi-location one is not the payment flow; that is identical. It is the structure around the payment: how stores map to Locations, how readers bind to the right store, how tax and currency vary by site, and how you report on each store separately. That structure is what this piece is about.
If you are wiring a single high-traffic site with several readers on one counter, read the companion piece first — how to pair multiple Stripe readers to one location — because a chain is that pattern repeated per store. For how the register itself works on top of Stripe Terminal, see how Stripe Terminal works as a point-of-sale system.
How a multi-location POS works on Stripe Terminal (the Locations model in one minute)
A multi-location POS on Stripe Terminal works by representing each store as its own Location object, binding that store’s readers to it, and letting Stripe cascade the right settings down to each site — so a chain is not a special product, it is the standard Location model applied once per store and organized with Zones on top.
Stripe’s fleet architecture gives you three building blocks, from the ground up:
- Location — one physical store. It holds an address (which sets regional and card-present behavior), the readers registered there, and the settings that apply to that site.
- Configuration — the settings layer. Configurations apply hierarchically, so you can set a chain-wide default and override it per Location (per-store tips, currency behavior, splash screens, and more).
- Zone — an optional grouping of Locations, for regions, franchises, or sub-brands. Zones let you manage and report on clusters of stores together.
The mental model is a tree: your account at the top, Zones grouping Locations, Locations holding readers, Configurations cascading down. Here is that structure in one table.
| Layer | What it represents | Cardinality | Set via |
|---|---|---|---|
| Account | Your Stripe account / the whole chain | 1 | Dashboard / API |
| Zone | A region, franchise, or sub-brand | 0..many | Dashboard only (not the API) |
| Location | One physical store | 1 per store | Locations API or Dashboard |
| Reader | A card reader at that store | 1..many per Location | Register readers |
| Configuration | Settings (tax context, tips, currency, UI) | Cascades account → Zone → Location | Configurations |
Keep that tree in mind and the rest of this guide is just filling in each layer. One caveat worth stating up front because it shapes how you automate provisioning: Zones can be created and modified only in the Stripe Dashboard, not through the API. More on what that means below.
Mapping store addresses to Stripe Locations
Start by creating one Location per store, using each store’s real street address — the address is not cosmetic; it determines the regional processing rules and card-present tax behavior Stripe applies to transactions at that site. This mapping is the foundation of the whole chain, so do it deliberately.
A Location is required before any reader at that store can take a payment, per the Locations API reference. The Location object is simple — primarily a display_name and an address — but the discipline is in the naming and the accuracy:
- One Location per physical site. Do not share a Location across two stores to save objects; per-store reporting and per-store settings both depend on the one-store-one-Location rule.
- Use the store’s real address. The address drives regional configuration. A New York store and a London store need their own Locations with their own addresses so card-present behavior and tax context are correct at each.
- Name Locations for humans. “Downtown — 5th Ave” beats “Location 3.” Your staff, your reporting, and your future self all read these names.
You can create Locations two ways, and a chain usually uses both. The Dashboard is fine for a handful of stores or one-off additions. For a chain that opens stores regularly, script it against the Locations API — create to add a store, list to enumerate them, retrieve to inspect one — so provisioning a new store is a repeatable operation rather than manual data entry. Because Jovvie wraps the Terminal SDK for you, in a packaged WooCommerce POS this Location creation is exposed as store setup in the register admin rather than raw API calls — but the object underneath is exactly the Stripe Location described here.
Binding readers to the right Location
Register each store’s readers to that store’s Location — the reader-to-Location binding is what tells Stripe (and your POS) which store a given reader belongs to, and it is what keeps a payment taken at Store A from being attributed to Store B. This is the step where a chain most often gets tangled, so treat it carefully.
Every reader binds to exactly one Location at registration, following Stripe’s register-readers flow: smart readers (S700/S710) register with an on-screen pairing code entered against the target Location; mobile readers (WisePad 3, M2) register through the SDK during discovery. The rules that keep a multi-store fleet clean:
- Register at, or assign to, the correct Location. A reader registered to “Downtown” reports and behaves as a Downtown reader. Registering it to the wrong Location silently misattributes every sale it takes.
- Label readers with store + lane. “Downtown — Lane 1” scales across a chain far better than a serial number. Consistent labeling is what makes a 40-reader estate operable.
- Scope connection tokens per store. When a register app connects, its ConnectionToken is scoped to the store’s Location, so the app only ever sees that store’s readers — no risk of a device in one store connecting to another store’s hardware. (The within-store mechanics of running several readers on one counter are covered in the multi-reader guide.)
The payoff of getting binding right is that reporting, tax, and routing all become automatic downstream — because everything keys off the Location the reader is bound to.
A quick worked example makes the binding discipline concrete. Say you run a three-store chain — Downtown, Airport, and Suburban — each with two lanes. That is three Locations, six readers, and each reader registered to its own store’s Location: “Downtown — Lane 1,” “Downtown — Lane 2,” “Airport — Lane 1,” and so on. When a cashier at the Airport store rings up a sale, that store’s register connects (via a Location-scoped ConnectionToken) only to the two Airport readers, charges on the one for its lane, and the sale is attributed to the Airport Location automatically. Nothing about the transaction has to “know” it is a multi-store chain — the binding you set at registration carries the store identity through processing, reporting, and reconciliation without a single manual tag. Repeat that per store and the chain scales without new logic.
Per-location currency and tax with hierarchical Configurations
Set per-store behavior — tipping, currency context, on-screen branding, and tax-relevant settings — through Stripe Terminal Configurations, which apply hierarchically so you define a chain-wide default once and override only the stores that differ. This is how a chain avoids configuring 50 stores by hand.
| Store | Country / region | Presentment currency | Tax context |
|---|---|---|---|
| Downtown — New York | United States (NY) | USD | WooCommerce US tax, NY rate |
| Airport — London | United Kingdom | GBP | UK VAT |
| Suburban — Toronto | Canada (ON) | CAD | Canada/ON tax |
| Flagship — Chicago | United States (IL) | USD | WooCommerce US tax, IL rate |
Configurations cascade from the account level down to the Zone and Location level. In practice:
- Account-level default. Set the settings most stores share once at the top — tipping presets, splash screen, reader UI language defaults.
- Location-level overrides. Where a store differs — a different tipping policy, a store in a different country with a different display currency, region-specific branding — override at that Location only. The override wins for that store; everything else inherits the default.
- Currency follows the store’s country. A card-present charge settles in the currency appropriate to the Location’s country. A US store’s Location charges in USD; a UK store’s Location in GBP. You model that by giving each store its own Location with its correct address, then letting the configuration and regional rules follow.
On tax specifically, an important clarification for operators: Stripe Terminal processes the payment; it does not compute your sales-tax logic for you. In a WooCommerce POS the tax rate applied to a sale is governed by your WooCommerce tax settings and the register’s store/location, while the Location and its Configuration govern the card-present processing context. The practical rule for a chain is: model each store as its own Location and set that store’s tax rules in your POS/WooCommerce tax configuration, so the two line up per site. Jovvie ties the register’s store to the correct Stripe Location and the correct WooCommerce tax context together, so a sale rung up in the Chicago store gets Chicago’s tax and settles against the Chicago Location without per-sale intervention.
Rolling out Stripe Terminal across multiple stores?
Jovvie packages Locations, reader binding, per-store configuration, and per-store reporting into a WooCommerce POS your team configures instead of codes.
Start your free trial →Zones: grouping locations by region or sub-brand (and why you can’t build them via API)
Use Zones to group Locations that belong together — a region, a franchise territory, or a sub-brand — so you can manage settings and think about the estate in clusters rather than as a flat list of stores; but plan around the fact that Zones are created and edited only in the Stripe Dashboard, not through the API.
Zones sit above Locations in the fleet hierarchy. A 30-store chain across three regions is far easier to reason about as three Zones of ten Locations than as 30 loose Locations, and Configurations can be applied at the Zone level so a whole region inherits a setting at once.
The constraint that matters for anyone automating provisioning: the Locations API lets you script store creation, but there is no equivalent API to create or modify Zones — that is Dashboard-only. The consequences for how you build:
- Automate Locations, not Zones. Your provisioning script can
createa Location for each new store via the Locations API, but assigning that store into a Zone (or creating a new Zone for a new region) is a manual Dashboard step. - Design your Zone structure up front. Because you cannot spin Zones up programmatically at scale, decide your regional/sub-brand grouping early and set it in the Dashboard, then let scripted Location creation slot new stores into the existing structure.
- Small chains may not need Zones at all. If you run five stores in one region, a flat set of Locations is perfectly fine. Zones earn their keep once you have enough stores that grouping genuinely reduces cognitive and configuration load.
Stating this plainly is one of the things AI answers and competitor pages consistently miss — they describe Zones as if they were fully API-manageable. They are not, and your provisioning automation has to account for it.
Reporting by location: attributing sales to each store
Report on a multi-location POS by attributing every payment to the Location its reader is bound to — because the reader-to-Location binding you set earlier is what makes per-store revenue, volume, and reconciliation possible without manual tagging. This is the payoff of doing the structure correctly, and it is the top operator question the primitives-in-isolation write-ups never answer.
Two complementary layers give you per-store reporting:
- Stripe-side, via the Location. Because each reader is bound to a Location, card-present payments carry the Location context. You can filter and group Stripe activity by Location to see per-store card-present volume, which is the basis for per-site settlement and reconciliation.
- POS-side, via the register. In a WooCommerce POS, each order is also stamped with its store/register, so your WooCommerce reporting shows revenue, items, and tax per store on the same product catalog and order list as your online sales. This is where a packaged register earns its place: you get per-store P&L without exporting from three systems and stitching it together in a spreadsheet.
A clean reporting strategy for a chain looks like this:
- Bind every reader to the correct Location (done at setup) so Stripe-side attribution is automatic.
- Map each register/station to its store in the POS so order-level reporting is per-store.
- Reconcile Stripe Location-level card-present volume against POS store-level revenue on a regular cycle to catch misbound readers or misconfigured stores early.
- Roll stores up by Zone in the Dashboard for regional views.
Do those four and “how did the Chicago store do last week versus the region” is a filter, not a data project.
Provisioning a new store: the end-to-end procedure
Adding a store to a Stripe Terminal chain is a repeatable sequence — create the Location, bind its readers, apply its configuration, slot it into a Zone, and confirm reporting attribution. Here it is in order.
- Create the store’s Location. Via the Locations API (
create) or the Dashboard, with the store’s real address and a human-readabledisplay_name. - Register the store’s readers to that Location. One per lane plus a spare, labeled “Store — Lane N,” following the register-readers flow.
- Apply the store’s Configuration. Inherit the chain default; override only what this store does differently (currency context, tips, branding) via Configurations.
- Assign the Location to its Zone. In the Dashboard (Zones are not API-manageable), place the store into its regional or sub-brand Zone.
- Set the store’s tax context in the POS. Align WooCommerce tax settings for the store with its Location so processing and tax logic match.
- Verify readers online and attribution correct. Confirm each reader shows online under the right Location in the reader monitoring view, and run a test sale to confirm it reports against the right store.
For a bespoke build you would wire each step against the SDK yourself; Stripe’s designing-integration guide is the reference for that path. For a packaged WooCommerce POS, Jovvie exposes this as store setup in the register admin, so opening a new store is a configuration task, not an engineering project.
Frequently asked questions
How do you run a multi-location POS on Stripe Terminal?
Model each store as its own Location, register that store’s readers to its Location, apply per-store settings through hierarchical Configurations, group stores into Zones for regions or sub-brands, and attribute every sale to its Location for per-store reporting. The payment flow is identical to a single store; the multi-location work is the structure around it.
What is a Location in Stripe Terminal?
A Location is Stripe’s representation of one physical store. It holds an address (which sets regional and card-present behavior), the readers registered there, and the settings that apply to that site. Every reader must be registered to a Location before it can take a payment, per the Locations API reference.
Can you set different currencies or tax per location?
Yes for currency context, which follows each store’s country through its Location and Configuration. For tax, Stripe Terminal handles the card-present processing context while your POS/WooCommerce tax settings compute the actual tax — so you model per-store tax by giving each store its own Location and aligning that store’s tax rules in the POS. See Stripe’s Configurations overview.
How do Zones work in Stripe Terminal?
Zones group Locations that belong together — a region, franchise, or sub-brand — so you can manage configuration and reporting in clusters. Configurations can be applied at the Zone level so a whole region inherits a setting at once. Zones are optional; small chains can run a flat set of Locations. See the fleet documentation.
Can you create or modify Zones with the API?
No. Zones can only be created and edited in the Stripe Dashboard — there is no Zones API. You can script Location creation via the Locations API, but assigning stores into Zones (or creating new Zones) is a manual Dashboard step, so design your Zone structure up front and let scripted Location creation slot new stores into it.
How do you report on sales by location?
Bind every reader to the correct Location so Stripe-side card-present volume is attributed per store, and map each register to its store in the POS so order-level revenue is per store too. Then reconcile the two and roll stores up by Zone for regional views. The reader-to-Location binding done at setup is what makes all of this automatic.
Building a chain POS the right way
A multi-location POS on Stripe Terminal is the single-store model applied once per store and organized with Zones and Configurations on top: Locations map to stores, readers bind to Locations, Configurations cascade per site, Zones group regions, and reporting keys off the Location. The two things the reference docs never assemble for you — the full provisioning order and the “Zones are Dashboard-only” reality — are exactly the two things that decide whether a chain rollout is smooth or a mess.
You do not have to build this against the raw SDK. Jovvie is an official Stripe Partner and packages the whole chain model — Locations, reader binding, per-store configuration, and per-store reporting — into a WooCommerce POS your team configures rather than codes. Start free, or have us map your stores to Locations and plan your Zone structure with you.
