
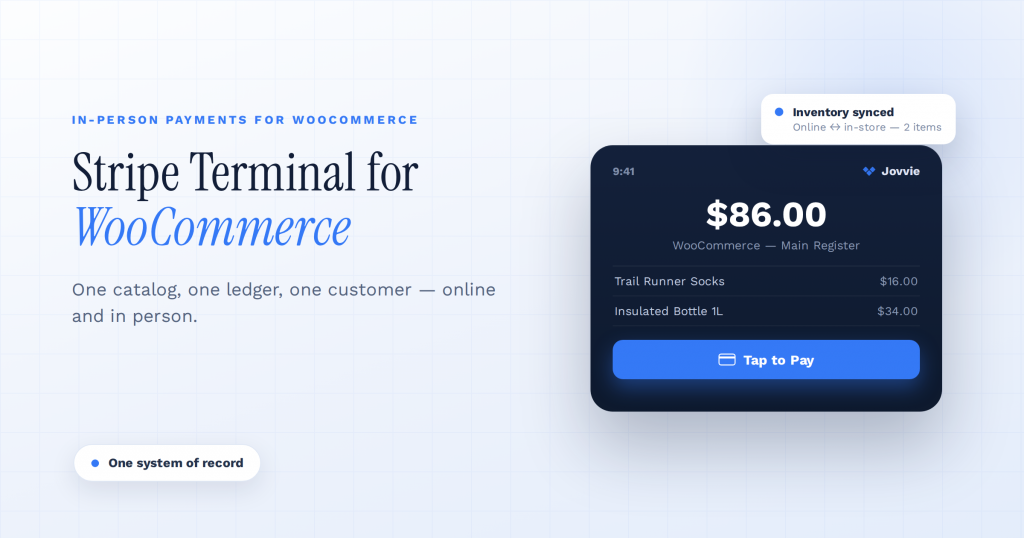
You add Stripe Terminal to WooCommerce by connecting a Stripe-certified card reader to a checkout application that sits on top of your WooCommerce store, so in-person sales draw on the same catalog, inventory, customers, and Stripe account as your online orders — and because WooCommerce has no built-in Terminal POS, you either build that checkout layer against the Terminal SDK or run a WooCommerce-native POS such as Jovvie that already includes it. The whole decision comes down to that last fork: WooCommerce gives you the commerce engine, Stripe Terminal gives you the card-present payment rail, and something has to join them into a register your staff can actually use at the counter.
Key Takeaways
- WooCommerce has no built-in Stripe Terminal POS. You add a register layer — either build one on the Terminal SDK or install a WooCommerce-native POS such as Jovvie.
- Your store stays the single source of truth. One catalog, inventory, customer list, and Stripe account across online and in-person — no second system to reconcile.
- In-person processing is cheaper. Stripe charges 2.7% + 5¢ per card-present transaction in the US, versus 2.9% + 30¢ online.
- Any Stripe-certified reader works — S700, WisePad 3, M2, or Tap to Pay — because it connects to the Terminal SDK, not to WooCommerce directly.
- Setup takes under an hour with a pre-built POS: connect Stripe, install the POS, register the reader, run a test transaction, then go live.
- Building your own means owning the sync and maintenance forever. A native POS gets you selling in days; a custom build is the rare exception for a genuinely unique requirement.
We have built WooCommerce point-of-sale on Stripe Terminal for eight years — for boutiques, cafes, pop-ups, multi-location retailers, and merchants selling in more than 30 countries — and the question we field most is some version of “I already run WooCommerce and I already use Stripe online; how hard is it to take cards in person too?” The honest answer is that the payment plumbing is straightforward and well-documented by Stripe, but the part everyone underestimates is the software around the payment: the catalog lookup, the cart, the tax logic, the receipt, and the sync back into WooCommerce. This guide covers both halves, end to end.
This is the WooCommerce pillar in a wider Stripe Terminal library. If you are still choosing a reader, start with the complete 2026 Stripe Terminal hardware guide. If you want to understand Terminal as a payment rail in general before going WooCommerce-specific, read how Stripe Terminal works as a point-of-sale system. And if you are a platform reselling Terminal to many merchant stores, the economics live in the Stripe Connect for platforms using Terminal guide.
What does “Stripe Terminal for WooCommerce” actually mean?
Stripe Terminal for WooCommerce means using Stripe’s card readers and Terminal SDK to accept in-person, card-present payments that post against your existing WooCommerce store — the same products, prices, stock levels, and customer records you already manage online, settled into the same Stripe account.
It is worth being precise here, because three different things often get blurred together under the same search:
The WooCommerce Stripe payment gateway is the official plugin that processes online card payments at your web checkout. It is published on WooCommerce.com and WordPress.org, and recent versions also expose Tap to Pay on iPhone through WooPayments. This handles cards typed into a browser, plus limited mobile tap-to-pay.
Stripe Terminal is Stripe’s separate product for card-present payments — physical chip, swipe, and contactless transactions through certified hardware like the Stripe Reader S700, BBPOS WisePad 3, and Stripe Reader M2, plus Tap to Pay on iPhone and Android. Terminal is driven by the Terminal SDK and lives in the same Stripe account as your online payments, but it is not a WooCommerce feature on its own.
A WooCommerce POS is the checkout software that turns Terminal into a usable register inside the WooCommerce world — product search, cart, tax, discounts, tendering, receipts, and order creation in WooCommerce. WooCommerce ships no such register natively, so this is the layer you add. Jovvie is one; a custom build is another.
The reason this matters: when someone says “I want Stripe Terminal on WooCommerce,” they almost always mean the third thing — a real in-person register backed by Terminal hardware — even though they searched for the second. The rest of this guide assumes that is your goal.
Is Stripe Terminal built into WooCommerce?
No. WooCommerce has no native Stripe Terminal point-of-sale; the core platform and the official Stripe gateway handle online payments and (in recent versions) Tap to Pay on iPhone, but they do not provide an in-store register, hardware reader pairing for countertop devices, or a cashier interface.
To run Terminal hardware like the S700 or WisePad 3 against your WooCommerce catalog, you add a POS layer on top — either by building one against the Terminal SDK or by installing a WooCommerce-native POS such as Jovvie. This is the single most common misunderstanding we correct, so recognize it early: choosing Terminal hardware is not the same as having a working WooCommerce register.
Why is WooCommerce a uniquely good fit for Stripe Terminal?
WooCommerce is a uniquely good fit for Stripe Terminal because your store data already lives in a system you own, so adding in-person payments unifies online and offline sales instead of creating a second, disconnected island of inventory, customers, and reporting.
All-in-one systems like Square or Clover bundle the hardware, the processing, and the checkout software into one closed product. That is convenient until you already run an online store — at which point you are maintaining two product catalogs, two customer lists, two stock counts, and two sets of reports that never quite reconcile. WooCommerce plus Stripe Terminal inverts that trade-off. You keep one WooCommerce backend as the source of truth and bolt the card-present rail onto it.
The specific advantages compound:
- One catalog, one inventory. A sale at the counter decrements the same stock that your website reads. No nightly export, no drift between channels.
- One customer record. An in-store buyer and an online buyer are the same WooCommerce customer, which makes loyalty, order history, and email marketing actually accurate.
- One Stripe account and one payout. Online and in-person funds land together, reconcile together, and report together — and the in-person rate is lower than the online rate, which we cover in the pricing section.
- Ownership and portability. Your store is not locked inside a payment vendor’s proprietary POS. If you change readers, change themes, or change hosting, the commerce data is still yours in WooCommerce.
This is exactly why Jovvie was built natively for WooCommerce rather than as a generic POS with a WooCommerce connector — when the register is WooCommerce, everything downstream stays consistent without sync jobs.
A concrete example shows the difference. Picture a boutique that does $30,000 a month online through WooCommerce and opens a physical shop. With an all-in-one POS, the shop becomes a second business: a duplicate catalog to maintain, a separate stock count that drifts from the website by closing time, a customer list that does not know the in-store buyer is the same person who shops online, and two reports that finance has to reconcile by hand. With WooCommerce plus Stripe Terminal, the shop is simply a second sales channel on the same store. A sweater sold at the counter decrements the same stock the website reads, so the online listing cannot oversell it. The walk-in customer is matched to their existing profile, so loyalty and email history stay accurate. And the in-store revenue lands in the same Stripe payout and the same WooCommerce reports as the online revenue — at the lower in-person rate. The boutique did not start a second business; it extended the one it already had. That is the structural advantage no connector-based POS fully replicates.
How is a WooCommerce + Stripe Terminal system architected?
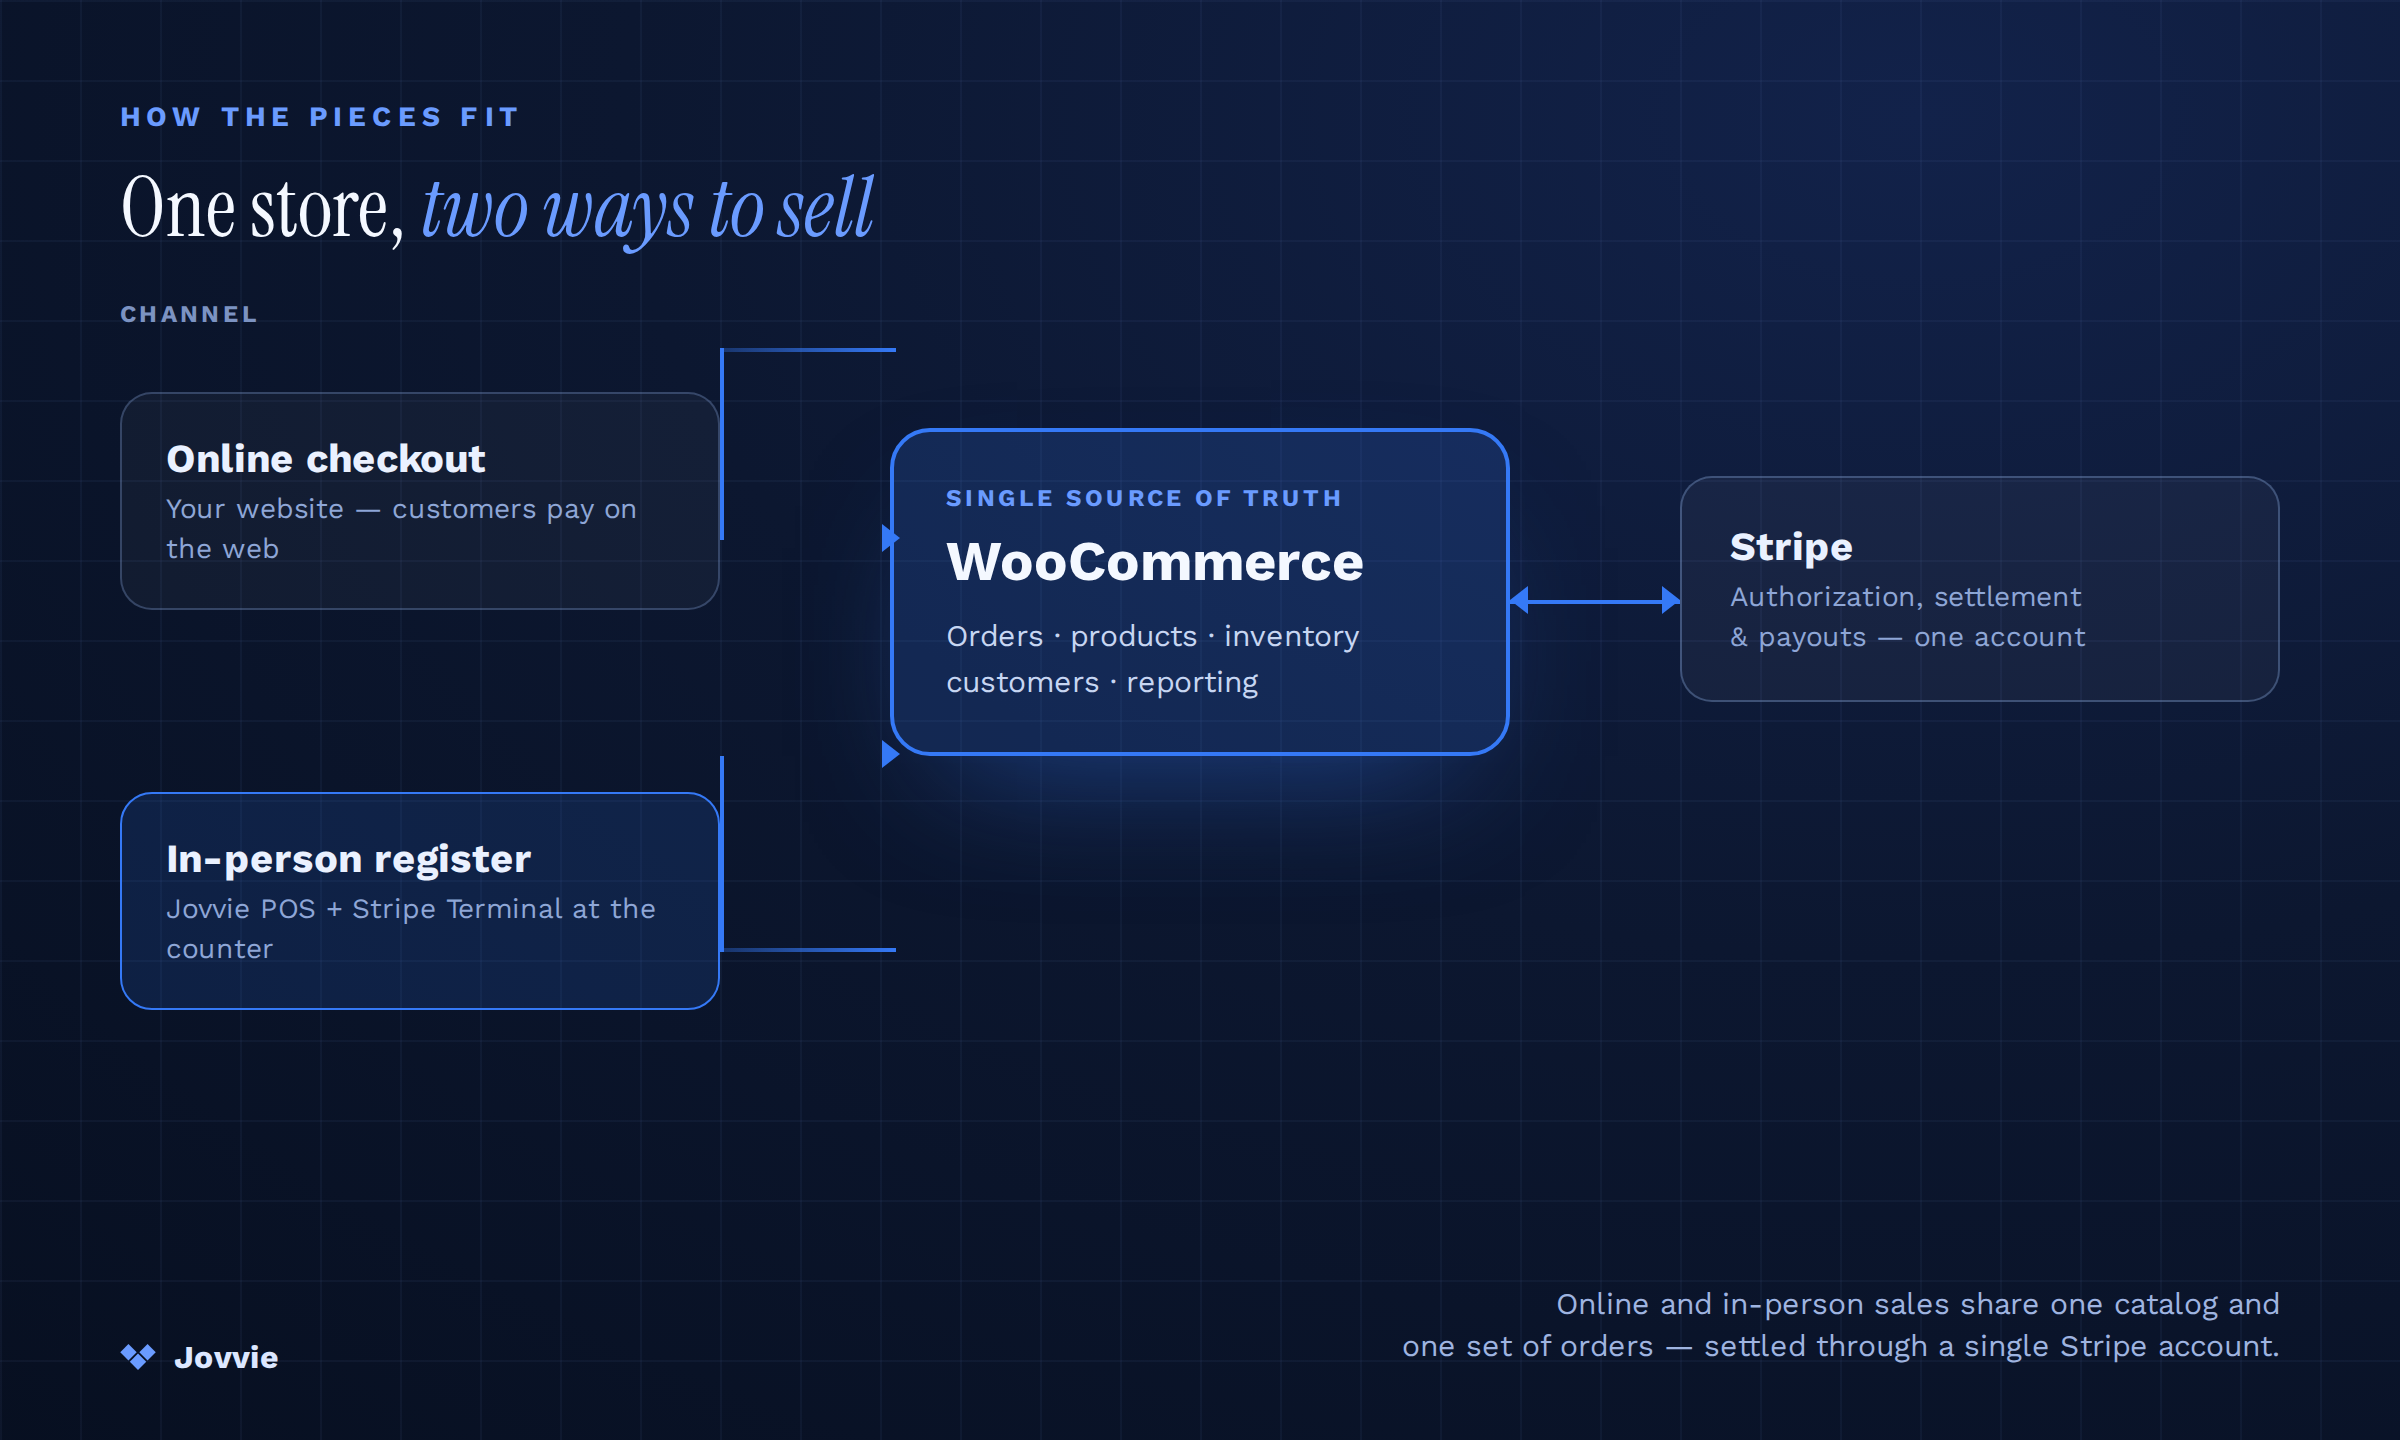
A WooCommerce + Stripe Terminal system has four layers: WooCommerce (the commerce engine), the POS application (the register your staff use), the Stripe Terminal SDK and reader (the card-present rail), and your Stripe account, optionally extended with Stripe Connect when a platform serves many merchant stores.
Here is how the pieces fit, from the counter inward:
- WooCommerce holds the products, prices, tax rules, stock, customers, and orders. It is the system of record. Nothing the POS does should require a second copy of this data.
- The POS application is what the cashier actually touches. It searches the WooCommerce catalog, builds a cart, applies WooCommerce tax and coupon logic, and — critically — creates a WooCommerce order for each completed sale so that stock and reporting stay correct. With Jovvie, this runs in the browser on a tablet or computer and talks to WooCommerce through the same store it already powers.
- The Stripe Terminal SDK and reader form the payment rail. The SDK (JavaScript for browser-based registers, or iOS/Android for native apps) discovers and connects the reader, sends it the amount to collect, and returns the result. The reader — an S700, WisePad 3, M2, or a Tap-to-Pay-capable phone — captures and encrypts the card. Per Stripe’s Terminal documentation, raw card data never touches your servers, which keeps your PCI scope minimal.
- Your Stripe account is where the money objects live. Your backend creates a
PaymentIntentfor each sale and mints the short-livedConnectionTokenthat lets the SDK drive a reader on your account. When a store platform serves many merchants — each with their own Stripe account and their own hardware — Stripe Connect sits on top, registering readers and locations per connected account and routing application fees to the platform. Stripe documents this model at stripe.com/terminal/payments/connect; we unpack the money mechanics in the Connect platform economics guide.
The end-to-end flow is clean: cashier rings up items from the WooCommerce catalog in the POS → POS asks your backend for a PaymentIntent (and a ConnectionToken if needed) → the SDK tells the reader to collect → the customer taps, inserts, or swipes → the SDK processes and your backend confirms → the POS writes a paid WooCommerce order and the reader prints or emails the receipt. Stock drops, the customer record updates, and the sale appears in the same reports as your online revenue.
How do I set up Stripe Terminal on WooCommerce? (Step by step)
You set up Stripe Terminal on WooCommerce by connecting Stripe to your store, installing a POS layer, registering your reader, and running a test transaction — a process that takes well under an hour with a pre-built POS and considerably longer if you build the register yourself. Here is the path most merchants take.
- Confirm your WooCommerce store and Stripe account are live. You need a working WooCommerce store and a free Stripe account. If you already take online card payments through the official WooCommerce Stripe gateway, you are most of the way there — Terminal will use the same account.
- Order a supported reader. From the Stripe Dashboard, order a Stripe Reader S700 (countertop/handheld smart reader), a BBPOS WisePad 3 or Stripe Reader M2 (mobile readers), or plan to use Tap to Pay on a compatible iPhone or Android phone. Hardware compatibility is covered in detail below.
- Install your POS layer. Install Jovvie on your WooCommerce store (it runs as a plugin and a browser-based register). If you are building your own, this is where you would scaffold a checkout app against the Terminal SDK and stand up the backend endpoints that mint connection tokens and create payment intents.
- Create a Location and register the reader. Stripe Terminal groups readers under a Location object. Create your store as a Location, then register your reader to it from the Dashboard or via the API, following Stripe’s reader setup documentation. A POS like Jovvie surfaces this in its settings so you are not calling the API by hand.
- Pair the register to the reader. In the POS, connect to the registered reader. Smart readers like the S700 join over Wi-Fi or Ethernet; the WisePad 3 and M2 pair over Bluetooth to the device running the register.
- Run a test transaction. Use Stripe test mode (and a test card or a real card you can refund) to ring up an item, take a payment on the reader, and confirm a paid WooCommerce order is created with stock decremented. This single test catches most configuration mistakes.
- Go live and train staff. Switch to live mode, do one real low-value transaction to confirm settlement, and walk your team through the open-to-close flow: search, cart, discount, tender, refund.
If you want the granular, screenshot-level version of steps 1–6, the cluster piece Connect WooCommerce to Stripe Terminal in 30 Minutes walks through it in detail, and WooCommerce POS with Stripe Terminal: Step-by-Step covers the full register configuration.
What do you keep, and what do you add?
You keep everything WooCommerce already manages — catalog, customers, inventory, tax rules, orders, and reporting — and you add only the in-person register and the card-present payment rail. That ratio is the whole appeal: in-person becomes a new channel on your existing store, not a new store.
The table below makes the split explicit.
| Capability | Where it comes from | Notes |
|---|---|---|
| Product catalog & pricing | Kept — WooCommerce | The POS reads it live; no second catalog |
| Inventory / stock levels | Kept — WooCommerce | In-store sales decrement the same stock |
| Customer records | Kept — WooCommerce | One profile across online and in-person |
| Tax rules & rates | Kept — WooCommerce | POS applies your existing WooCommerce tax classes |
| Coupons & discounts | Kept — WooCommerce | Reused at the counter |
| Orders & reporting | Kept — WooCommerce | In-person orders appear alongside online |
| Card-present processing | Added — Stripe Terminal | Lower in-person rate, same Stripe account |
| Reader hardware | Added — Stripe Terminal | S700, WisePad 3, M2, or Tap to Pay |
| Cashier register UI | Added — POS (e.g., Jovvie) | Search, cart, tender, receipt |
| Receipt printing | Added — POS + printer | Email or paper |
The practical implication: if your WooCommerce store is already well-organized — clean categories, accurate stock, correct tax — adding Terminal is mostly a matter of paying for the two “added” rows. If your catalog is messy, fix it in WooCommerce first; the POS inherits whatever state your store is in.
Which Stripe Terminal hardware works with WooCommerce?
Every Stripe-certified Terminal reader works with WooCommerce as long as your POS layer supports it, because the reader connects to the Terminal SDK, not to WooCommerce directly — so compatibility is really a question of which reader fits your counter and which connection method your register uses.
The four mainstream choices break down as follows.
| Reader | Price (USD) | Form factor | Connectivity | Best for |
|---|---|---|---|---|
| Stripe Reader S700 | $349 | Smart touchscreen reader (countertop or handheld) | Wi-Fi / Ethernet (S710 adds cellular) | Fixed counters, full-feature registers |
| BBPOS WisePOS E | $249 | Smart reader with screen | Wi-Fi | Stationary stores wanting a built-in screen |
| BBPOS WisePad 3 | $59 | Mobile PIN-pad reader | Bluetooth | Pop-ups, markets, low-cost mobile |
| Stripe Reader M2 | $59 | Mobile reader (US) | Bluetooth | Tablet-paired counters, mobile sellers |
| Tap to Pay | $0 hardware | Phone-as-reader (iPhone/Android) | Built-in NFC | Lowest barrier, no hardware to buy |
Prices and availability come from Stripe’s Terminal devices page and reader documentation; confirm current pricing and regional availability before ordering.
The two decisions that matter most for a WooCommerce setup:
- Smart reader vs. mobile reader. Smart readers (S700, WisePOS E) have their own screen and connect over the network, so they suit a fixed counter and a polished customer-facing experience. Mobile readers (WisePad 3, M2) are cheap and Bluetooth-tethered to the tablet running your register — ideal for pop-ups, markets, and mobile sellers. The S700 is the flagship: a 5.5-inch 1080p touchscreen, Android-based, Wi-Fi or Ethernet, roughly 15 hours of battery, detailed in the Stripe Reader S700 deep-dive.
- Tap to Pay to start. If you want to test in-person sales with zero hardware spend, Tap to Pay on a compatible iPhone or Android phone turns the phone itself into the reader. It is the lowest barrier to entry and a sensible pilot before committing to countertop hardware.
For the full comparison — including reliability, lifespan, and total cost of ownership across all readers — see the complete 2026 Stripe Terminal hardware guide.
How much does Stripe Terminal cost on WooCommerce?
Stripe Terminal on WooCommerce has three cost components: the per-transaction card-present rate, the one-time hardware cost, and the POS software — and notably, Stripe’s in-person rate is lower than its online rate, so moving sales to the counter can actually reduce your effective processing cost.
- Per-transaction processing. In the US, Stripe charges 2.7% + 5¢ for each successful card-present Terminal transaction, versus 2.9% + 30¢ for standard online or keyed payments, per Stripe Terminal pricing and Stripe’s pricing page. On a $40 sale, that is about $1.13 in person versus $1.46 online — the card-present discount reflects the lower fraud risk of a physically tapped card.
- Hardware. A one-time cost ranging from $0 (Tap to Pay) to $59 (WisePad 3 / M2) to $349 (S700), as shown in the hardware table above.
- POS software. The register layer. Jovvie is priced as a WooCommerce POS (see the Jovvie pricing page for current plans); a custom build trades that subscription for engineering and maintenance time, which is almost always the more expensive path once you account for upkeep.
A worked example for a small shop doing $20,000/month in-store across ~500 transactions on a single S700: roughly $565 in processing (2.7% + 5¢ × 500), a one-time $349 reader, plus the POS subscription. Run the same volume through the standard 2.9% + 30¢ online-style rate and processing would be about $730 — so the card-present discount alone saves this shop roughly $165 every month, which pays back the S700 in two months and the POS subscription many times over. The savings scale with volume: a higher-ticket or higher-count store sees a proportionally larger gap. Compare that honestly against an all-in-one POS’s bundled rate and locked hardware — the WooCommerce path usually wins on rate and always wins on data ownership, but you should run your own numbers against your real basket size and transaction count. The cluster piece Stripe Terminal Pricing for WooCommerce Stores builds a full calculator-style breakdown, and the broader Connect platform economics guide covers application-fee math for platforms reselling Terminal to many stores.
What are the limitations of Stripe Terminal on WooCommerce?
The main limitations of Stripe Terminal on WooCommerce are that it requires an added POS layer, depends on reader connectivity, offers only constrained offline behavior, and carries real-world edge cases around HPOS, subscriptions, multi-currency, and tax that you should plan for rather than discover at the counter.
Here are the constraints that actually bite:
- You must add a register. As covered above, Terminal is a payment rail, not a POS. Budget for the POS layer (software or build) from the start.
- Connectivity matters. Smart readers need Wi-Fi or Ethernet; mobile readers need a stable Bluetooth link to the tablet. A flaky network shows up as slow or failed pairings. Plan your in-store connectivity before launch.
- Offline mode is constrained. Stripe Terminal supports limited offline payment collection on certain readers, but it is a fallback, not a primary mode — and it has rules about amounts, timing, and reader support. Do not design a store that assumes the internet is always optional.
- WooCommerce-specific edge cases. High-Performance Order Storage (HPOS), WooCommerce Subscriptions, multi-currency, and EU/UK VAT each interact with an in-person register in ways worth reading before you commit. Start with WooCommerce HPOS and Stripe Terminal: Compatibility, Stripe Terminal + WooCommerce Subscriptions: In-Person Renewals, Multi-Currency Stripe Terminal in WooCommerce, and VAT Handling for Stripe Terminal in WooCommerce.
- Migration from the online-only plugin. If you currently use only the WooCommerce Stripe gateway for online payments, adding Terminal is additive, not a rip-and-replace — but platforms moving to a Connect model should read Migrating from the WooCommerce Stripe Plugin to Stripe Terminal first.
When a different stack is genuinely the better answer — say, a single-location merchant with no online store who would be better served by an all-in-one — we will say so. But for any business that already runs WooCommerce, keeping the store as the source of truth is almost always the right call.
Build it yourself or use a WooCommerce-native POS?
Use a WooCommerce-native POS if you want to be selling in person this week with WooCommerce staying the source of truth; build your own only if you have engineering capacity and a requirement no existing POS meets — because the build is not the payment integration (that part is well-documented) but the register, the WooCommerce sync, and the years of maintenance around them.
| Factor | WooCommerce-native POS (e.g., Jovvie) | Custom build on Terminal SDK |
|---|---|---|
| Time to first sale | Hours | Weeks to months |
| WooCommerce sync | Built-in | You build and maintain it |
| Tax / coupons / inventory | Inherited from WooCommerce | You wire each one |
| Receipts & refunds | Included | You build the flows |
| Ongoing maintenance | Vendor’s responsibility | Yours, indefinitely |
| Best when | You run WooCommerce and want to sell now | You have a genuinely unique requirement and a dev team |
The payment integration is the easy 20%. The register, the catalog search, the tax edge cases, the refund and PIN flows, and keeping all of it in step with WooCommerce updates are the 80% — and that 80% never stops needing attention. For most WooCommerce merchants, a native POS is the rational choice; for the rare team with a requirement nothing covers, the building on the Terminal SDK discussion in the POS pillar lays out the trade-offs.
What does the in-store checkout flow look like in practice?
The in-store flow on a WooCommerce + Stripe Terminal register is a short, repeatable loop: find the product, build the cart, take payment on the reader, and hand over a receipt — with every step reading from and writing back to WooCommerce so nothing has to be re-entered later.
Walking through a single sale makes the architecture concrete:
- Find the product. The cashier searches or scans. The POS queries the live WooCommerce catalog, so the price, variations, and stock shown are the real ones — not a snapshot.
- Build the cart. Add quantities, apply a WooCommerce coupon if the customer has one, and the register computes tax using your existing WooCommerce tax classes. No parallel tax engine to keep in sync.
- Collect payment. The cashier hits charge; the POS asks your backend for a
PaymentIntent, the Terminal SDK tells the reader to collect, and the customer taps, inserts, or swipes on the S700, WisePad 3, M2, or Tap-to-Pay phone. The reader handles the card; your servers never see the number. - Confirm and record. Stripe confirms the charge, the POS writes a paid WooCommerce order, stock decrements, and the customer record updates with the purchase.
- Receipt and next customer. The reader or POS emails or prints the receipt, the register resets, and the cashier is ready for the next sale.
The reason this loop is worth spelling out: each step is a place where a poorly integrated POS forces a manual workaround — re-keying a price, adjusting stock by hand at close, reconciling a separate customer list at month end. A WooCommerce-native register removes those workarounds because the register is the store. The step-by-step register configuration that makes this loop fast for your staff is covered in WooCommerce POS with Stripe Terminal: Step-by-Step.
How does WooCommerce + Stripe Terminal handle multiple registers and locations?
WooCommerce + Stripe Terminal scales to multiple registers and locations through Stripe’s Locations and reader-registration model layered under a POS that can run several registers against one WooCommerce store — so a growing retailer adds counters and stores without splitting their commerce data.
Stripe Terminal organizes hardware under Location objects, and each reader is registered to a location. That structure maps naturally onto a multi-store business: each storefront is a Location, each counter has one or more registered readers, and your single WooCommerce store remains the shared catalog, inventory, and customer database behind all of them. The practical advantages:
- Shared inventory across stores. When every location sells against the same WooCommerce stock, you see true cross-location availability instead of per-store islands — useful for “buy online, pick up in store” and for moving stock between sites.
- Per-station configuration where you need it. Different counters can carry different tax behavior, receipt settings, or hardware. The cluster piece Per-Station Configuration in WooCommerce Stripe Terminal covers how to set this up cleanly.
- Unified reporting. Because all locations write orders into one WooCommerce store, end-of-day and end-of-month reporting rolls up automatically — no consolidation spreadsheet.
For the deeper architecture of running many readers across many sites, including the Stripe Locations API, see the Locations API piece referenced in the hardware pillar. We have deployed this pattern for multi-location retailers and it holds up: the constraint is rarely Stripe Terminal and almost always whether the POS layer was built to run more than one register at once. Jovvie was.
What are the most common mistakes when adding Stripe Terminal to WooCommerce?
The most common mistakes are treating Terminal as a finished POS, skipping the test transaction, launching on weak connectivity, and adding in-person sales on top of a disorganized catalog — all avoidable with a little planning before the first live sale.
In order of how often we see them:
- Assuming the reader is the whole solution. Teams order an S700, then discover at unboxing that there is no register. Decide your POS layer (build or buy) before the hardware arrives.
- Skipping the test-mode transaction. Stripe’s test mode exists precisely so you can validate the full loop — payment, order creation, stock decrement — before a customer is standing at the counter. Skipping it moves every configuration bug to your busiest moment.
- Underestimating connectivity. Smart readers want reliable Wi-Fi or Ethernet; mobile readers want a stable Bluetooth link. A back-corner counter with one bar of Wi-Fi will produce intermittent pairing failures that look like hardware faults but are network problems.
- Launching on a messy store. The POS inherits your WooCommerce state. Wrong prices, stale stock, or missing tax classes online become wrong prices, stale stock, and tax errors at the counter. Clean the catalog first.
- Ignoring the WooCommerce-specific edge cases. HPOS, Subscriptions, multi-currency, and VAT each have in-person nuances. Read the relevant cluster pieces before you commit a workflow, not after a reconciliation surprise.
Avoiding these five is most of what separates a smooth launch from a frustrating one. None of them are about Stripe Terminal being hard; they are about respecting that an in-person register is a new operational surface on your store.
Frequently asked questions
Can WooCommerce accept in-person payments with Stripe?
Yes. WooCommerce can accept in-person, card-present payments through Stripe Terminal — either via Tap to Pay on iPhone (supported in recent WooPayments versions) or via a certified reader like the S700 or WisePad 3 driven by a POS layer on top of your store. The official WooCommerce Stripe gateway handles online payments; in-person countertop registers require an added POS such as Jovvie.
Do I need WooPayments to use Stripe Terminal with WooCommerce?
No. You need a Stripe account and a POS layer that drives the Terminal SDK. WooPayments offers a built-in Tap to Pay on iPhone path, but full countertop Terminal hardware on WooCommerce runs through a POS like Jovvie connected to your Stripe account — WooPayments is one option, not a requirement.
Which Stripe reader is best for a WooCommerce store?
For a fixed counter, the Stripe Reader S700 ($349) is the flagship choice with its own touchscreen and network connectivity. For mobile or pop-up selling, the BBPOS WisePad 3 or Stripe Reader M2 ($59 each) are cost-effective Bluetooth readers. To test with no hardware spend, start with Tap to Pay on a compatible phone. See the 2026 hardware guide for the full comparison.
How much does Stripe charge for in-person WooCommerce payments?
In the US, Stripe Terminal charges 2.7% + 5¢ per successful card-present transaction — lower than the 2.9% + 30¢ standard online rate — plus one-time hardware and your POS software cost. Confirm current rates on Stripe’s pricing page.
Does an in-store Stripe Terminal sale update my WooCommerce inventory?
Yes, when you use a WooCommerce-native POS. Because the register reads and writes to your WooCommerce store, a completed in-person sale creates a WooCommerce order and decrements the same stock your website uses — no separate inventory to reconcile. A custom build only does this if you implement the sync yourself.
Can I use my existing Stripe account for both online and in-person?
Yes. Stripe Terminal uses the same Stripe account as your online payments, so funds, payouts, customers, and reporting stay unified. This single-account model is one of the main reasons WooCommerce and Stripe Terminal fit together so well.
Start taking in-person payments on your WooCommerce store
If you already run WooCommerce, Stripe Terminal lets you sell in person without giving up the store you own — one catalog, one customer list, one Stripe account, and a lower card-present rate than you pay online. The only piece you add is the register, and that is exactly what Jovvie provides as a WooCommerce-native POS built on Stripe Terminal.
Start a free Jovvie trial and have your WooCommerce store taking card-present payments this week. Want a hand mapping the setup to your specific store, hardware, or multi-location plan? Our team has done it for merchants in 30+ countries — reach out and we will walk you through it.
Related reading: How Stripe Terminal Works as a POS · The Complete 2026 Stripe Terminal Hardware Guide · Stripe Connect for Platforms Using Terminal
Run Stripe Terminal on WooCommerce with Jovvie
Jovvie is the WooCommerce-native point of sale built on Stripe Terminal — take in-person payments, sync every sale to your store, and keep one system of record. Start free, no credit card required.
