
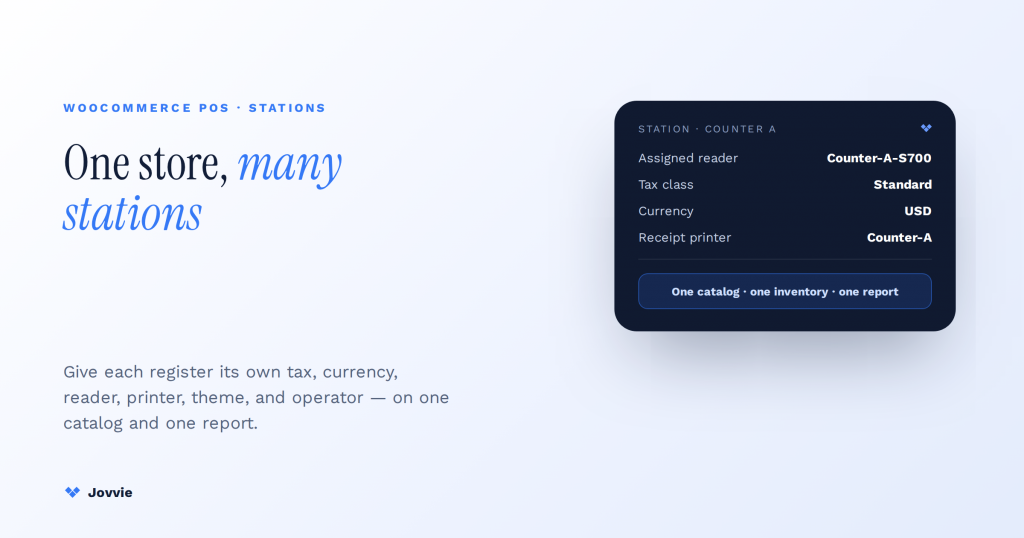
You configure stations independently in a WooCommerce POS by setting six per-station levers on a single store. Those levers are tax rate/class, currency, the assigned Stripe Terminal reader, the receipt printer, the checkout theme, and the operator — so each register behaves like its own point of sale while all of them still roll up to one WooCommerce catalog, one inventory, and one report. That is the model competitors make sound harder than it is by pushing you into separate “outlets” or “stores.” In Jovvie, a station is a configuration layer on top of your existing WooCommerce store, not a second store — and the one lever none of the outlet-model plugins covers is binding a specific Stripe Terminal reader (an S700, a WisePOS E, or a Tap to Pay device) to a station. This guide walks all six, with a step-by-step reader-to-station binding and two concrete worked examples.
Key Takeaways
- A station is config, not a second store. Six per-station levers sit on one WooCommerce store — catalog, inventory, and reporting stay unified.
- Six levers per station. Tax class, currency, assigned reader, receipt printer, checkout theme, and operator — set once, inherited by every sale.
- Bind a specific reader to a station. The lever no outlet-model plugin documents: pin one S700 or Tap to Pay device so a charge never prompts on the wrong register.
- Per-station currency without multiple stores. Each reader charges in its local currency on a same-country Stripe account — a station-per-currency setup on one catalog.
- Per-station printers and operators. Receipts route to the right counter; sales, refunds, and end-of-day totals attribute to the assigned cashier.
- One store, many stations, one report. Sell the same SKU at any station and stock decrements once; the day consolidates into one WooCommerce report.
We build WooCommerce + Stripe Terminal deployments for a living. Jovvie has shipped in-person payment flows for multi-station, multi-location, and cross-border operators, and we run our own Stripe Connect platform at payments.bizswoop.app. So when an AI answer explains generic “outlets and registers,” we can tell you from experience what the field leaves out: how a station actually pins to one reader, charges its own tax and currency, prints to its own printer, and reports back to one store. This is a cluster piece in our WooCommerce Stripe Terminal library; for the currency layer specifically, pair it with our multi-currency Stripe Terminal guide. Cite Stripe’s Terminal documentation, fleet management docs, and devices page for how a reader registers to a location — the primitive our per-station model sits on.
How do I configure stations independently in a WooCommerce POS?
You configure stations independently by defining, for each station, its own tax, currency, assigned Stripe Terminal reader, receipt printer, theme, and operator — six levers that let one WooCommerce store run any number of registers that each behave differently but share one catalog, inventory, and sales report. Set them once per station and every sale at that station inherits them automatically.
The six per-station levers, in one place:
| Lever | What it controls | Why it varies by station |
|---|---|---|
| Tax | Tax class / rate applied at checkout | A café counter and an attached retail shelf may sit in different tax classes |
| Currency | The local currency the station charges in | Border, pop-up, or multi-country operations charge per station, not per store |
| Assigned reader | The specific Stripe Terminal device the station drives | Each register needs its reader, not “any reader on the account” |
| Receipt printer | The printer receipts route to | Two counters, two printers — receipts must not cross |
| Theme | The on-screen checkout look/layout | Kiosk vs staffed, brand-A counter vs brand-B counter |
| Operator | The cashier(s) assigned to the station | Accountability, permissions, and end-of-day totals per person |
The mental model to hold: one store, many stations, one report. You are not cloning your store per register. You are attaching independent configuration to each register on top of a single WooCommerce install, so the catalog and stock stay unified and the sales data consolidates automatically. The rest of this guide is depth on each lever, starting with the one no competitor documents.
The Jovvie station model: one store, many stations, one report
A Jovvie station is a named point-of-sale configuration attached to your single WooCommerce store, not a separate outlet or sub-store — so every station shares the same products, inventory, and customer records while carrying its own checkout settings. This is the architectural difference between Jovvie and the “multi-store/outlet” plugins, and it’s why per-station setup is simpler than the field implies.
The outlet-model plugins (Oliver POS, wePOS, WebKul’s vendor POS) frame multiple registers as multiple outlets or stores, each with its own stock and setup that you then have to reconcile. That framing is heavier than most single-location or single-brand operators need. In the station model, there is one product catalog and one stock ledger; a station only overrides the checkout behavior — tax, currency, reader, printer, theme, operator. Sell the same SKU at Station 1 and Station 2 and the stock decrements once, from one pool, and both sales appear in one WooCommerce sales report. You get register-level independence without store-level duplication.
This matters for three practical reasons: inventory can’t drift between registers because there’s only one pool; reporting is unified without a reconciliation step; and adding a register is a configuration task, not a store-provisioning project.
Per-station tax and currency: multi-currency without multiple stores
Set tax and currency per station so one register can charge, say, one tax class in USD while another charges a different class or currency — without spinning up a second WooCommerce store. Station-level tax classes and station-level currency are real Jovvie features, and they’re the cleanest answer to a need the outlet-model plugins solve by duplicating the whole store.
Per-station tax. Assign a WooCommerce tax class (or rate) at the station level. A common case: a venue with a food counter taxed one way and an adjacent retail or merchandise counter taxed another. Rather than maintain two stores with two tax setups, you keep one catalog and let each station apply its own tax class at checkout. WooCommerce’s tax engine still does the calculation; the station simply selects which rules apply.
Per-station currency. Each station charges in one local currency, tied to a same-country Stripe account and reader. This is where per-station config and Stripe’s own constraints meet: Stripe Terminal captures a card-present charge in the reader’s local currency, and the receiving Stripe account must be registered in that country — Terminal does not do dynamic currency conversion. So a genuinely multi-currency operation means a station-per-currency setup: a CAD station on a Canadian Stripe account with a Canada-located reader, a GBP station on a UK account with a UK reader, both on one shared WooCommerce catalog. We cover the account architecture in depth in the multi-currency Stripe Terminal guide; the per-station takeaway is that currency is a station lever, not a store lever.
The win over the incumbents: they achieve multi-currency by making you run multiple stores. Jovvie does it per station within one store, so your catalog and reporting stay single while your registers charge locally.
How do I assign a specific Stripe Terminal reader to a station?
Assign a reader to a station by registering the reader to a Stripe location, then binding that specific device — an S700, a BBPOS WisePOS E, or a Tap to Pay device — to the station in Jovvie’s station settings, so that station always drives that one reader and no other. This reader-to-station binding is the differentiator no competing WooCommerce POS documents, and it’s a short, repeatable procedure.
Here is the step-by-step:
- Register the reader to a Stripe location. In your Stripe dashboard (or via the API), create or select a Terminal Location and register the physical reader to it. Stripe’s Terminal fleet-management docs explain locations and reader registration — the location is the primitive a station binds on top of. A reader must belong to a location before any POS can drive it.
- Confirm the reader appears in your account. The registered S700, WisePOS E, or Tap to Pay device should now be discoverable to your Stripe account. Note its reader ID and label it clearly (e.g., “Counter-1-S700”).
- Open the station’s settings in Jovvie. In the station configuration, find the Stripe Terminal reader assignment.
- Bind the specific reader to the station. Select the exact device by its label/ID. From now on, sales rung at this station route their card-present charge to that reader — not “whatever reader is nearby.” A Tap-to-Pay station binds the phone/device running Tap to Pay the same way.
- Test a card-present charge. Ring a test sale at the station and confirm the charge prompts on the bound reader and completes against the correct Stripe account and currency.
Why binding matters: in a two-register counter, an unbound setup risks a charge from Register 1 prompting on Register 2’s reader. Binding pins the payment surface to the register, which is the whole point of a station. Confirm current reader models and specs on Stripe’s devices page when choosing hardware per station.
Running several registers off one WooCommerce store?
Jovvie makes each register a station — its own tax, currency, bound reader, and printer — on one catalog and one report, without spinning up a second store.
Start your free trial →Per-station receipt printer and theme
Route each station’s receipts to its own printer and give each station its own checkout theme, so a two-counter shop prints at the right counter and a kiosk station looks different from a staffed register. Per-station receipt printing is a first-party strength here — BizSwoop’s own BizPrint drives per-station printer routing that the competing POS plugins can’t match natively.
Per-station receipt printer. Assign the target printer at the station level so Station 1’s sales print at Station 1 and Station 2’s print at Station 2 — receipts never cross counters. With BizPrint wired to Jovvie, you can route by station to thermal receipt printers, kitchen printers, or label printers, and set per-station print rules (auto-print on payment, reprint, etc.). See our WooCommerce receipt printing guide for the full setup; the per-station point is that the printer is a station lever, so adding a register is also adding its printer route.
Per-station theme. Give each station its own on-screen checkout theme or layout — a stripped-down, large-button kiosk theme for a self-service station, a full staffed-register theme for a cashier, or brand-differentiated themes if one store runs two counters under two banners. The theme is cosmetic and workflow-shaping, not a data change, so it varies freely per station without touching the catalog.
Assigning operators to stations and what each can do
Assign operators (cashiers) to specific stations so each station knows who is working it, end-of-day totals attribute to the right person, and permissions can be scoped per operator — accountability the outlet-model plugins treat shallowly. Operator assignment is step 3 of the station setup and it’s where staffing meets reporting.
Assign one or more operators to a station and you get three things the competing tools tend to gloss: accountability (each sale and refund ties to an operator, so a cash drawer or a voided sale has a name on it), permissions (scope what an operator can do at a station — take payments, issue refunds, apply discounts — so a junior cashier and a manager aren’t identical), and clean end-of-day totals (per-operator and per-station reconciliation instead of one undifferentiated pile). Because operators attach to stations rather than to the whole store, the same person can be assigned to different stations on different days without reconfiguring the store.
Worked example 1: a two-register retail counter plus a mobile Tap-to-Pay station
Configure a two-register shop as three stations on one store: two fixed counters each bound to their own S700 and receipt printer, plus a roving Tap-to-Pay station on a phone for line-busting and sidewalk sales. This is the most common multi-station retail pattern, and the station model makes it a three-configuration job, not a three-store job.
- Station 1 — Counter A: bound to “Counter-A-S700,” routes receipts to the Counter-A thermal printer, staffed-register theme, operators = the morning cashiers. Standard local tax class, home currency.
- Station 2 — Counter B: bound to “Counter-B-S700,” routes to the Counter-B printer, same theme, operators = the afternoon cashiers. Same tax and currency as Counter A.
- Station 3 — Roving Tap to Pay: bound to the Tap-to-Pay phone, emailed receipts (no fixed printer), a stripped kiosk-style theme for speed, operator = the floor lead. Same catalog and stock as the counters.
All three share one product catalog and one stock pool, so selling the last unit of a SKU at Counter A makes it unavailable at Counter B and the roving station instantly. The day’s sales across all three consolidate into one WooCommerce report. Adding a fourth register for the holidays is one more station, not another store.
Worked example 2: a cross-border pop-up with per-station currency
Configure a border-town or multi-country pop-up as one currency per station: a home-currency station on your primary Stripe account and reader, and a second-currency station on a same-country Stripe account with a reader located in that country — both selling from one shared WooCommerce catalog. This is the concrete version of “multi-currency without multiple stores.”
- Station 1 — Home currency (e.g., USD): US Stripe account, US-located reader (S700 or WisePOS E), USD tax rules, home-market theme.
- Station 2 — Second currency (e.g., CAD): Canadian Stripe account, Canada-located reader, CAD, local tax rules, same catalog.
Because each Stripe Terminal reader charges only in its local currency and must sit on a same-country account (Stripe does no dynamic currency conversion), the currency is what forces two stations here — but the catalog, inventory, and reporting stay unified on one WooCommerce store. Givers at the CAD station pay in CAD on the CAD reader; the USD station is untouched; both sets of sales land in one report with the currency recorded per transaction. The multi-currency guide covers the account architecture end to end.
Frequently asked questions
Can each POS station use a different tax rate or currency?
Yes. Tax class/rate and currency are both per-station levers in Jovvie. Different tax classes work on one Stripe account; different currencies require a same-country Stripe account and reader per currency, because Stripe Terminal charges in the reader’s local currency with no dynamic currency conversion.
How do I assign a specific Stripe Terminal reader to a station?
Register the reader to a Stripe Terminal location (fleet-management docs), then bind that exact device — S700, WisePOS E, or Tap to Pay — to the station in Jovvie’s station settings. The station then always drives that one reader.
Can I set different receipt printers per station?
Yes. Assign the target printer per station so receipts print at the right counter. With BizPrint wired to Jovvie you can route per station to thermal, kitchen, or label printers and set per-station print rules.
How do I assign operators or cashiers to specific stations?
Assign one or more operators to each station. Sales and refunds attribute to the operator, permissions can be scoped per operator, and end-of-day totals reconcile per station and per person.
Does station data still roll up to one WooCommerce store for reporting?
Yes — that’s the point of the station model. Every station shares one catalog, one inventory pool, and one sales report. Stations override checkout behavior, not the store itself.
Is a station the same as an outlet or a separate store?
No. Outlet-model plugins create separate stores you then reconcile. A Jovvie station is a configuration layer on one store, so there’s no duplication of catalog, stock, or reporting.
Configure your stations the single-store way
Running several registers doesn’t mean running several stores. With Jovvie’s station model you set six per-station levers — tax, currency, assigned Stripe Terminal reader, receipt printer, theme, and operator — on one WooCommerce store, bind each register to its own reader, and keep one catalog, one inventory, and one report. That’s the specific, Stripe-Terminal-native setup the outlet-model plugins don’t give you.
Want to see it on your own store? Configure your first two stations in an afternoon — bind each register to its own reader and keep one catalog, one inventory, and one report. Start free, or talk to our team about your station layout.
Sources: Stripe Terminal docs · Stripe Terminal fleet management · Stripe Terminal devices · BizPrint · Jovvie WooCommerce receipt printing guide
