

Looking for a way to add tips at checkout in WooCommerce? Although there are a number of checkout features built within WooCommerce, accepting tips at checkouts isn’t one of them. For this, you’ll need to extend the functionality of the core plugin. In this post, we show you how to let customers add tips at checkouts for your online store and in-person payments using point of sale (POS) software.
Why set up a tipping option at checkout?
Tipping is a social norm in physical restaurants, and eCommerce stores are increasingly implementing a tipping option at the checkout. While adding an automatic charge or gratuity to a bill is not always a good idea – surveys of restaurant customers indicate that they disapprove of automatic gratuity, even if they enjoyed the meal and service – tips are voluntary, and adding WooCommerce add tip at checkout functionality to your online and physical POS has several benefits, including:
- Give staff a good wage: Tips are prevalent in industries that pay their workers subminimum wages and can make up an average of 25% of restaurant employees’ salaries. Adding tips to wages will help boost staff morale and performance. Satisfied employees and business performance go hand in hand.
- Allow customers to show gratitude: On average, people tip 19% for most services. Tipping is a socially accepted way to show gratitude, but it is also motivated by an expectation of future service, a sense of duty, and a desire to avoid disapproval. If customers are happy with your service, then accepting tips allows you to benefit from their loyalty.
- Follow customs: If you run a restaurant or catering business through WooCommerce with a Point of Sale (POS) solution, then you need a way to accept tips from your customers. Tipping is essential in service industries: in the United States, tips are often 20% of the value of a meal. Tipping is expected in many other cultures and countries too.
Setting up tipping at your WooCommerce checkout isn’t only beneficial for restaurants and other businesses in the service sector. For example, imagine you run a plant nursery where staff help customers load pots and heavy plants into their vehicles. You can provide customers with the option to leave a tip for your staff at the time of checkout. It will save customers the few moments they’d spend taking out cash from their wallets while your staff can also attend more quickly to the next customer.
How to enable tipping on the WooCommerce checkout page
You can easily accept tips for online ordering at your WooCommerce store using the Product Manager plugin from BizSwoop.
Product Manager has a comprehensive suite of features that allows customization options for products, upsells and add-ons on your WooCommerce store.
Select from different add-on types to create your products the way you want – no product is too complex. By enabling cart page and checkout add-ons, Product Manager supports a versatile array of different tipping options to add to your checkout page. You can include a flat rate tip at a fixed amount with a checkbox for easy input, a radio button with different pre-fill percentage options, or an open input box for customers to type their own tip value.
You can set up Product Manager in a few simple steps:
- Download the plugin from the BizSwoop site. Install and activate it from your WordPress dashboard.
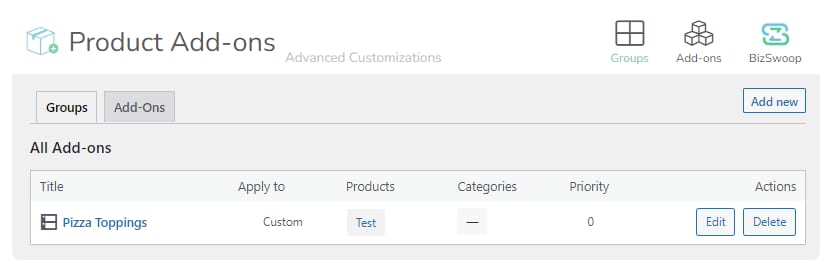
- Once the plugin is activated, you’ll have a new section in your dashboard called ‘Add-on Groups’. Navigate to Products > Add-on Groups to access it.
- Under ‘Add-on Groups’, click ‘Add new’.
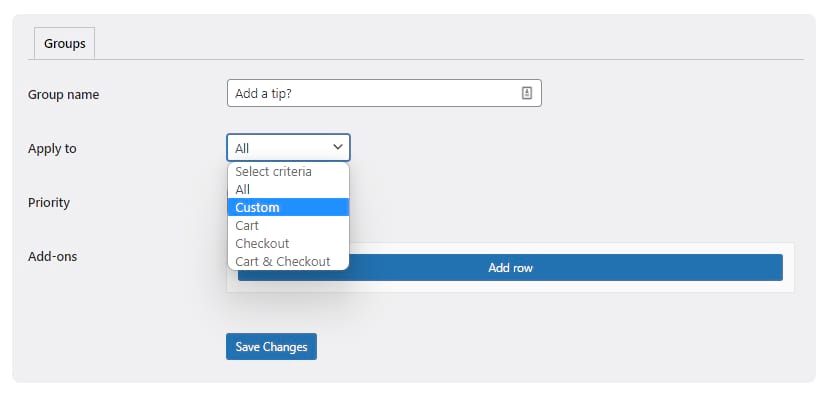
- Give your group a name and choose where you would like the addon to apply: all product pages, custom product pages, cart, checkout, or cart & checkout (note that applying the group to the cart or checkout requires the ‘Cart & Checkout Add-ons’, available as part of the Product Manager ‘Plus’ and ‘Pro’ plans).
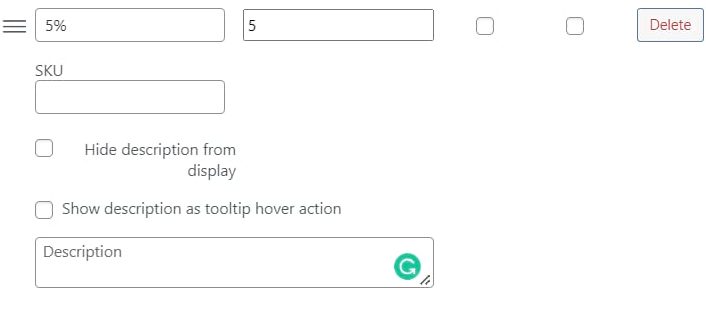
- Click ‘Add row’ to create a tipping option, and customize how this will display on your store’s front end. Choose a name for your tipping option, and choose how customers can select it (radio button, checkbox, text field).

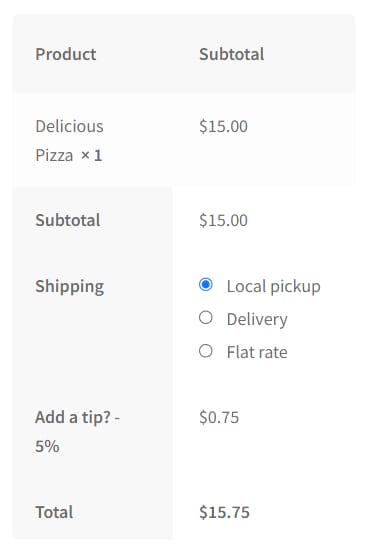
- Click ‘Add option’ to create pre-filled options that your customers can select. For example, if you want to add an option to tip 5% of the order value, simply fill in the tip value as ‘5’ as shown below:
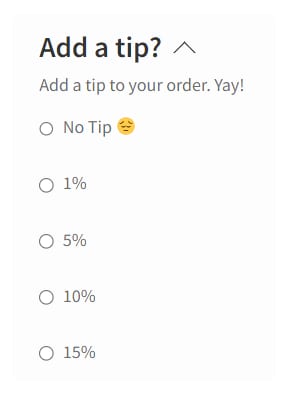
- Check your tip option is showing correctly on the front end. In this instance, we’ve set the tip options to appear on the checkout page:
This is just scratching the surface of what you can do with Product Manager. The plugin offers three different pricing plans, depending on the level of functionality your business requires. To get a full picture of how Product Manager can transform your WooCommerce store, why not take advantage of its 7-day free trial?
How to enable in-person tips with a WooCommerce POS solution
If you use a WooCommerce POS to take payments in-person, you might want to allow customers to add tips at the point of payment with cash or a credit/debit card. With Jovvie, this is easy to set up. Jovvie is a lightweight, all-in-one POS system for WooCommerce with all the features needed to run your store. It’s perfect for restaurants or hospitality businesses that want to use WooCommerce in a physical setting.
★★★★★ RATED 4.9/5 BY 5,000+ WOOCOMMERCE STORES
Sell anywhere. Sync to WooCommerce instantly.
Your retail counter, your tradeshow booth, your next pop-up — Jovvie is the only POS built natively for WooCommerce. No duplicate inventory, no failed syncs, no middleware.
Once you’ve purchased your Jovvie POS license, it’s easy to start accepting tips at your in-store cash register. Follow the tutorial below to add WooCommerce add tip at checkout functionality using Jovvie:
1. Get the plugins: Download and install the Point of Sale API connector plugin and the Point of Sale WP UI self-hosted plugin.
2. Select cloud or self-hosting: Once the plugins have been installed, select POS Settings > Connections.
3. Choose your station: Click POS > Stations, and select the station you want to use.
4. Set up your POS device: Connect your iPhone, iPad or Android device with the BizSwoop app or web dashboard to use as your POS interface.
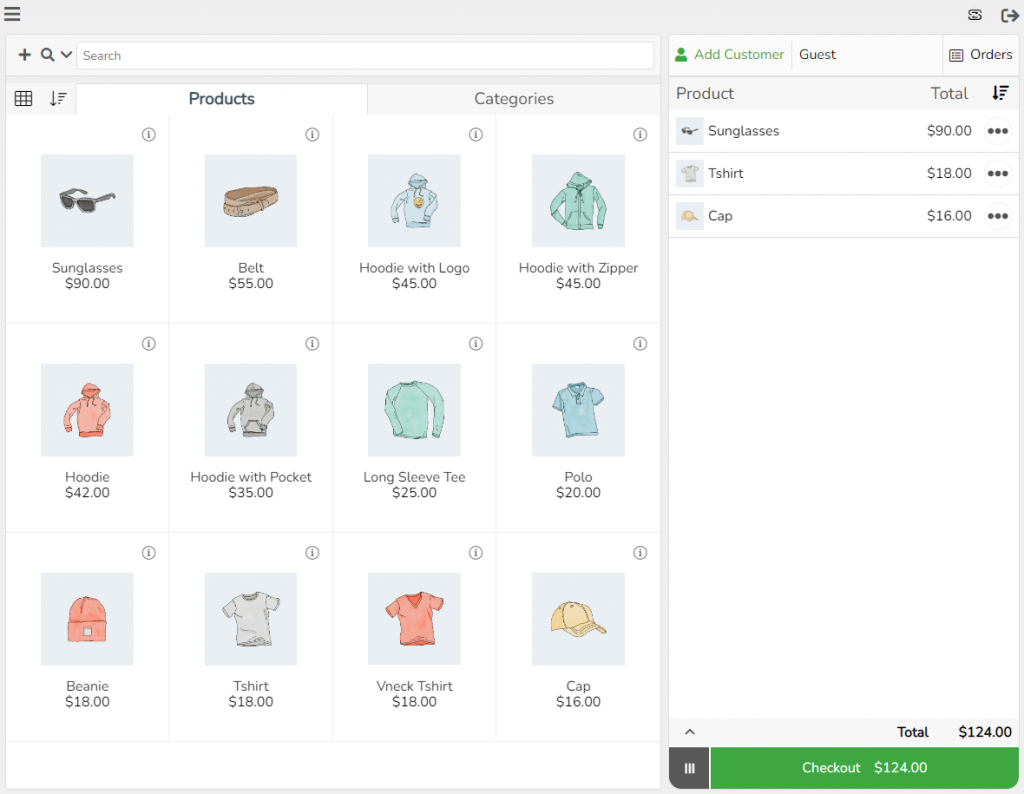
5. Add products: When a customer wants to make a purchase, choose a product from either the product tile or product list view, which can be toggled via the toggle icon in the top-left of the POS interface screen. You can also search for products, either via name or barcode, to quickly add them to the cart.
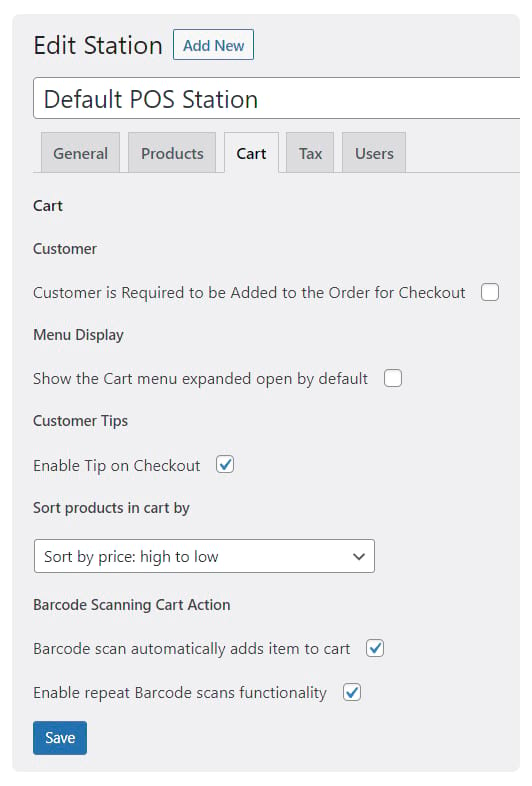
6. Enable tipping: Go to POS > Stations > Edit Station and click on the Cart tab. Here you’ll be able to enable tipping at the POS station level.
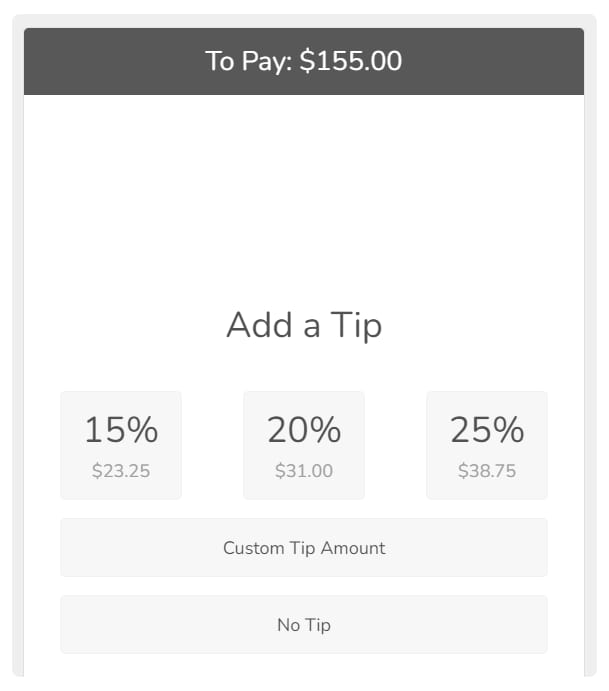
7. Accept tips: That’s it! Now, the customer can choose the 15%, 20%, or 25% tipping buttons, or add a custom tip amount in the tip field at the point of checkout, all within WooCommerce!
Get WooCommerce add tip at checkout functionality for online, in-person, or hybrid sales
Tips are voluntary payments from customers to service workers. You can offer customers the option to add a tip to their order on the payment page when they check out of your store or website. Enabling WooCommerce add tip at checkout functionality can help your business in many ways, including giving employees a competitive salary and allowing customers to show loyalty.
Tipping is the norm in restaurants and customary in many hospitality settings. But eCommerce and retail store owners in many sectors can also introduce WooCommerce donation and tipping. Customers may tip for various reasons, including an expectation of future service, as a show of appreciation for excellent service, or from a sense of duty.
There are many ways to add tipping functionality to your WooCommerce store. There are various paid tipping extensions available – Product Manager from BizSwoop stands out from its competitors, with a wide array of tipping options and advanced WooCommerce product management features.
The best way to add tips to point-of-sale orders is through WooCommerce POS software like Jovvie. When you use Jovvie, you get an all-in-one WooCommerce POS solution that also allows you to accept tips at checkout. Here’s a round-up of some reasons to use Jovvie to add WooCommerce add tip at checkout functionality:
- Lightweight and easy to set up, with little technical expertise required
- Multiple tipping options and amounts at the checkout stage
- Accepts multiple payment gateways, including Stripe and Square
- Add coupons and other promotions
- Print receipts, invoices and packing slips by integrating sister product BizPrint
Jovvie can help increase turnover by providing a quick and convenient way to take payments in-store, all within WooCommerce. It is trusted by tens of thousands of businesses that need a native POS solution for WooCommerce. A free Jovvie trial is available – you can start taking WooCommerce orders with your Jovvie POS in as little as five minutes. If you need assistance setting up Jovvie and adding WooCommerce add tip at checkout functionality, don’t hesitate to schedule a free consultation.
★★★★★ RATED 4.9/5 BY 5,000+ WOOCOMMERCE STORES
Sell anywhere. Sync to WooCommerce instantly.
Your retail counter, your tradeshow booth, your next pop-up — Jovvie is the only POS built natively for WooCommerce. No duplicate inventory, no failed syncs, no middleware.