

QuickBooks can integrate with WooCommerce through multiple methods, including the official WooCommerce Connector by Intuit, third-party plugins, and custom solutions. These solutions automate the transfer of orders, customer data, and financial information between systems.
Running a WooCommerce store requires managing many moving parts – orders, inventory, taxes, and financial records. Connecting your store to QuickBooks automates these processes, reduces errors, and saves time. QuickBooks, used by more than 29 million small businesses in the U.S., has become the go-to accounting solution for a reason.
This guide explores how to integrate WooCommerce with QuickBooks, covering available options and common challenges. We’ll also examine why some businesses are moving beyond traditional integrations to solutions that eliminate complex connections altogether.
Official integration method: WooCommerce Connector by Intuit
The WooCommerce Connector by Intuit is the official integration solution developed by the same company that created QuickBooks. This connector allows you to automatically sync orders, products, and inventory between your WooCommerce store and QuickBooks accounts at no additional cost.
How the WooCommerce Connector works
The WooCommerce Connector creates a direct pipeline between your online store and QuickBooks. When customers place orders, this data flows automatically to QuickBooks, updating your financial records in real time. The connector handles several critical functions:
- Syncs product information including names, prices, and stock-keeping units (SKUs).
- Transfers customer data including contact information.
- Imports order information with line items, taxes, and discounts.
- Updates inventory levels across both platforms.
- Maps payment methods to the appropriate QuickBooks accounts.
Setting up the WooCommerce Connector
Follow these steps to implement the official integration:
- Log in to your QuickBooks Online account.
- Navigate to the Apps section, select Find apps and search for “WooCommerce Connector.”
- Install the WooCommerce Connector application.
- Select Get app now, then select Connect.
- You will be redirected to the Connections tab in your QuickBooks Connector. Select Connect to WooCommerce.
- Enter your WooCommerce store’s domain URL.
- Click Connect to WooCommerce again.
- Enter your WooCommerce administrator credentials when prompted.
- Select Approve to authorize the connection between your WooCommerce account and QuickBooks.
Once connected, you can customize your sync settings to determine which data transfers between systems and how frequently these updates occur.
Data verification
After setting up the connector, it’s essential to verify that your data is syncing correctly. Create a test order in WooCommerce and check that it appears in QuickBooks with all the correct information. Pay special attention to product names, prices, taxes, and customer details to ensure everything transfers accurately.
Pros and cons of the official connector
The official WooCommerce Connector by Intuit offers several notable advantages:
- No additional cost: Free to use with your existing QuickBooks Online subscription.
- Automatic data sharing: Syncs data between WooCommerce and QuickBooks.
- Multi-channel support: Connects multiple sales channels to QuickBooks Online.
- Inventory management: Keeps stock levels up-to-date across platforms.
Despite its benefits, the connector does have some limitations:
- Custom status limitations: Cannot use custom order statuses as filters.
- Permalink limitations: Default/Plain permalinks will not work with the connector.
While the official connector handles basic integration needs effectively, consider alternative solutions if your business uses custom order statuses, requires advanced customization, deals with multiple currencies, or requires integration with additional business systems beyond QuickBooks.
Alternative integration methods
While WooCommerce Connector works well for many businesses, you may want to consider the following alternatives if you need more customization or enhanced features:
Method 1: Third-party workflow automation platforms
If you need more flexibility or already use other automation tools, third-party integration platforms can connect WooCommerce and QuickBooks, along with many other services.
Zapier: Best for simple and fast integrations
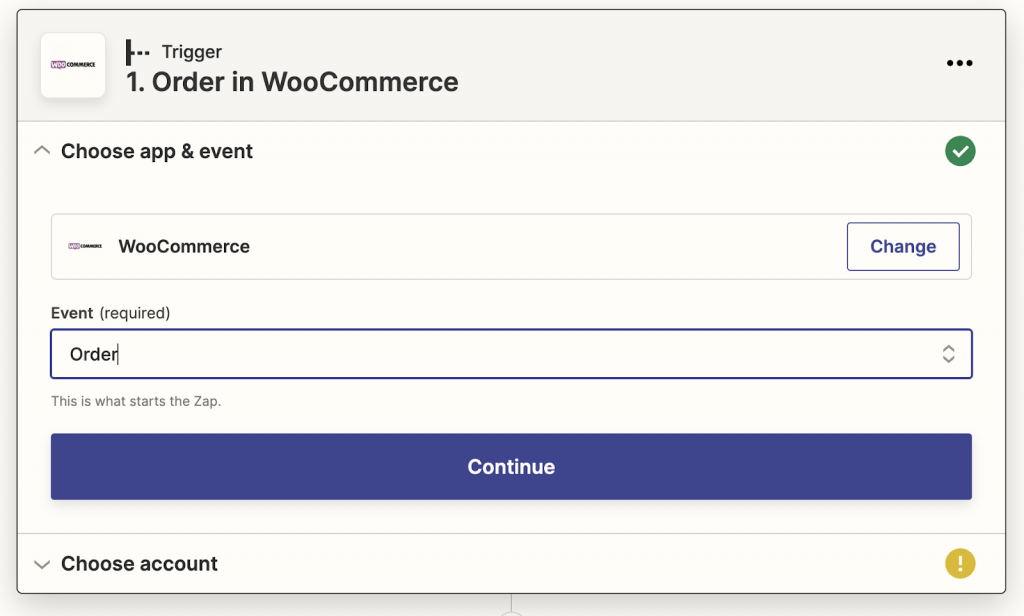
Zapier offers instant triggers for QuickBooks events like new accounts, bills, expenses, and customers. Setting up is straightforward:
- Create a Zapier account.
- From the Zapier dashboard, create a “Zap” by selecting WooCommerce as the trigger app and “Order” as the event.
- Choose QuickBooks Online as the target app and select an action like “Create Invoice.”
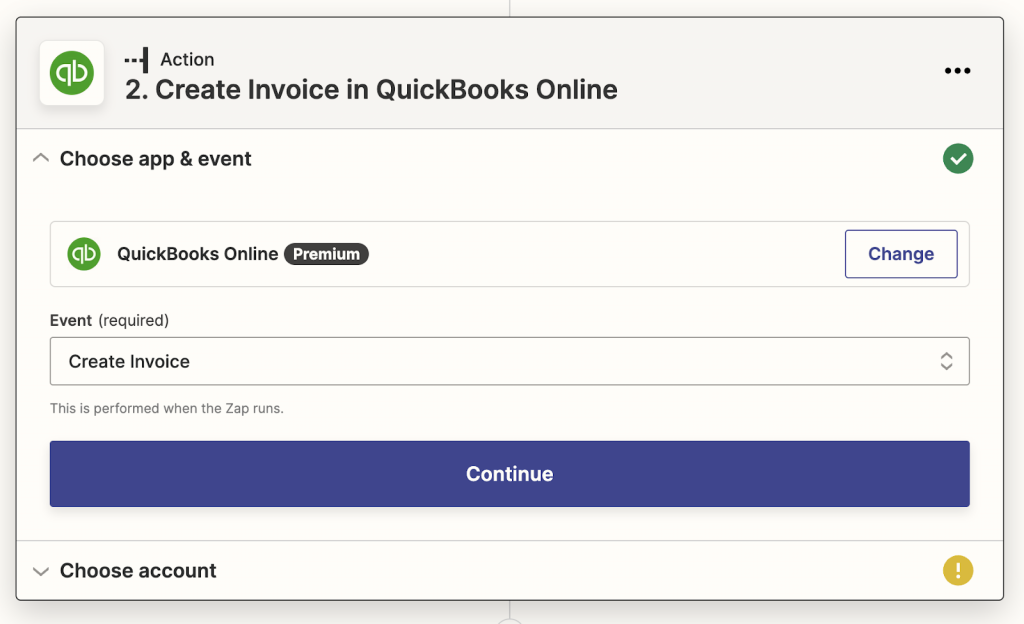
- Map WooCommerce data fields to QuickBooks fields to populate information automatically.
However, Zapier requires a paid subscription for QuickBooks integration (Premium), with plans starting at around $20 per month.
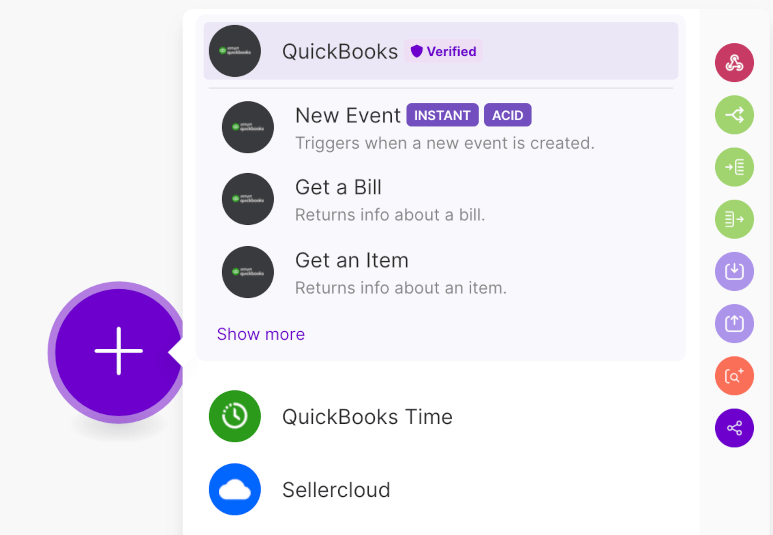
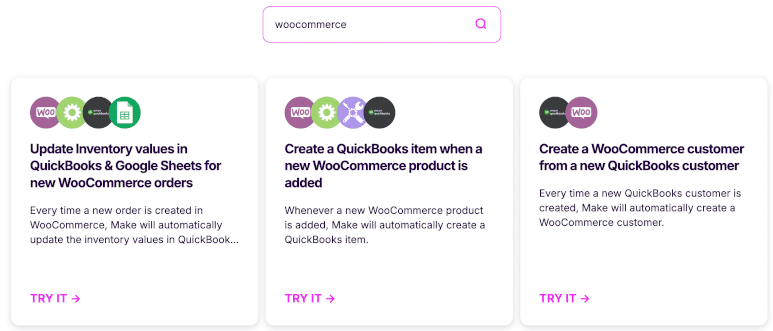
Make: Best for complex and flexible integrations
Make offers a visual workflow builder with 93 different QuickBooks modules for managing invoices, bills, sales receipts, estimates, payments, customers, and more. The connection process is simple:
- Create a Make account and create a scenario.
- Add a QuickBooks module to your scenario.
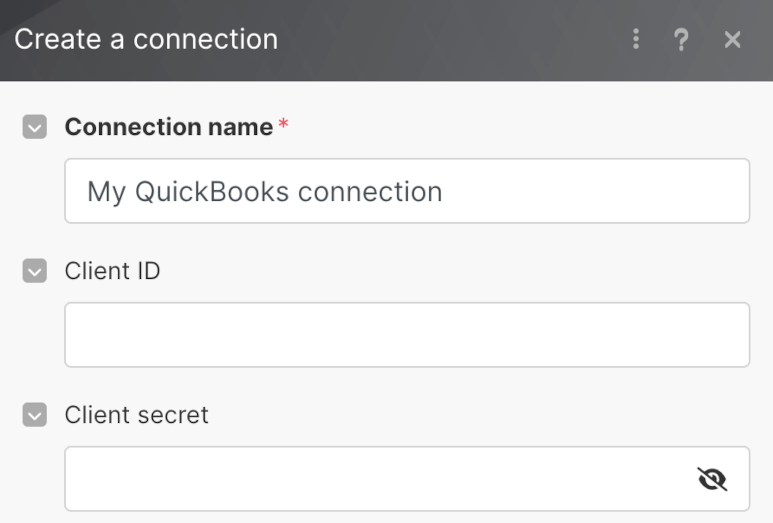
- Click “Create a connection” and select a WooCommerce module of your choice.
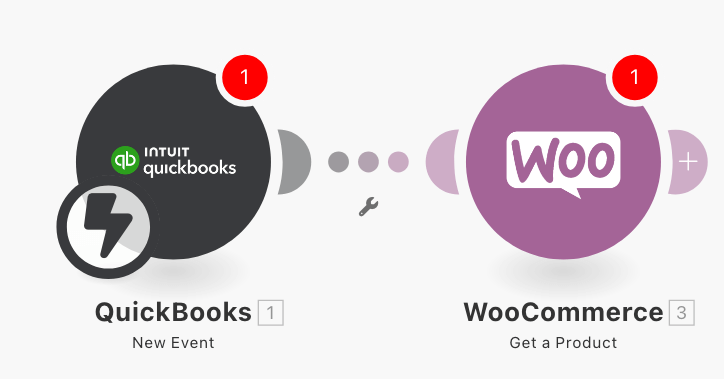
- Authenticate both your QuickBooks and WooCommerce Accounts.
- Map QuickBooks data fields to WooCommerce data fields to populate information automatically.
- Run your scenario to test it.

Make provides ready-made templates for common tasks like sending new invoices to Slack, uploading invoices to cloud storage, or creating sales receipts from spreadsheet data.
While you can start with a free account offering 1,000 operations by month, you might need a Pro Plan at $16 per month if you have more extensive needs.
Method 2: Dedicated QuickBooks-WooCommerce connector plugins
For more comprehensive integration between WooCommerce and QuickBooks, specialized WordPress plugins provide advanced connection features. These dedicated plugins automatically sync your WooCommerce orders to QuickBooks as invoices, transfer customer data, synchronize inventory levels, and map tax settings between platforms. Unlike general integration tools, these purpose-built plugins understand the specific requirements of accounting integrations for online stores.
WooCommerce Sync for QuickBooks Oonline by MyWorks
MyWorks Sync offers robust two-way synchronization between WooCommerce and QuickBooks Online. The plugin automatically syncs orders, customers, inventory, and payments while giving you control over the mapping process.
Setting up MyWorks Sync:
- Install the plugin from the WordPress repository.
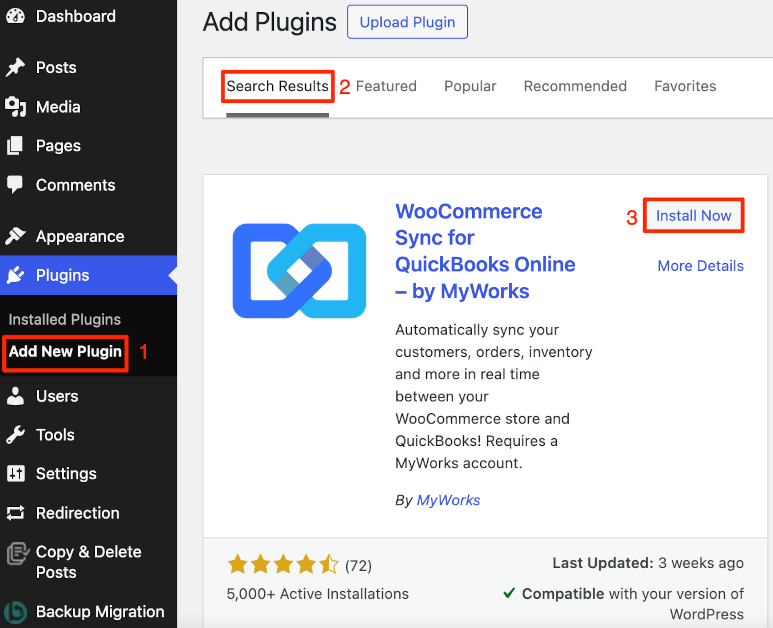
- Create a MyWorks account.
- Connect to QuickBooks Online through your MyWorks account.

- Configure sync settings based on your business needs.
Key features include automatic syncing as frequently as every 5 minutes, two-way product and inventory synchronization, advanced payment handling, custom field mapping, and compatibility with 25+ WooCommerce extensions. Pricing ranges from free to $99/month (billed annually) depending on your requirements.
Integration for WooCommerce and QuickBooks by CRM Perks
Unlike subscription-based services, CRM Perks offers a WordPress plugin with both free and premium versions with a one-time payment model for connecting WooCommerce to QuickBooks. This solution excels in customizable data flows and rule-based synchronization.
Setting up CRM Perks:
- Install the free version to test basic functionality or purchase the premium version (starting at $119 for a single site).
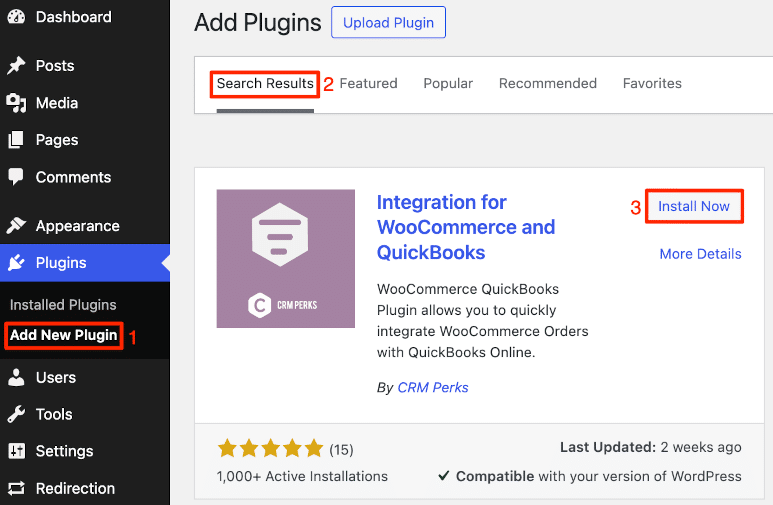
- Connect your QuickBooks account through secure OAuth 2.0 authentication.
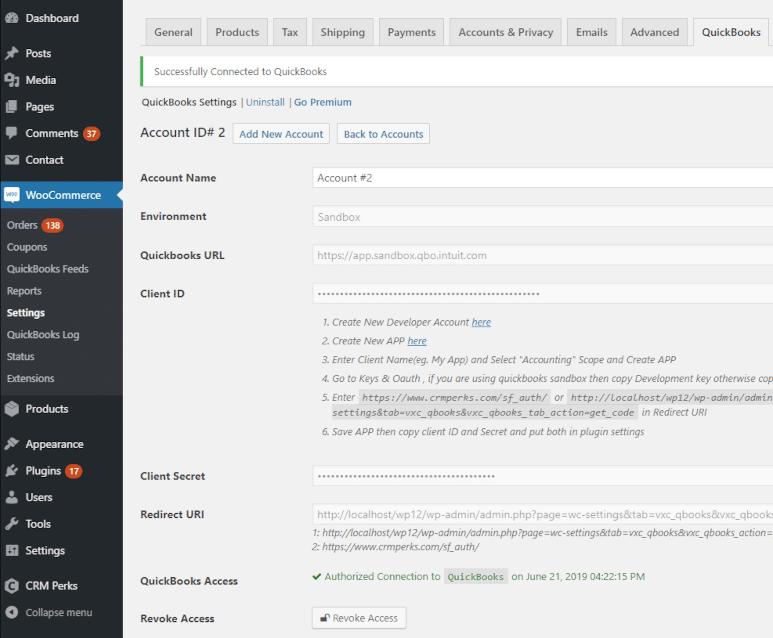
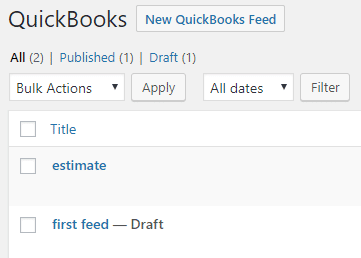
- Create feeds to determine how WooCommerce data should be sent to QuickBooks.
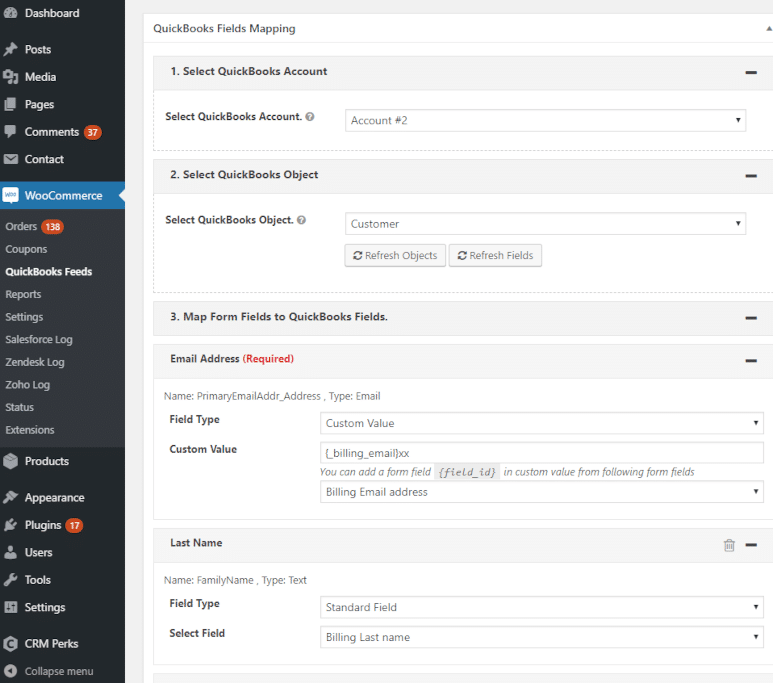
- Map your WooCommerce fields to QuickBooks objects (Invoices, Sales Receipts, Customers, etc.).
The plugin’s standout features include conditional filtering that lets you control exactly which orders sync to QuickBooks, multiple export events that trigger based on order status changes, and comprehensive error reporting with email notifications. Premium versions include additional features like multiple QuickBooks account support and 10+ add-on extensions. With no monthly fees or per-order charges, this plugin offers a cost-effective solution for businesses looking to maintain long-term integration between WooCommerce and QuickBooks.
Method 3: Custom API integration
For businesses needing complete control over their integration, custom API integration provides a tailored solution for connecting WooCommerce with QuickBooks.
Setting up a custom API integration:
- Create an app in the Intuit Developer Portal for Client ID and Client Secret.
- Configure redirect URI (e.g., https://yourdomain.com/auth/callback).
- Generate REST API keys (Consumer Key and Consumer Secret).
- Set up authentication using OAuth 2.0 to securely connect systems. Exchange authorization code for access_token and refresh_token.
- Implement data mapping code to translate between WooCommerce and QuickBooks formats. As an example, WooCommerce tax classes must map to QuickBooks tax codes (e.g., standard → TAX). Use pagination for large datasets (e.g., SELECT * FROM Invoice MAXRESULTS 100).
⚠️ for inventory, bidirectional sync requires handling stock adjustments across both platforms. - Develop synchronization routines for orders, products, customers, and payments.
- Create error handling. Log API errors (e.g., QuickBooks 4000 series errors) with retry mechanisms and use idempotency keys to prevent duplicate transactions.
- Test thoroughly before deploying to production.
This approach requires development resources but offers complete control over the integration process. Consider consulting with a developer experienced in both platforms’ APIs to properly implement this solution.
QuickBooks versions & their integration capabilities
Different QuickBooks versions exist and offer varying integration options with WooCommerce. Let’s look at what defines them to help you choose the right approach for your business.
| Feature | QuickBooks Online | QuickBooks Desktop | QuickBooks POS |
| Cloud Access | Yes, accessible from anywhere | No, requires installation on a PC | No, for in-store use only |
| Real-Time Sync | Yes, automatic syncing with WooCommerce | Limited, manual sync required | Not designed for online sync |
| Mobile App | Yes, full app support | No | No |
| WooCommerce Integration | Direct API support | Requires third-party plugins | No |
| Pricing | Starts at $99/month | Starts at $1,768/year | No longer available |
Quick Summary:
- QuickBooks Online: Best for businesses needing real-time syncing and cloud access.
- QuickBooks Desktop: Best for businesses that need more robust features but don’t require cloud access.
QuickBooks POS: Not available anymore. Primarily for physical stores, not for WooCommerce integration.
QuickBooks Online
QuickBooks Online, also known as QBO, provides the most straightforward integration with WooCommerce and has become the preferred option for most businesses. It features:
- Direct API access for real-time data exchange.
- Support for the official WooCommerce Connector by Intuit.
- Compatibility with most third-party integration plugins.
- Cloud-based accessibility from any device with internet access.
- Automatic updates with the latest security features.
- Mobile app support for managing finances on the go.
This version works well for businesses that need frequent synchronization, real-time financial data, and the flexibility to work from anywhere. Pricing starts at $99/month for the Online Plus plan Accounting only (with promotional discounts often available).
QuickBooks Desktop
QuickBooks Desktop requires additional steps for WooCommerce integration:
- Web Connector software must be installed and running on the computer with QuickBooks.
- Data syncs occur only when the Web Connector is active.
- Requires plugins specifically designed for Desktop versions.
- Limited to computers where QuickBooks is installed.
- Data stored locally rather than in the cloud.
While Desktop versions offer some robust features for specific business needs, they lack the accessibility and automatic updates of the Online version. Desktop Enterprise starts at $1,768/year.
QuickBooks offers an online migration tool if you want to switch to QuickBooks Online.
QuickBooks POS
QuickBooks Point of Sale has been discontinued and is no longer available for new customers. Prior to discontinuation, it wasn’t designed with WooCommerce compatibility in mind, creating significant integration challenges for online retailers.
For WooCommerce store owners needing to connect their online and physical stores, specialized POS systems designed specifically for WooCommerce provide better results with fewer integration headaches. These purpose-built solutions allow for direct connections to your WooCommerce data without requiring complex synchronization between separate platforms.
Key integration features
Regardless of which integration method you choose, certain core capabilities are essential for effectively connecting WooCommerce with QuickBooks. When evaluating integration options between WooCommerce and QuickBooks, focus on these essential features that will have the most impact on your business operations:
Order syncing eliminates double-entry of sales data and reduces accounting errors. Look for solutions that let you control which order statuses trigger synchronization to match your business workflow. For example, you might want to sync only orders marked as “Completed” or “Processing,” while excluding orders that are still in “Pending” status.
Inventory management integration prevents overselling and provides accurate cost of goods sold calculations for financial reporting. This is particularly important for businesses like furniture stores or bookstores, managing physical products across multiple sales channels.
Customer data synchronization creates a complete view of customer purchase history and enables segmented financial reporting. This helps with both accounting accuracy and marketing insights.
Tax handling capabilities vary widely between integration solutions. Proper tax synchronization is critical for compliance and reporting, especially for businesses selling in multiple tax jurisdictions.
Payment processing integration ensures your accounts receivable records match actual customer payments. This feature simplifies reconciliation and provides accurate cash flow reporting.
Troubleshooting common integration issues
Connection problems
- Verify API credentials are correct and haven’t expired.
- Format your domain correctly (use “example.com” not “example.com/wp-admin”).
- Check that your hosting firewall allows connections to api.quickbooks.com.
Sync errors
- Look for specific errors in sync logs like “Product SKU not found” or “Tax rate mismatch.”
- Test by syncing a recent completed order before importing historical data.
- Fix product names with special characters (like &, %, or “) that may cause XML parsing errors.
Data mapping issues
- Ensure WooCommerce tax rates match QuickBooks tax items exactly.
- Map payment methods properly (e.g., “Credit Card” in WooCommerce to “Visa/MC” in QuickBooks).
- Verify shipping methods have corresponding income accounts in QuickBooks.
Version compatibility
- Keep plugins updated, especially after QuickBooks API changes.
- Test integrations in a staging environment after major WordPress updates.
- Check compatibility when switching between QuickBooks Online plans.
For persistent issues, contact your integration provider with screenshots of error messages and exact steps to reproduce the problem.
Why dedicated WooCommerce POS systems offer better value
While QuickBooks integration with WooCommerce addresses basic accounting needs, it creates ongoing challenges. Integration breakage during updates, synchronization delays causing inventory discrepancies, and imperfect data mapping all demand constant attention from store owners.
QuickBooks wasn’t built for retail operations, requiring additional tools for essential POS features like barcode scanning and quick checkout – adding more complexity to your setup. Meanwhile, most businesses find they can handle essential accounting functions by simply exporting sales data to their accountant or using specialized software, making direct QuickBooks integration unnecessary.
Instead of struggling with complex integrations, dedicated WooCommerce POS systems provide a simpler approach. By working directly with your existing store data, solutions like Jovvie deliver real-time inventory updates, support for all WooCommerce product types, and retail-focused features without the technical overhead.
With a WooCommerce-native solution, you’ll spend less time troubleshooting system disconnects and more time growing your business.
Start automating your eCommerce today with Jovvie
Now that you understand the options for connecting WooCommerce with accounting systems, it’s time to consider what matters most for your business: reliable operations, happy customers, and sustainable growth.
Jovvie POS was designed specifically for WooCommerce store owners who need a straightforward solution for in-person sales. Unlike the integration approaches we’ve discussed, Jovvie offers:
- A simplified setup process that gets you selling in under 5 minutes.
- Support for multiple payment methods including cash, cards, and digital wallets.
- Flexible device options – sell from iPads, tablets, mobile devices, or desktops.
- Compatibility with thousands of WooCommerce payment gateways.
Many businesses discover that Jovvie not only eliminates their integration challenges but also enhances their customer experience with faster checkouts and consistent inventory information across all sales channels.
Try Jovvie’s free trial today and experience firsthand how a native WooCommerce POS solution can transform your retail operations while providing all the data you need for effective financial management.
Choose Jovvie for the best alternative to QuickBooks POS
You need to use a POS system for your WooCommerce business because it allows you to take in-store payments. POS systems also sync your sales in your physical and online stores, making it easier to keep track of stock and reducing the chance of stock-outs and delays in fulfilling orders for your WooCommerce customers.
Most small businesses that use QuickBooks accounting software to manage business expenditure also adopt QuickBooks POS. While this system is useful, it’s not built specifically for WooCommerce; therefore users need to use a plugin to integrate between the two platforms.
If you are looking for a better alternative, Jovvie is the best choice for WooCommerce store owners. It integrates quickly and easily with WooCommerce and can manage multiple payment gateways. You can also use the system to manage WooCommerce coupons natively and to set up multiple POS stations and accounts according to the needs of your employees. Jovvie even allows you to print sales receipts directly from WooCommerce by setting up POS integration with Jovvie’s sister plugin, BizPrint.
★★★★★ RATED 4.9/5 BY 5,000+ WOOCOMMERCE STORES
Sell anywhere. Sync to WooCommerce instantly.
Your retail counter, your tradeshow booth, your next pop-up — Jovvie is the only POS built natively for WooCommerce. No duplicate inventory, no failed syncs, no middleware.