
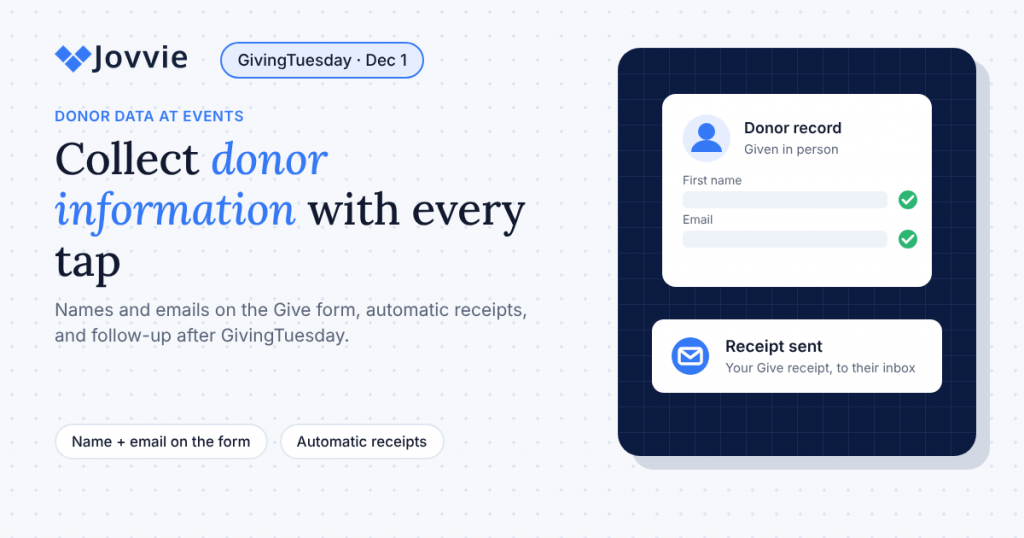
To collect donor information at events, take the gift on the same Give form you use online. With Tap To Donate for Give by Jovvie, the volunteer or donor fills in the form’s donor fields (at minimum a first name and email) before the donor taps, so every in-person gift arrives in Give (formerly GiveWP) as a full donation with a donor record and a receipt address, not as an anonymous card charge you have to match up later.
That’s the difference between “we raised $4,000 at the open house” and “we met 80 new donors at the open house.” This guide covers which details to collect, how to capture them in seconds at a busy table, what to tell donors about consent, and the follow-up sequence that carries GivingTuesday (Tuesday, December 1, 2026) donors into your year-end campaign.
Key Takeaways
- The Give form does the capturing. In-person gifts run through your Give form, so whatever donor fields that form collects are recorded with the donation, alongside your online gifts.
- Email is the field that matters most. Give requires a first name and email by default, and the email is where the receipt goes, how Give identifies the donor, and how you follow up.
- Use the email donors already use with you. Give creates a separate donor profile for each email address, so a different address at the event means a duplicate record.
- Keep the event form short. Name, email, amount and an optional marketing opt-in are enough at a table; collect the rest later.
- Receipts are your first follow-up. Give’s donation receipt email is sent automatically when a donation completes, so test it before the event.
- Plan the sequence now. A thank-you within 48 hours, an impact update in week two, then your year-end appeal before December 31.
How do I collect donor contact details when people donate in person?
You collect donor contact details in person by running the gift through a Give donation form that asks for them, so the details are entered as part of the donation rather than on a separate sign-up sheet. With Jovvie, the volunteer opens the form on a phone or tablet, the donor’s name and email go into the form, the volunteer selects the in-person payment option, and the donor taps, inserts or swipes (Jovvie setup documentation).
Because it’s an ordinary Give donation, the result is the same as an online gift: the donation and the donor record appear in Give alongside your online donations, and the payment appears in your Stripe dashboard (WordPress.org listing).
Exactly which fields you capture depends on the form, not on Jovvie. Give’s documentation lists first name and email as the standard required fields, and you can make other fields required if you need them (Give: customizing required fields). Before your event, open the form you’ll use in person and check what it actually asks for.
What donor information should you collect at an event?
Collect the minimum you need to thank, receipt and follow up with the donor: first name, last name, email and the gift itself. Everything else can wait for a follow-up form or the donor’s next online visit.
| Field | At the event? | Why |
|---|---|---|
| First name | Required | Required by Give by default; personalizes the receipt and thank-you |
| Last name | Recommended | Needed to tell donors apart and for most year-end acknowledgments |
| Required | Receipt address, donor identity in Give, and your follow-up channel | |
| Amount and frequency | Required | The gift itself; offer monthly if you use Give’s Recurring Donations add-on |
| Email marketing opt-in | Recommended | Separate, unticked consent for newsletters and appeals |
| Mailing address | Optional | Useful for mailed appeals and some tax acknowledgments, but slows the line |
| Phone number | Optional | Only if you’ll actually call; many donors hesitate to give it |
| Employer (for matching gifts) | Optional | Worth adding during GivingTuesday matching campaigns |
| “How did you hear about us?” | Skip at events | You already know: they’re at your event. Use a hidden field or a dedicated form instead |
Two practical rules:
- Every extra field costs time at the table. A queue of donors waiting while one person types a street address is how events lose gifts.
- Use a dedicated event form. Duplicate your main form, trim it to the fields above, and attach it to your event or GivingTuesday campaign. Your online form keeps its full set of fields.
Why does the email address matter so much?
The email address matters because it’s how Give receipts the donor, identifies them and lets you reach them again. Get it wrong and the donor gets no receipt, you get a duplicate record, and the follow-up never lands.
Give uses the email to tie donations to donor profiles. Its documentation notes that when a supporter gives using different email addresses, each address creates a separate donor profile, which then has to be merged by hand (Give: how to merge donors). Merging is manageable for one-time gifts. If the duplicate profiles both hold recurring subscriptions, Give doesn’t support merging them at all.
So at the table, ask for “the email you use with us” rather than “an email.” If you send newsletters, a volunteer can say: “Is that the same email you get our newsletter at?” It takes two seconds and saves a merge later.
A few other email habits that help:
- Read it back. Typos are the most common capture failure. Have the volunteer turn the screen toward the donor before the tap.
- Let the donor type it. On a tablet or kiosk, donors type their own details faster and more accurately than a volunteer taking dictation in a noisy room.
- Don’t accept placeholder emails. “none@none.com” creates a donor record you can never thank. If a donor won’t share an email, take the gift and note that they’ll need a printed or later receipt.
What are the fastest ways to capture donor details at a busy table?
The fastest way is to let donors enter their own details on a device they’re already holding or facing, and keep the volunteer focused on the conversation and the tap. Choose the pattern that suits the station; our event fundraising guide for GiveWP covers station setup in more depth.
- Volunteer phone with Tap to Pay. The volunteer opens the event form, hands the phone to the donor to type their name and email, takes it back and starts the in-person payment. The donor taps a card, phone or watch on the back of the phone. Best for roaming volunteers and short lines. Our guide to Tap to Pay donations on iPhone and Android covers device requirements.
- Tablet plus card reader at a staffed table. The donor fills in the form on a tablet facing them while the volunteer handles the reader. Faster than a phone for longer forms, and the reader takes chip cards as well as tap.
- Self-serve kiosk. In kiosk mode, the donor completes the whole form unaided, then the form resets for the next person (WordPress.org listing). Keep kiosk forms especially short; the GiveWP donation kiosk guide covers setup and signage.
- QR code to the same form. For donors who’d rather give on their own phone, a sign with a QR code to the same Give form captures their details and takes the gift online. It also works as a fallback if your device loses signal. Note that this is an online donation through your usual online gateway, not an in-person one.
- Sign-up card for cash and check donors. Cash gifts don’t create donor records on their own. A short card (name, email, opt-in) at the cash box lets you add those donors afterward.
What should volunteers say?
Volunteers should ask for details as part of the thank-you, not as paperwork. A simple script:
“Thank you! Could you pop your name and the email you use with us in here? That’s where your receipt goes. Then just tap your card on the back.”
And before the tap:
“Could you check the amount and our organization’s name on the screen?”
That last line reassures donors who’ve read about tap-to-pay scams, and it catches typos in the amount before they become refunds.
How do receipts work for in-person donations in GiveWP?
In-person donations taken through Jovvie are completed Give donations, so they follow your Give receipt settings. Give sends its donation receipt email automatically when a donation completes successfully, to the email entered on the form (Give: donation receipt email).
Before the event:
- Check the receipt is enabled and read the template. Give’s default receipt lists the donor’s name, the donation, date, amount, payment method and receipt ID, and you can add a personal thank-you and your branding.
- Run a test donation in Test Mode on the in-person form with a Stripe test card, using your own email, and confirm the receipt arrives and reads well. Test donations don’t move real money (Jovvie setup documentation).
- Mention the event. If you use a dedicated event form, a line such as “Thank you for giving at our GivingTuesday open house” makes the receipt feel personal, not automated.
For U.S. donors, a written acknowledgment matters at tax time. The IRS requires a contemporaneous written acknowledgment for any single contribution of $250 or more for the donor to claim a deduction (IRS Publication 1771). Make sure your Give receipt includes what your accountant says it must, such as your organization’s name and a statement about goods or services provided. Check your own requirements with your advisor; this isn’t tax advice.
Donors can also look up past gifts and download receipts in Give’s Donor Dashboard, either by logging in or by requesting a one-time access link by email. That’s another reason the email they enter at the event needs to be one they actually use.
Be ready for GivingTuesday (December 1). Add in-person giving to the Give forms you already have — free, about five minutes to set up — and capture every donor’s details on the same form.
How do you handle privacy and consent when collecting donor data?
Handle privacy and consent by collecting only what you need, explaining what you’ll use it for, and keeping marketing consent separate from the donation. A receipt is part of the donation; a newsletter is not.
- Separate the receipt from marketing. Sending the receipt to the email on the form is part of processing the gift. Adding someone to your newsletter or appeal list is a separate choice. Use a clear, unticked opt-in on the form. If you use Mailchimp, Give’s Mailchimp add-on adds an opt-in to donation forms, with an optional double opt-in.
- Say what happens next. A line under the email field (“We’ll email your receipt. Tick the box if you’d also like updates.”) sets expectations.
- Rules vary by country. In the U.K. and European Union, marketing consent rules are stricter than in the U.S. If you fundraise across borders, ask your advisor how your opt-in wording should read.
- Keep card data out of your forms. Card details are handled by Stripe’s readers and Tap to Pay, not typed into your Give form, so your form only stores contact details. Don’t add free-text fields that invite donors to write card numbers.
- Lock down shared devices. Run event forms logged out of WordPress, and don’t leave an admin session open on a volunteer tablet or kiosk.
How should you follow up with donors after GivingTuesday?
Follow up after GivingTuesday with a fast personal thank-you, an impact update, and then a year-end appeal before December 31, so the momentum of December 1 carries into the biggest giving month of the year.
- December 1–3: personal thank-you. Give’s receipt goes out instantly. Within 48 hours, send a human thank-you that names the event where they gave. Segment by the event form or campaign so the email says “at our open house,” not “recently.”
- Week of December 7: impact update. Show what GivingTuesday raised in total and what it will fund. A photo and one specific outcome do more than a long report.
- Mid-December: invite them to give monthly. Donors who gave once in person are good candidates for a monthly gift. Offer it with a short explanation of what a small monthly amount sustains. Our guide to recurring donations in person has scripts you can adapt.
- December 20–31: year-end appeal. Include event donors in your year-end appeal, with a note that thanks them for their GivingTuesday gift first. Many donors make year-end gifts before December 31 for tax reasons.
- January: year-end receipts and a welcome. Send annual giving summaries if you use them; Give’s Donor Annual Receipt page lets donors download yearly receipts from the Donor Dashboard. Welcome new donors into your regular newsletter if they opted in.
| When | Message | Who gets it |
|---|---|---|
| Instantly | Give donation receipt | Every donor with an email |
| Within 48 hours | Personal thank-you naming the event | Event donors (segment by form or campaign) |
| Week of December 7 | GivingTuesday total and impact | All GivingTuesday donors |
| Mid-December | Monthly giving invitation | One-time event donors |
| December 20–31 | Year-end appeal with thanks | Event donors who opted in to updates |
| January | Annual receipt and welcome | All donors; newsletter only for opt-ins |
For the GivingTuesday day plan itself, see the GivingTuesday in-person donations playbook.
How do you keep event donor records clean in GiveWP?
Keep event donor records clean by using one form per event, checking for duplicates within a week, and adding any cash or paper donors before the follow-up sequence starts.
- Review the event campaign in Give the day after. In-person gifts appear alongside online ones, so filter by the event form or campaign to see who gave at the event.
- Merge obvious duplicates (same name, different email) using Give’s change-donor and recalculate-statistics steps (Give: how to merge donors). Do it before the thank-you goes out.
- Add cash and check donors from sign-up cards. Give’s offline donations feature is designed for gifts paid by check or another non-digital method (Give offline donations docs).
- Add notes. A donor note (“met at GivingTuesday open house, interested in volunteering”) is the kind of context that makes the next conversation easier.
- Export for your CRM or accountant using Give’s donation history export if your donor data also lives elsewhere.
When is a different approach a better fit?
A different approach is a better fit if your donation forms don’t run on Give. Tap To Donate for Give by Jovvie captures donor details through Give forms, so if your online giving lives in another platform, use that platform’s in-person tools so donors stay in one database. And if an event is cash-only, a sign-up card and a QR code to your online form will capture more donors than any card reader. For the wider strategy, see BizSwoop’s nonprofit in-person payments strategy guide.
Frequently asked questions
How do I collect donor information at events?
Take each gift on a Give donation form that asks for the donor’s name and email, then use Tap To Donate for Give by Jovvie for the in-person payment. The details are saved with the donation in Give, next to your online donors.
Does Jovvie capture the donor’s name and email?
Jovvie takes the payment; your Give form captures the donor details. Whatever fields your form collects (Give requires first name and email by default) are recorded with the in-person donation, and the donor record appears in Give alongside online donations.
Do donors get a receipt for in-person donations?
Yes, if your Give receipt email is enabled and the donor enters an email. Give sends its donation receipt automatically when a donation completes. Run a test donation in Test Mode to confirm the receipt before your event.
What if a donor doesn’t want to give their email?
Take the gift anyway, but expect no emailed receipt and no donor record you can follow up with. Offer a printed receipt or a sign-up card instead, and never enter a placeholder email, which creates an unreachable donor record.
Can I add in-person donors to my email list automatically?
Only with their consent. Add a clear, unticked opt-in to your event form; Give’s Mailchimp add-on, for example, adds an opt-in and supports double opt-in. The donation receipt itself doesn’t require marketing consent.
Why do I have duplicate donors after an event?
Give creates a separate donor profile for each email address, so a donor who used a different email at the event gets a second profile. Ask for “the email you use with us,” and merge duplicates using Give’s change-donor steps.
How soon should I follow up after GivingTuesday?
Within 48 hours. The automatic Give receipt goes out immediately; a personal thank-you that names the event should follow within two days, then an impact update the next week and your year-end appeal before December 31.
What happens if the connection drops at the table?
There’s no offline mode, so the device needs Wi-Fi or mobile data for each gift. Keep a QR code to the same Give form so donors can give and enter their details on their own phones.
Be ready for GivingTuesday with every donor captured
GivingTuesday is December 1. If your campaign already runs in Give, your event table can do more than take cards: it can turn each tap into a donor record, a receipt and the start of a year-end relationship. Tap To Donate for Give by Jovvie adds Tap to Pay, card readers and kiosk mode to the forms you already have — free, about five minutes to set up. The plugin and Jovvie account are free with no monthly fees; a platform fee of 0.5% to 2% applies to in-person donations only, depending on your donation volume, in addition to Stripe’s processing rate.
Build your event form this week, run a test gift to your own inbox, and you’ll be ready well before December 1.
Sources and primary documentation: Tap To Donate for Give by Jovvie on WordPress.org, Jovvie for Give, Jovvie setup documentation, Give: customizing required donation form fields, Give: donation receipt email, Give: how to merge donors, Give: Donor Dashboard, Give: Donor Annual Receipt page, Give: Mailchimp add-on, Give: offline donations, Give: export donation history, IRS Publication 1771, How Tap to Donate Technology Works and What It Costs (Liquid Web).
