
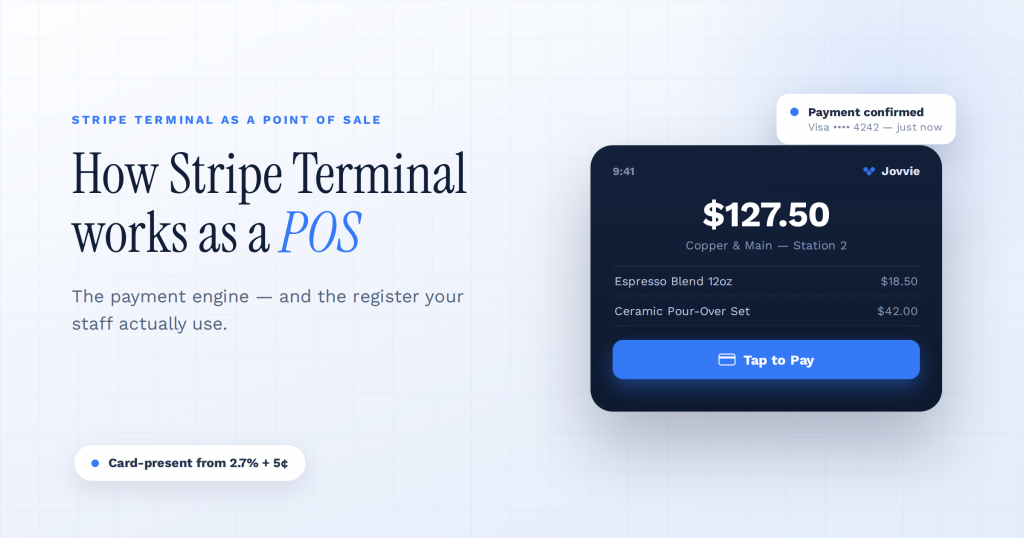
Stripe Terminal works as a point-of-sale system by acting as the card-present payment rail behind your checkout: a Stripe-certified reader captures the card, the Stripe Terminal SDK drives that reader from your application, and your backend creates and confirms the charge through the same Stripe account you already use online — but Terminal itself is not a complete POS, so you either build the surrounding software or use a pre-built POS like Jovvie that supplies it. Understanding that distinction is the whole game: Terminal is the payment engine, and a POS is everything wrapped around it.
Key Takeaways
- Stripe Terminal is the payment engine, not the POS. Readers plus the Terminal SDK capture the card; the register software that rings up the sale sits on top.
- The POS layer adds catalog, cart, tax, discounts, receipts, and order-writing. Terminal handles only card-present capture — everything a cashier touches is the POS.
- Three ways to get that layer: a Terminal-native POS like Jovvie (ideal for WooCommerce), a third-party POS that integrates Terminal, or a custom build on the SDK.
- Buy to sell in days; build only for a unique requirement. A custom register means owning the sync, tax and refund flows, and maintenance indefinitely.
- It scales across registers and locations through Stripe’s Locations API, with one POS and one Stripe account behind every counter.
- Card-present pricing is 2.7% + 5¢ in the US — lower than online — settling into the same Stripe account as your web sales.
We have built Stripe Terminal point-of-sale flows for eight years — for retail counters, restaurants, pop-ups, kiosks, and multi-location operations across more than 30 countries — and the most common misunderstanding we see is the assumption that “Stripe Terminal” and “a POS system” are the same purchase. They are not. This guide explains exactly how Terminal functions as the payment layer of a POS, what it gives you out of the box, what you still have to provide, and how to decide whether to build that layer yourself or run a pre-built POS on top of it.
This is the point-of-sale pillar in a wider Stripe Terminal library. If you are still choosing a reader, start with the complete 2026 Stripe Terminal hardware guide. If your store runs on WooCommerce, the Stripe Terminal for WooCommerce implementation guide is your fastest path. And if you are a platform reselling Terminal to merchants, read the Stripe Connect for platforms using Terminal guide.
What is Stripe Terminal as a point-of-sale system?
Stripe Terminal as a POS is the use of Stripe’s card readers and Terminal SDK to take in-person payments inside a checkout application — providing the payment-acceptance layer of a point-of-sale, while the catalog, cart, tax, receipts, and reporting come from the software you run on top of it.
A traditional all-in-one POS (think Square or Clover) bundles hardware, payment processing, and the checkout software into one product. Stripe Terminal unbundles that. Stripe gives you world-class card-present processing and certified hardware at a flat card-present rate of 2.7% + 5¢ in the US; you bring — or buy — the software that turns “accept a card” into “ring up a sale.” This is a feature, not a gap: it means your in-person payments live in the same Stripe account as your online payments, your customers are unified, your payouts are consolidated, and you are never locked into one vendor’s closed checkout. Stripe’s own Terminal documentation is the canonical reference for the platform.
For a WooCommerce store, this unbundling is especially powerful. Jovvie is a POS built natively for WooCommerce that uses Stripe Terminal as its payment rail, so your in-store sales, online orders, inventory, and customers all share one WooCommerce backend and one Stripe account. You get the polished checkout software of an all-in-one POS without surrendering ownership of your store. More on that below — first, the architecture.
Is Stripe Terminal a full POS system on its own?
No. Stripe Terminal is the payment-acceptance layer, not a complete POS — it does not include a product catalog, cart, tax engine, receipt designer, or reporting dashboard out of the box. You add those by building a checkout application against the Terminal SDK or by using a pre-built POS such as Jovvie that already includes them.
This is the single most important thing to understand before budgeting a Terminal project. If you expected to unbox a reader and start ringing up sales with a finished interface, you will either build that interface or adopt one. Recognizing this early saves weeks of misaligned expectations.
How is a Stripe Terminal POS architected?
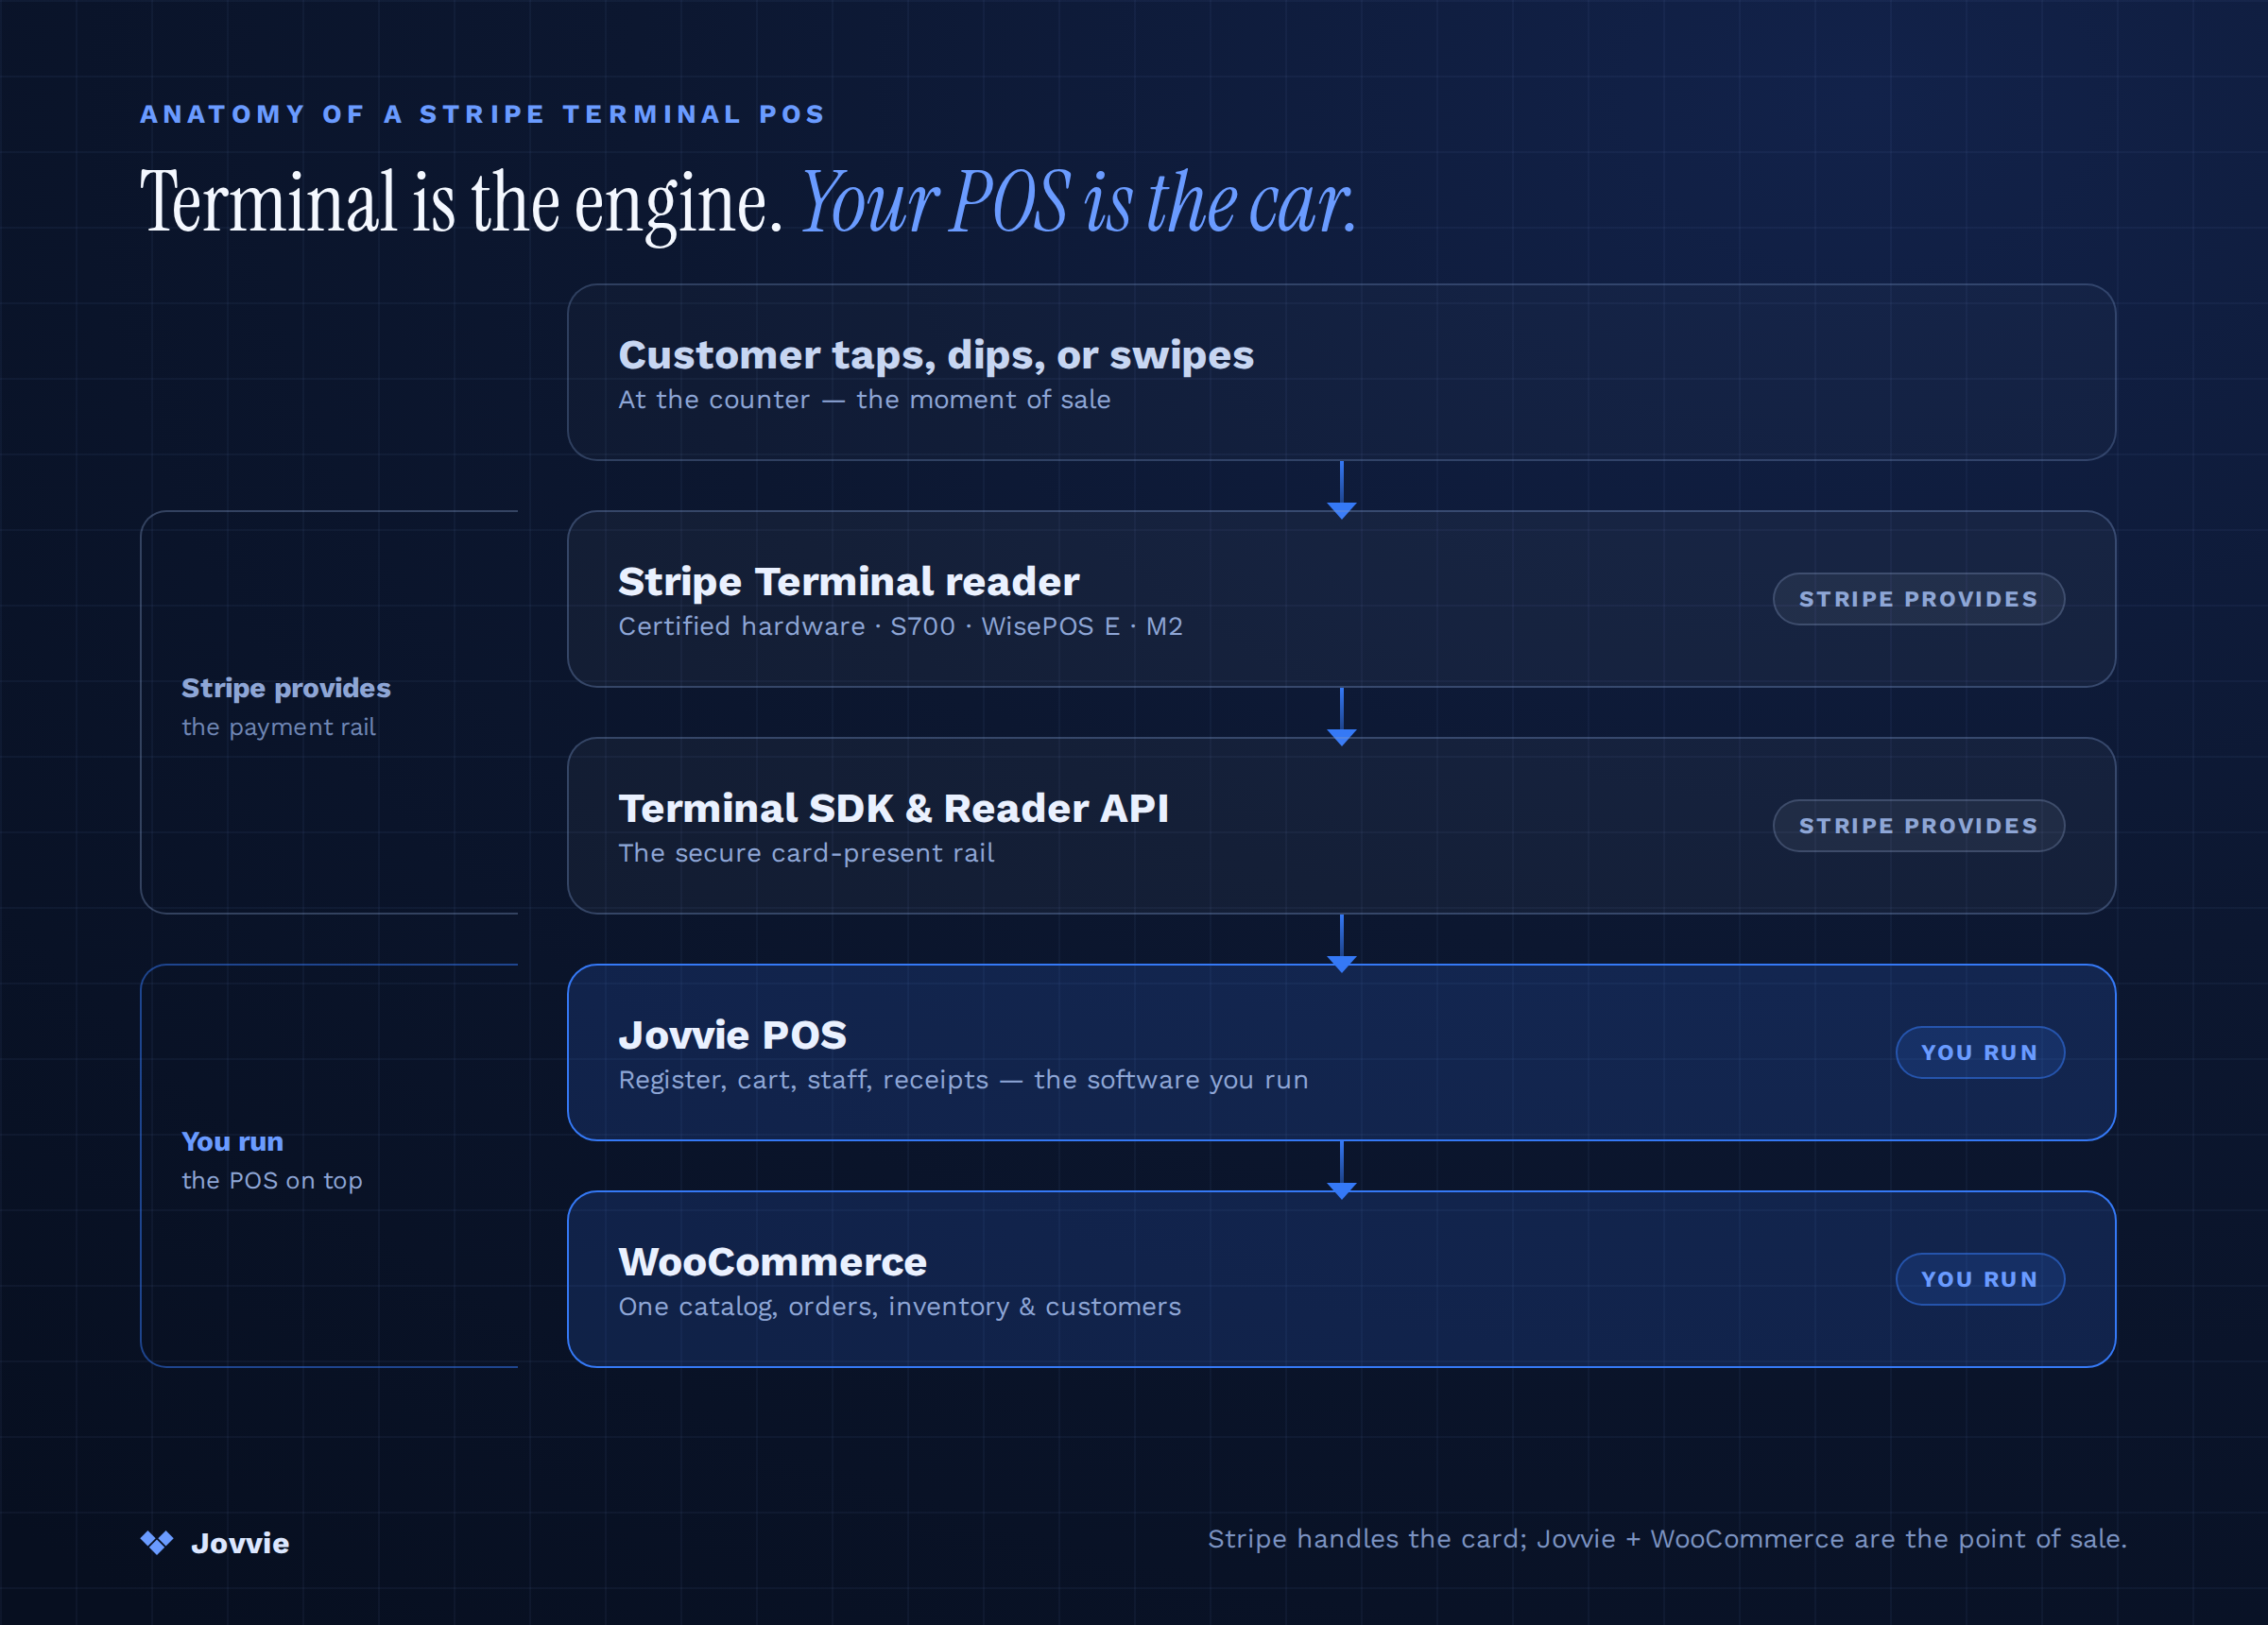
A Stripe Terminal POS has three layers: the reader (hardware), the Terminal SDK (running in your checkout app on a phone, tablet, or smart reader), and your backend (which talks to the Stripe API). Payments flow through all three, and understanding the handoffs is what makes the system make sense.
Here is the architecture, layer by layer:
The reader is the certified hardware — a Stripe Reader S700, BBPOS WisePad 3, Stripe Reader M2, or Tap to Pay on a phone. It physically reads the card and encrypts the data. It never talks to your servers directly and never exposes raw card numbers to your application; that is what keeps your PCI scope minimal.
The Stripe Terminal SDK runs inside your checkout application. Stripe provides SDKs for iOS, Android, React Native, and JavaScript, plus an API-based integration, per the Terminal integration documentation. The SDK is responsible for discovering and connecting to the reader, sending it the amount to collect, and shuttling the result back. It is the bridge between the physical reader and your software.
Your backend is where the actual money objects live. Your server creates a PaymentIntent (Stripe’s object representing one payment), and it mints the ConnectionToken that authorizes the SDK to use a reader on your Stripe account. Sensitive operations stay server-side; the client only ever handles short-lived secrets.
The data flow ties these together cleanly. When a sale starts, your backend creates a PaymentIntent and returns its clientSecret to the SDK. The SDK already holds a ConnectionToken secret (fetched from your backend) that gives it permission to drive the reader. The SDK tells the reader to collect the card, the customer taps or inserts, the SDK processes the PaymentIntent, and your backend confirms and captures it. Stripe’s collect-card-payments guide documents each call. We unpack the trade-offs of running this on a phone-tethered SDK versus a smart reader in building a POS on the Terminal SDK and Terminal SDK vs a pre-built POS.
What is a connection token in Stripe Terminal?
A connection token is a short-lived credential your backend generates and hands to the Terminal SDK, granting the SDK permission to connect to and operate a reader on your Stripe account. The SDK requests a fresh token through a handler you implement (often called fetchConnectionToken), so the reader is always authorized without your client ever holding long-lived API keys.
This design is a security cornerstone: your secret Stripe keys stay on your server, the client gets only disposable tokens, and a compromised device can’t drain your account. It’s a small piece of plumbing with outsized importance, and any pre-built POS handles it for you.
What does the cashier’s flow look like end to end?
From the cashier’s side, a Stripe Terminal sale is four steps — build the order, send the amount to the reader, the customer pays, the sale completes — and everything in the architecture above happens invisibly underneath. A good POS makes the technical handshakes disappear.
Walking through a single transaction as the person at the counter experiences it:
- Build the order. The cashier adds items to the cart in the POS interface — scanning, tapping products, or selecting them from a menu. The software calculates the subtotal, applies tax, and may add tips or discounts. (Terminal does none of this; the POS software does. This is the part you build or buy.)
- Send the total to the reader. The cashier taps “Charge.” Behind the scenes, the backend creates a PaymentIntent for the order total and the SDK pushes that amount to the connected reader. The reader’s screen — or the cashier’s app — shows the customer what they owe.
- The customer pays. The customer taps a contactless card or phone, inserts a chip card, or swipes. On readers with a PIN pad (S700, WisePad 3), they enter a PIN if required. The reader encrypts the card data and the SDK processes the PaymentIntent.
- The sale completes. Stripe authorizes and captures the payment, the POS marks the order paid, decrements inventory, and offers a receipt — printed, emailed, or texted. The transaction appears in the Stripe dashboard immediately, reconciled against the same payouts as online sales.
The entire sequence takes a few seconds and feels, to the cashier and customer, exactly like any modern card terminal. The difference is what happens to the data afterward: because it all flows through your Stripe account and your POS software, you get unified reporting, customer records, and inventory in one place rather than siloed in a closed terminal. For the specific mechanics of tips, refunds, and receipts, see tipping configuration on Stripe Terminal, refunds via Stripe Terminal, and Stripe Terminal receipt printing.
What does Stripe Terminal include, and what do you have to build?
Stripe Terminal includes the payment-critical layer — certified readers, the SDK, card processing, encryption, PCI scope reduction, and reader/location management — but you must supply everything above the payment: the catalog, cart, tax logic, tipping UI, receipts, reporting, and offline handling. This table is the clearest answer to “what am I actually getting?”
| Stripe Terminal provides (out of the box) | You build or buy (the POS layer) |
|---|---|
| Certified card readers (S700, WisePad 3, M2, Tap to Pay) | Product catalog and inventory |
| Terminal SDK (iOS, Android, React Native, JS) | Cart and order-building interface |
| Card-present processing at 2.7% + 5¢ | Tax calculation and tax classes |
| End-to-end card encryption (minimal PCI scope) | Tipping prompts and discount logic |
| PaymentIntent and ConnectionToken APIs | Receipt generation and printing |
| Locations and reader management APIs | Sales reporting and analytics |
| Connect support for platforms | Customer records and loyalty |
| Refund and capture primitives | Offline-mode workflow and cash handling |
Read that right column carefully, because it is the real scope of a POS project. Each item is a feature your customers and staff will expect, and none of them ship with Terminal. This is exactly why most businesses do not build a POS from the SDK — they adopt a pre-built one and spend their time running the business instead of maintaining checkout software. We cover the trickier items in dedicated guides: cash management with Stripe Terminal POS, inventory sync patterns, tax handling on Terminal, and the realities of Stripe Terminal offline mode.
Does Stripe Terminal handle tax, tips, and receipts automatically?
No — Stripe Terminal processes the payment but does not calculate tax, design tipping prompts, or generate receipts on its own. Those belong to the POS software layer. Terminal can display a tip prompt on capable readers and capture a tipped amount, but the logic for what to prompt, how tax is computed, and what a receipt contains is something you build into your application or get from a pre-built POS.
What are the pre-built POS options for Stripe Terminal?
The main ways to get a finished POS on top of Stripe Terminal are to use a Stripe-Terminal-native POS like Jovvie (especially for WooCommerce), adopt a third-party POS that integrates Terminal, or build your own on the SDK — with the right choice depending on your existing stack and how much you want to maintain. For most merchants, a pre-built POS is the faster, cheaper, and more reliable path.
The realistic options:
- Jovvie is a point-of-sale system built natively for WooCommerce that uses Stripe Terminal as its card-present rail. If your store already runs on WooCommerce, this is the shortest path to a real POS: your products, inventory, customers, and orders already live in WooCommerce, and Jovvie adds the in-store checkout, register interface, tipping, receipts, and reporting — all reconciled through your existing Stripe account. You skip the entire right-hand column of the table above. We detail the WooCommerce path in the WooCommerce POS with Stripe Terminal walkthrough and the broader Stripe Terminal for WooCommerce guide.
- Other pre-built POS products integrate Stripe Terminal to varying degrees. If you are not on WooCommerce, it is worth checking whether your existing platform — or an ERP or SaaS you already run — has a Terminal integration. We cover those paths in our ERP integrations guide and embedding Terminal in SaaS platforms.
- Building your own on the Terminal SDK is the right call only when your requirements are genuinely unusual — a bespoke kiosk, an embedded payment flow inside custom software, a vertical workflow no product supports. It gives you total control and total maintenance responsibility. We are honest about this trade-off in Terminal SDK vs a pre-built POS and the build vs buy decision, because having implemented both approaches, we have watched teams underestimate the build path more than once.
A note on honesty, because it matters for trust: Stripe Terminal is not always the right answer. If you want a fully closed, zero-integration, hardware-and-software-in-one-box experience and you don’t care about owning your data, an all-in-one like Square may suit you better. Where Terminal wins — and where Jovvie shines — is when you want in-person and online to be one unified system you control. We compare the alternatives directly in Stripe Terminal vs Square Terminal, vs Clover, vs Shopify POS, and vs Toast.
Should you build a Stripe Terminal POS or buy one?
Buy a pre-built POS if your needs are standard retail, restaurant, or WooCommerce commerce; build on the SDK only if you have unusual requirements, in-house engineering capacity to maintain it, and a reason no existing product can satisfy. For the large majority of businesses, buying is faster, cheaper over time, and more reliable.
The decision comes down to four honest questions.
| Question | Lean “buy” if… | Lean “build” if… |
|---|---|---|
| How standard is your checkout? | Normal cart, tax, tips, receipts | Bespoke kiosk or embedded flow |
| Do you run WooCommerce or a supported platform? | Yes — a native POS exists | No — and no product fits |
| Do you have engineers to maintain a POS long-term? | No, or you’d rather not | Yes, with capacity to spare |
| How fast do you need to launch? | Weeks | You can absorb months |
The build path’s hidden cost is not the initial development — it is the years of maintenance afterward: SDK updates, OS changes, new reader support, tax-rule changes, edge cases discovered at the counter, and PCI considerations. A pre-built POS amortizes all of that across its entire customer base. When we counsel clients, the question is rarely “can we build it” (we can — we’ve shipped it) but “should you own that maintenance forever.” Usually the answer is no.
For WooCommerce merchants specifically, the calculus is nearly always “buy,” because Jovvie already is the POS layer purpose-built for your stack. You get the control and data ownership of the unbundled Stripe approach with the finished experience of an all-in-one — without writing or maintaining a line of payment code.
Is it cheaper to build a POS on Stripe Terminal or buy one?
For almost all businesses, buying is cheaper once you account for maintenance — building a POS on the Terminal SDK has a meaningful upfront engineering cost plus ongoing upkeep for SDK updates, new readers, tax changes, and edge cases, while a pre-built POS spreads those costs across all its users. Building only pencils out when no product fits your workflow and you already have engineers who would otherwise be idle.
Rather buy than build a Stripe Terminal POS?
Jovvie runs Stripe Terminal as a ready-made point of sale for WooCommerce — no SDK work, no custom app to maintain.
Start your free trial →How do you set up a Stripe Terminal POS? (step by step)
Setting up a Stripe Terminal POS takes five steps: have a Stripe account, choose and order a reader, choose your POS software, register and pair the reader, then run a test transaction. With a pre-built POS the technical steps collapse into configuration; building from the SDK adds development to steps three and four.
- Start with a Stripe account. Your in-person sales will share it with your online sales, so use your existing account rather than creating a new one. This is what unifies reporting and payouts across channels.
- Choose and order a reader. Match the device to where you sell — an S700 for a counter, a WisePad 3 or M2 for mobile, or Tap to Pay for hardware-free. The hardware guide covers the decision.
- Choose your POS software. For WooCommerce, install Jovvie and connect it to your store and Stripe account. If you are building, this is where you implement the Terminal SDK, the
ConnectionTokenendpoint, and your checkout interface. - Register and pair the reader. Assign the reader to a Location and connect it — over Wi-Fi for smart readers, over Bluetooth for mobile readers. A pre-built POS guides this; the connect-a-reader documentation covers the manual path.
- Run a test transaction. Ring up a small sale, confirm it appears in your Stripe dashboard and your POS reporting, test a refund and a receipt, and you are live.
For WooCommerce stores, this is genuinely a same-day setup with Jovvie — your catalog and customers already exist, so you are configuring a register, not building one. The WooCommerce POS walkthrough shows it end to end.
How is a Stripe Terminal POS different from an all-in-one POS like Square?
The core difference is ownership: an all-in-one POS like Square bundles hardware, processing, and software into one closed system you rent, while a Stripe Terminal POS unbundles processing and hardware from software you choose and own — keeping your in-person and online sales in one Stripe account and one platform. For a growing WooCommerce business, that ownership is the deciding factor.
Both models take a card and ring up a sale. What differs is everything around the transaction. With an all-in-one, your customer list, sales data, and inventory live inside the vendor’s ecosystem; leaving means migrating off their rails. With Stripe Terminal — especially through a WooCommerce-native POS like Jovvie — your data lives in your WooCommerce store and your Stripe account. Your online and in-store customers are the same records. Your payouts are consolidated. Your reporting spans both channels natively rather than requiring an export-and-merge dance.
| Factor | All-in-one POS (e.g. Square) | Stripe Terminal POS (e.g. Jovvie) |
|---|---|---|
| Hardware | Proprietary, locked to vendor | Stripe-certified readers, multiple choices |
| Processing | Vendor’s rate, their account | Stripe card-present rate, your account |
| Software | Closed, vendor-controlled | Open — build or use Jovvie/another POS |
| Data ownership | In the vendor’s ecosystem | In your WooCommerce + Stripe account |
| Online + in-person | Often separate or siloed | One unified system |
| Switching cost | High (full migration) | Low (you own the stack) |
The trade-off is honest in both directions. An all-in-one is genuinely simpler to start with if you want zero integration and don’t care about owning your data — and we’ll say so plainly. A Stripe Terminal POS rewards businesses that want one system of record across channels and the freedom to change software without changing processors. For a WooCommerce store already invested in its catalog, customers, and online orders, the Terminal-plus-Jovvie path almost always wins because it extends what you already own rather than replacing it. We go head-to-head in Stripe Terminal vs Square Terminal and Stripe Terminal vs Clover.
How do you deploy a Stripe Terminal POS across registers and locations?
You deploy a multi-register, multi-location Stripe Terminal POS by organizing readers under Stripe’s Locations API, assigning readers to each site, and running your POS software on a device at each register — with a pre-built POS handling the location logic so you don’t have to. This is where Terminal’s unbundled design pays off operationally.
In a single Stripe account you can register dozens of readers, group them by Location (a store, a branch, a food truck), and route each transaction to the correct location for reporting and reconciliation. A new register is a new reader paired to a location; a new store is a new location with its own readers. Because it all reports into one account, a regional manager sees consolidated numbers and a store manager sees their own — without separate logins or merged spreadsheets. Stripe documents the building blocks in its Terminal documentation, and we walk through the practical setup in multi-location POS with the Stripe Terminal Locations API and how to pair multiple readers to one location.
Two operational realities are worth planning for. First, connectivity model matters at scale: smart readers like the S700 ride your store Wi-Fi, while mobile readers ride a paired phone’s connection — a multi-location rollout should standardize this per environment so support stays simple. Second, offline behavior is limited: Stripe Terminal has constraints on offline payments, so any location with unreliable internet needs a deliberate plan rather than an assumption that sales will queue. We cover the specifics in Stripe Terminal offline mode: limits and workarounds and the day-to-day money handling in cash management with Stripe Terminal POS.
A pre-built POS like Jovvie abstracts most of this. You add a register, assign it to a location, and the software manages the reader connection, location routing, and reporting — so scaling from one counter to ten is an operational task, not an engineering project.
Frequently asked questions about Stripe Terminal as a POS
How does Stripe Terminal work as a POS?
Stripe Terminal works as a POS by serving as the card-present payment layer: a certified reader captures the card, the Terminal SDK drives the reader from your checkout app, and your backend creates and confirms the charge through Stripe. The catalog, cart, tax, tips, receipts, and reporting come from POS software you build or buy on top of Terminal — Terminal handles the payment, the POS software handles the sale.
Can I use Stripe Terminal as a complete point-of-sale system?
Only when paired with POS software. Stripe Terminal provides the readers, SDK, and processing, but not the catalog, cart, tax engine, or reporting. To use it as a complete POS you either build that software on the Terminal SDK or use a pre-built POS like Jovvie that already includes it. For WooCommerce stores, Jovvie supplies the full POS layer on top of Terminal.
What hardware do I need for a Stripe Terminal POS?
You need a Stripe-certified reader — the Stripe Reader S700 for a countertop or handheld smart terminal, the BBPOS WisePad 3 or Stripe Reader M2 for mobile use, or Tap to Pay on a supported iPhone or Android for hardware-free acceptance. Each works as the payment device for a Terminal POS; see the complete hardware guide for which to choose.
How much does a Stripe Terminal POS cost to run?
The processing cost is the card-present rate, currently 2.7% + 5¢ per transaction in the US, plus a one-time reader purchase ($59 to $349 depending on the model). POS software costs depend on whether you build (engineering time) or buy (a product subscription). There are no separate Terminal processing fees beyond the card-present rate.
Does Stripe Terminal work with WooCommerce?
Yes. Stripe Terminal integrates with WooCommerce through a POS like Jovvie, which is built natively for WooCommerce and uses Terminal as its payment rail — so in-store and online sales, inventory, and customers all share one WooCommerce backend and one Stripe account. See the Stripe Terminal for WooCommerce guide for setup.
Is Stripe Terminal PCI compliant?
Yes. Stripe Terminal readers encrypt card data end to end and never expose raw card numbers to your application, which keeps your PCI scope minimal. Combined with server-side connection tokens and PaymentIntents, the architecture is designed so your systems never handle sensitive card data directly. Platforms reselling Terminal should also review the Connect platform documentation.
Can Stripe Terminal handle multiple locations and registers?
Yes. Stripe Terminal uses a Locations API to organize readers, so you can run multiple registers at multiple sites under one Stripe account with consolidated reporting. A pre-built POS like Jovvie manages this for you; if you build your own, you handle it through the Locations and reader-management APIs. See multi-location POS with the Stripe Terminal Locations API.
The bottom line: Terminal is the engine, your POS is the car
Stripe Terminal is an excellent card-present payment engine — fast, secure, low-cost, and unified with your online Stripe account. But an engine is not a car. The point-of-sale experience your staff and customers actually touch is the software wrapped around Terminal: the catalog, the register, the tax and tips, the receipts, the reporting. Terminal gives you the engine; you decide whether to build the car or drive one that’s already built.
For WooCommerce merchants, that decision is easy. Jovvie is the POS built natively for WooCommerce and powered by Stripe Terminal — eight years of card-present deployments behind it, official Stripe Partner credentials, and a real Connect platform at payments.bizswoop.app. You get in-person and online as one system you own, without writing or maintaining payment code.
Try Jovvie free to see a Stripe Terminal POS running on your own WooCommerce store, or book a POS consultation and we’ll map the fastest path from your current setup to a working in-store checkout — and tell you honestly if building is the better call for your situation.
Sources and primary documentation: Stripe Terminal documentation, set up your Terminal integration, collect card payments, use Terminal with Connect, Stripe pricing.
Run Stripe Terminal on WooCommerce with Jovvie
Jovvie is the WooCommerce-native point of sale built on Stripe Terminal — take in-person payments, sync every sale to your store, and keep one system of record. Start free, no credit card required.
