
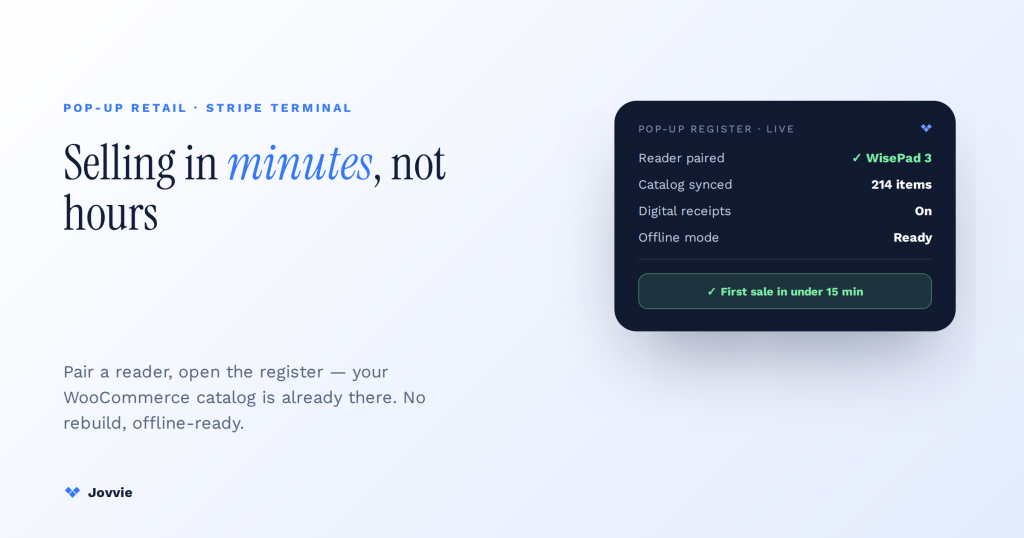
The best Stripe Terminal setup for a pop-up shop isn’t about the card reader — it’s about getting your catalog onto the register fast. Pick a reader for your venue (a ~$59 Bluetooth WisePad 3 or M2 for a quick till, or the cellular Stripe Reader S710 for a spot with no reliable WiFi), pair it in minutes, and — if your store already runs on WooCommerce — sync your existing products and prices to a Jovvie POS register instead of rebuilding your catalog by hand. That last step is the real pop-up bottleneck, and it’s the one the “Stripe is too technical, use SumUp” comparisons quietly ignore. A store already on WooCommerce + Jovvie can stand up a working pop-up register — reader paired, catalog live, digital receipts on — without writing a line of code or re-keying a single SKU. This guide is the quick-deploy kit, step by step.
Key Takeaways
- The bottleneck is the catalog, not the reader. Pairing a Stripe reader takes minutes; getting every product, price, and variant onto the register is the real work.
- A WooCommerce store skips the rebuild. A Jovvie POS register reads your existing catalog and inventory directly — no export, no re-keying, one source of truth.
- Pick the reader for the venue. A ~$59 Bluetooth WisePad 3 or M2 for a light till, or the cellular S710 (~$299) where venue WiFi can’t be trusted.
- Bluetooth readers keep selling offline. The M2 and WisePad 3 store-and-forward during an outage; Tap to Pay needs a live connection and can’t queue offline.
- Receipts are digital. No printer — Jovvie emails or texts a branded receipt the moment the sale clears, and after forwarding for offline sales.
- Live in under fifteen minutes. Enable Terminal, create a location, pair the reader, open the register (catalog already loaded), test a sale, turn on receipts.
We build WooCommerce-native POS on Stripe Terminal for a living. Jovvie has eight years of WooCommerce POS behind it, official Stripe Partner status, and our own Stripe Connect platform at payments.bizswoop.app. So when the 2026 review sites tell you Stripe Terminal is “for API-comfortable teams” and a pop-up operator should reach for something simpler, we can tell you from experience that the framing is half true — Stripe’s raw SDK is developer-facing — and that the fix is a pre-built POS layer that removes the code entirely. This is a cluster piece under the Stripe Terminal industry use-case pillar, and it’s the retail sibling to our festival and event vendor guide, which solves the same connectivity-and-receipts problem for an outdoor stall.
What’s the best Stripe Terminal setup for a pop-up shop?
The best setup is a quick-deploy kit: a venue-appropriate reader paired to a WooCommerce-native POS that already holds your catalog, with digital receipts turned on — so you’re selling within minutes of arriving, not rebuilding your product list.
Here’s the reasoning most guides miss. A pop-up’s friction was never the card reader; pairing a Stripe reader takes a few minutes. The friction is the catalog — getting every product, price, variant, and tax rule onto the register so you can actually ring a sale. The review-site listicles benchmark pop-up systems on “how fast does the reader connect,” which is the easy 5%, and skip “how fast can I sell my actual products,” which is the hard 95%. If your store already lives on WooCommerce, a Jovvie POS register reads that same catalog directly — no export, no re-keying, no separate product database to maintain. Pair the reader, open the register, and your inventory is already there.
So the “best setup” question really has two answers stacked together: the right reader for your venue, and the right POS layer to skip the catalog rebuild. The reader is a quick hardware pick. The catalog is where a WooCommerce store wins, and it’s the part the “just use SumUp” advice can’t offer.
The quick-deploy pop-up kit: hardware in minutes
The fastest pop-up hardware is a Bluetooth WisePad 3 or M2 (~$59) paired to a phone or tablet for a light till, or the cellular Stripe Reader S710 (~$299) when the venue’s WiFi can’t be trusted. Here’s how the readers compare for a temporary shop.
| Reader | Cost | Best for a pop-up when… | Connectivity | Offline capable |
|---|---|---|---|---|
| Tap to Pay (phone) | $0 hardware | You have a supported phone and reliable WiFi/cellular | Needs live internet | ❌ No |
| Stripe Reader M2 | ~$59 | You want a cheap handheld till paired to a tablet | Bluetooth to host device | ✅ Yes (store-and-forward) |
| BBPOS WisePad 3 | ~$59 | Same as M2; mobile, pocketable | Bluetooth to host device | ✅ Yes (store-and-forward) |
| Stripe Reader S710 | ~$299 | The venue has weak or no WiFi (markets, basements) | Built-in cellular | Online via own cellular |
(Hardware pricing per Stripe Terminal devices; confirm live figures on Stripe’s pages, since regional pricing varies. For the full picture on picking a reader and integration path, Stripe’s own choosing a reader guide is the primary source.)
For most pop-ups, a Bluetooth WisePad 3 or M2 at ~$59 is the sweet spot: cheap, pocket-sized, and — importantly — it can keep selling if the venue’s connection drops (more on that below). Choose the cellular S710 when you’re setting up somewhere WiFi is unreliable and you don’t want to depend on it. Reserve Tap to Pay for the case where you have a supported phone, reliable signal, and want a zero-hardware till, keeping in mind it needs a live internet connection and can’t store transactions offline (Stripe Tap to Pay docs).
Getting your catalog onto the register without rebuilding it (WooCommerce + Jovvie)
The real pop-up win is skipping the catalog rebuild: a Jovvie POS register reads your existing WooCommerce products, prices, variants, and tax rules directly, so there’s nothing to re-enter. This is what turns Stripe Terminal from “a developer tool” into a genuinely quick pop-up setup.
Think about what a pop-up normally demands if you use a standalone reader app: you re-create every product and price in a second system, keep it in sync with your online store by hand, and reconcile two sets of sales afterward. That’s hours of setup and a running maintenance tax — and it’s exactly the work the “Stripe is too technical” comparisons assume you’ll have to do. With Jovvie, the WooCommerce store is the catalog. Your pop-up register shows the same items your website sells, priced the same way, with the same variants and modifiers, because it’s reading one source of truth. Sell a unit at the pop-up and inventory decrements in the same store that fulfills your online orders.
That single-catalog model is the honest rebuttal to the SumUp-vs-Stripe framing. SumUp and Square are genuinely fast to pair a reader — but if your business already runs on WooCommerce, they hand you a second catalog to build and maintain, which is slower overall than a system that already knows your products. Jovvie removes the code Stripe’s raw SDK would require and removes the catalog rebuild a standalone app would require. If you’re weighing the plug-and-play players directly, our Stripe Terminal vs Square Terminal comparison lays out where each one actually wins.
What’s the fastest Stripe Terminal setup for a pop-up shop? (Step-by-step)
You can go from unboxing to first sale in under fifteen minutes if your store is already on WooCommerce. Here’s the quick-deploy procedure.
- Confirm your Stripe account and location. In the Stripe Dashboard, make sure Terminal is enabled and create a Terminal Location for the pop-up. Readers register to a location — this is a one-minute step that Stripe requires.
- Pick and pair the reader. For a Bluetooth WisePad 3 or M2, pair it to your phone or tablet running the Jovvie POS; for the S710, power it on and let it connect over its own cellular. Pairing is a few taps (Stripe: select your reader).
- Open the Jovvie POS register. Log in on the device; your WooCommerce catalog — products, prices, variants, tax — is already loaded. No import, no re-keying.
- Do a $1 test sale and refund it. Verify the tap, the charge in your Stripe Dashboard, and the receipt flow before customers arrive. Always test on-site, because venue connectivity varies.
- Turn on digital receipts. Set the register to email or text a receipt so you don’t need a printer (covered next).
- Sell. You’re live. Inventory, reporting, and reconciliation all flow back to the one WooCommerce store you already run.
That’s the whole setup. The steps that would normally eat an afternoon — building the catalog, reconciling two systems — simply aren’t there when the register reads your existing store.
Standing up a pop-up on an existing WooCommerce store?
Jovvie’s POS register reads your live catalog and inventory directly, so you pair a reader and sell in minutes — no second catalog to build or reconcile.
Start your free trial →Does Stripe Terminal work offline for a pop-up?
Yes, if you use a Bluetooth reader: the Stripe Reader M2 and BBPOS WisePad 3 support offline store-and-forward, capturing the sale on the device and authorizing it when connectivity returns. Tap to Pay does not work offline.
Pop-ups land in basements, back rooms, and market halls where WiFi is patchy and cell signal comes and goes. Stripe Terminal’s offline mode means a Bluetooth reader keeps taking cards during an outage — it stores the encrypted payment locally at the point of sale and forwards it to Stripe automatically once you’re back online (Stripe: operate offline). Tap to Pay, by contrast, needs a live connection and has no offline queue, so a phone-only till in a dead spot stops selling.
Be aware of the trade-off, because platform-neutral honesty matters more than a clean pitch: offline payments authorize after the fact, so a card can decline on forwarding, and Stripe limits offline transaction amounts and how long a payment can stay queued. For typical pop-up ticket sizes that risk is small and the resilience is worth it; for high-value items, reconnect often and treat offline as a stopgap. Configure offline mode before the event, not during the rush.
Sending digital receipts at a pop-up
A pop-up almost never has a printer, so your receipt is digital — an emailed or texted confirmation fired the moment the sale clears, which Jovvie handles from the same register that took the payment.
Stripe Terminal can email a card-present receipt, covering the basics. Running receipts through your Jovvie POS keeps them branded and consistent with your online store, and pairs naturally with a post-sale confirmation or follow-up — the customer-experience layer that makes a temporary shop feel like a permanent one. No paper roll, no printer to pack, no line held up. For offline sales the receipt fires when the queued payment forwards and clears, so the customer still gets their confirmation shortly after. It’s the same digital-receipt discipline we cover for event stalls on FlowNotify.
Frequently asked questions
What POS system is best for a pop-up shop?
For a business already on WooCommerce, a WooCommerce-native POS like Jovvie is best, because it reads your existing catalog and inventory directly — no rebuild — and runs on Stripe Terminal hardware. Standalone reader apps (SumUp, Square) pair quickly but make you build and maintain a second catalog, which is slower overall for an existing online store.
Can I use Stripe Terminal for a temporary store?
Yes. Stripe Terminal is well suited to temporary and mobile retail: register a Terminal Location for the pop-up, pair a reader, and take card-present payments. Pairing it with a POS layer (like Jovvie) gives you the catalog, inventory, and receipts a temporary store needs without custom code.
How fast can you set up Stripe Terminal?
If your store is already on WooCommerce, under fifteen minutes: enable Terminal, create a location, pair the reader, open the Jovvie register (your catalog is already loaded), run a test sale, and turn on digital receipts. The reader pairs in a few taps; the catalog — normally the slow part — is already there.
Does Stripe Terminal work offline for pop-ups?
A Bluetooth reader (M2 or WisePad 3) does, via offline store-and-forward (Stripe docs). It captures the sale on the device during an outage and forwards it when connectivity returns, within Stripe’s offline limits. Tap to Pay requires a live internet connection and cannot store payments offline.
What hardware do I need for a pop-up shop card reader?
At minimum, one Stripe Terminal reader and a device to run your POS. A ~$59 Bluetooth WisePad 3 or M2 paired to a phone or tablet suits most pop-ups; choose the cellular S710 (~$299) if the venue’s WiFi is unreliable. Add a power bank and, ideally, a second reader as a backup.
Set up your pop-up register in minutes
Jovvie sets up quick-deploy Stripe Terminal pop-up registers on your existing WooCommerce store — reader mix, catalog sync, and digital receipts, no rebuild. Start free, or book a pop-up consult and we’ll get you selling in minutes on your next event.
