
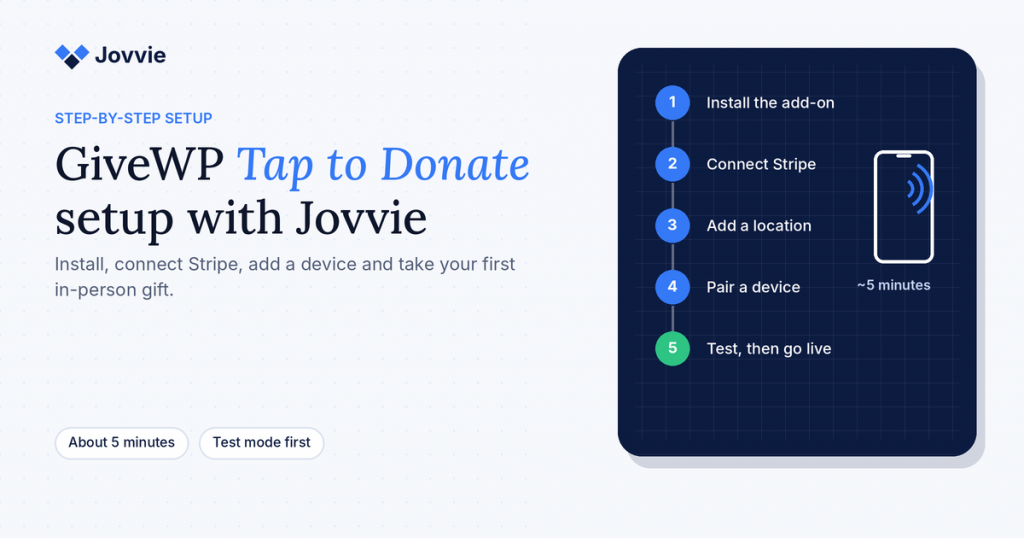
You set up Tap to Donate for GiveWP in about five minutes by installing the free Tap To Donate for Give by Jovvie plugin, connecting it to your Stripe account through a free Jovvie account, adding a location, registering a card reader or Tap to Pay phone, and enabling the Jovvie gateway on your Give (formerly GiveWP) forms. After a few test donations in Test Mode, you switch to Live Mode and start taking card, Apple Pay and Google Pay gifts in person, recorded in Give next to your online donations.
This guide walks through every screen, in order, with the exact menu names. It covers both kinds of setup: Wi-Fi countertop readers (Stripe Reader S700 and BBPOS WisePOS E), which you register from WordPress, and Tap to Pay or Bluetooth readers (Stripe Reader M2 and BBPOS WisePad 3), which you set up in the free Jovvie app on iOS or Android. If you want the bigger picture first — which device to choose, costs and where in-person giving fits — start with our complete guide to accepting in-person donations with GiveWP.
Planning for GivingTuesday on December 1, 2026? Do the setup and a test donation this week. That leaves time to order a reader if you want one, and to brief volunteers without any last-minute surprises.
Key Takeaways
- The whole setup takes about five minutes. Install the plugin, connect Stripe through a free Jovvie account, add a location, register a device and enable the gateway.
- There are two registration paths. S700 and WisePOS E readers register with a one-time code from WordPress; Tap to Pay, M2 and WisePad 3 are set up in the free Jovvie app.
- You don’t need a reader to start. A supported iPhone (XS or later) or Android phone (Android 13 or later with NFC) works as the reader through Tap to Pay.
- Test Mode lets you rehearse safely. Register in Test Mode and use Stripe test cards; test donations don’t move real money.
- Your online donations don’t change. Jovvie adds an in-person payment option next to your existing Give gateways.
- Every in-person gift lands in Give. In-person and online donations appear together in Give and Stripe with the donor record intact.
What do you need before you start?
You need a WordPress site running Give, a Stripe account (new or existing), and a device to take donations: either a supported phone for Tap to Pay or a Stripe Terminal reader. Have your Stripe login handy.
The full checklist, from the official WordPress.org listing and the Jovvie setup documentation:
| Requirement | Detail |
|---|---|
| WordPress | 4.4 or newer |
| PHP | 8.0 or newer |
| Give | Installed and active, with at least one donation form |
| Plugin | Tap To Donate for Give by Jovvie (free) |
| Jovvie account | Free; created during setup |
| Stripe account | New or existing; in-person donations deposit to it |
| Device | Supported iPhone or Android phone for Tap to Pay, or a Stripe Reader M2, BBPOS WisePad 3, Stripe Reader S700 or BBPOS WisePOS E |
| Internet | Wi-Fi or mobile data on the device taking donations (there’s no offline mode) |
Which phones work for Tap to Pay?
Per Stripe’s Tap to Pay requirements, you need an iPhone XS or later on a current, non-beta iOS version, or an Android phone with working NFC running Android 13 or later, with a security update from the last 12 months, Google Mobile Services and the Play Store, and an unmodified operating system. If a volunteer’s phone doesn’t qualify, pair it with a Bluetooth reader instead.
Step 1: How do you install Tap To Donate for Give?
Install it like any WordPress plugin: from your WordPress admin, go to Plugins › Add New Plugin, search for “Tap To Donate for Give by Jovvie”, then install and activate it.
- In WordPress admin, open Plugins › Add New Plugin.
- Search for Tap To Donate for Give by Jovvie (or download it from the WordPress.org listing and use Upload Plugin to add the .zip).
- Select Install Now, then Activate.
Give must already be active. Activating the plugin adds a new payment gateway called Jovvie Payments to Give; nothing changes on your live forms until you enable it.
Step 2: How do you connect Jovvie Payments to Give?
Open Give’s gateway settings and start the Jovvie connection: go to Give › Settings › Payment Gateways, select Jovvie Payments, and choose Connect with Jovvie Payments.
- Go to Give › Settings › Payment Gateways.
- Find Jovvie Payments and select it.
- Select Connect with Jovvie Payments. A connection window opens.
If the window doesn’t appear, check that your browser isn’t blocking pop-ups for your WordPress admin.
Step 3: How do you create a Jovvie account and link Stripe?
In the connection window, create a free Jovvie account, choose the Stripe account you want donations to go to, and connect your site. Your API keys are filled in automatically.
- Select Get Started and enter your name, email and a password to create your Jovvie account.
- Sign in to Stripe if prompted, and confirm the Stripe account to connect by selecting Connect. If you don’t have a Stripe account yet, you can create one in this step.
- Select Connect My Site to securely link your WordPress site to Jovvie. The API credentials populate in Give for you.
Use the same Stripe account you use for online Give donations if you want all gifts to reach the same balance and bank account. Most organizations do.
Step 4: How do you add a location?
Create a location for the place where you’ll take donations, then choose Test Mode or Live Mode for it. Stripe Terminal groups readers by location, so each venue, campus or event can have its own.
- Open Location Management › Create Location.
- Enter the location’s name and address, then select Save Changes.
- Under the new location, choose Test Mode to rehearse (recommended for your first setup) or Live Mode to take real donations.
You can add more locations later, for example one for your main office and one for an annual gala venue. Stripe’s documentation on locations and zones explains how locations organize readers.
Step 5a: How do you register an S700 or WisePOS E reader?
Wi-Fi countertop readers register from WordPress with a one-time code shown on the reader.
- Power on the Stripe Reader S700 or BBPOS WisePOS E and connect it to Wi-Fi (or Ethernet, where supported).
- On the reader, open the settings and generate a registration code.
- In WordPress, open the location you created and go to the Register Reader section.
- Enter the registration code and give the reader a clear label, such as “Lobby kiosk” or “Gala table 1”.
- Save. The reader now appears under that location and is ready for donations.
Labels matter more than you’d think on a busy night. If you run several readers, name them by place, not by serial number.
Step 5b: How do you set up Tap to Pay or a Bluetooth reader in the Jovvie app?
Tap to Pay and Bluetooth readers (Stripe Reader M2 and BBPOS WisePad 3) are set up in the free Jovvie app on iOS or Android. The app loads your Give donation form and connects it to the phone’s NFC or a paired reader.
Connect the app to your account:
- Download the Jovvie app from the Apple App Store or Google Play.
- Open the app and tap the Jovvie icon in the upper right to open settings.
- In WordPress, find your donation form’s URL (open Give › All Forms, edit the form, and copy its URL from the form settings). In the app, set the Home URL to that form URL.
- Tap Payment Server › Link Payment Accounts, choose Already have an account, and sign in with your Jovvie account.
- Tap Connect to enable payments, then OK to save the API credentials.
Add the payment device:
- Tap Credit Card Gateways and Enable, then Add Credit Card Gateway.
- Choose the Connection Type: Tap to Pay for the phone’s own NFC, Bluetooth for an M2 or WisePad 3, or Internet for an S700 or WisePOS E.
- Enter the Stripe Location ID. You’ll find it in WordPress at Give › Settings › Payment Gateways › Jovvie Payments › Location & Terminals.
- Select your device (for Bluetooth, make sure the reader is charged and switched on so it can be discovered).
- Close settings and accept the permissions the app requests (Bluetooth, location and NFC, depending on the device). A green dot confirms the gateway is set up.
Repeat this on every volunteer phone you plan to use. Each phone can connect to one reader at a time.
Step 6: How do you enable the gateway and take a test donation?
Make sure Jovvie Payments is enabled in Give, then run a donation in Test Mode using one of Stripe’s test cards. If it shows up in Give, you’re ready.
- Go to Give › Settings › Payment Gateways and confirm Jovvie Payments is enabled.
- Open your donation form (in the browser for a countertop reader, or from the app’s Home for Tap to Pay and Bluetooth).
- Enter an amount, select Donate with Swipe, Insert, or Tap, and select Donate Now (in the app, choose the Jovvie option and Process Payment).
- The reader or phone prompts for a card. Tap, insert or swipe a Stripe test card.
- You’ll see the confirmation page. In the app, the form refreshes after about five seconds for the next donor.
- Check Give › Donations to confirm the test gift is recorded.
Test donations don’t move real money. Run a few, including one with the recurring option if your form offers it, so you know what donors will see.
Be ready for GivingTuesday (December 1). Once your test donation shows up in Give, you’re ready for real gifts.
Step 7: How do you go live?
Switch the location to Live Mode, make sure live readers are registered, and run one small real donation to confirm the full path into Stripe and your bank.
- Change the location to Live Mode (or create a live location) and register your readers there. Readers registered in Test Mode are for testing only.
- In the Jovvie app, confirm each phone is linked to the live location’s Stripe Location ID.
- Make a small real donation yourself, check it appears in Give and in your Stripe Dashboard, and refund it if you like.
Do this the day before an event, not the morning of. It’s the single best way to avoid surprises.
What does each setup path look like, side by side?
The steps differ mainly in where you register the device. This table summarizes the two paths.
| Step | S700 / WisePOS E (Wi-Fi) | Tap to Pay / M2 / WisePad 3 (Jovvie app) |
|---|---|---|
| Install plugin and connect Stripe | WordPress | WordPress |
| Create location | WordPress (Location Management) | WordPress (Location Management) |
| Register device | Enter the reader’s one-time code in WordPress | Add a Credit Card Gateway in the Jovvie app with the Stripe Location ID |
| Open the donation form | Browser on any device at the station | Jovvie app Home (loads your Give form URL) |
| Best for | Fixed desks, counters, kiosks | Mobile volunteers, events, door-to-door |
How do you fix common setup problems?
Most setup problems come down to the wrong mode, a missing permission, the wrong form URL, or no internet. This table covers the usual suspects.
| Problem | Likely cause | Fix |
|---|---|---|
| “Connect with Jovvie Payments” window doesn’t open | Browser pop-up blocker | Allow pop-ups for your WordPress admin and try again |
| Reader doesn’t appear in the app | Bluetooth or location permission denied, or reader asleep | Allow permissions in phone settings; wake and charge the reader |
| Tap to Pay option missing | Phone doesn’t meet Stripe’s requirements | Check iPhone XS+ / Android 13+ with NFC; otherwise pair an M2 |
| App opens the wrong page | Home URL isn’t your Give form URL | Copy the form URL from Give › All Forms › Edit and update Home URL |
| Payments fail in a test | Test card used on a live location (or vice versa) | Match Test Mode readers with test cards, Live Mode with real cards |
| Card declined asking for a PIN | Some cards need insertion for PIN (common in Canada and Finland) | Use an M2 or WisePad 3 so the donor can insert the card |
| Payment won’t authorize at an outdoor venue | No internet on the device | Switch to mobile data or a hotspot; there’s no offline mode |
| Donation not showing in Give | Gateway not enabled on that form | Enable Jovvie Payments in Give’s gateway settings and recheck the form |
For anything not covered here, Jovvie Support can help.
How do you get volunteers ready?
Give each volunteer a two-minute walkthrough and one practice donation in Test Mode. That’s usually enough.
- Install the Jovvie app on their phone (for Tap to Pay or a Bluetooth reader) and connect it before the event, not at the door.
- Show the three moves: open the form, choose the in-person option, hand over the device.
- Agree on a fallback: if a card fails, try another card or a phone wallet, or share the online donation link. Never write card numbers down.
- Bring power: a few power banks at the donation table prevent dead phones mid-event.
- Name a device lead who knows the setup and can help others.
Frequently asked questions
How long does it take to set up Tap to Donate for GiveWP?
About five minutes for the core setup: install the plugin, connect Stripe, add a location and register one device. Allow a little more time to set up the Jovvie app on each volunteer phone and to run a few test donations.
Do I need to buy a card reader?
No. Tap to Pay on a supported iPhone or Android phone works without any extra hardware. Add a Stripe Reader M2, BBPOS WisePad 3, Stripe Reader S700 or BBPOS WisePOS E if you want chip insertion or a fixed station.
Where do I find my Stripe Location ID?
In WordPress, go to Give › Settings › Payment Gateways › Jovvie Payments › Location & Terminals. You’ll enter it in the Jovvie app when you add a Tap to Pay or Bluetooth device.
Can I test before taking real donations?
Yes. Set your location to Test Mode, register readers there, and use Stripe test cards. Test donations don’t move real money. Switch to Live Mode when you’re ready.
Do I need my own Stripe account?
Yes. Donations go to your own Stripe account, new or existing, and pay out to your bank. You connect it during setup through your free Jovvie account.
What does Tap to Donate cost?
The plugin and Jovvie account are free, with no monthly fees or contracts. A platform fee of 0.5% to 2% applies to in-person donations only, depending on your donation volume, in addition to Stripe’s processing rate. Online donations are not affected.
Will this change my existing online donation forms?
No. Jovvie Payments is added as an extra gateway. Your current online gateways and forms keep working as before.
Take your first in-person donation
Five minutes of setup and one test donation are all that stand between your Give forms and in-person giving at your next event. Install Tap To Donate, connect Stripe, register a phone or reader, and you’re ready for GivingTuesday and every gathering after it.
Prefer a walkthrough for your setup? Talk to a Jovvie advisor.
Sources and primary documentation: Jovvie setup documentation, Tap To Donate for Give by Jovvie on WordPress.org, Jovvie for Give, How to Accept In-Person Donations with Jovvie and Give (Nexcess docs), How Tap to Donate Technology Works and What It Costs (Liquid Web), Stripe Tap to Pay documentation, Stripe Terminal locations, Stripe Terminal testing.
