
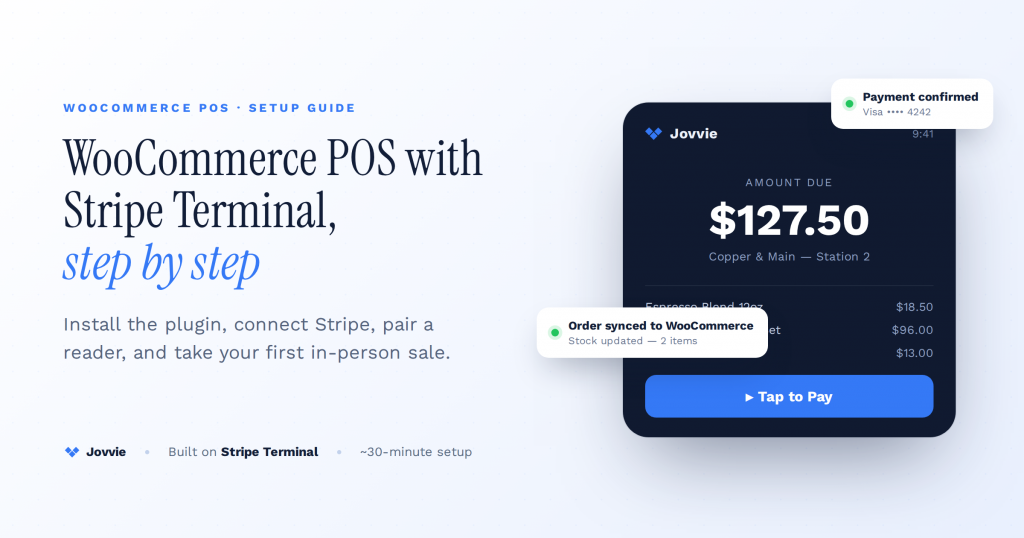
You set up a WooCommerce POS with Stripe Terminal by choosing a deployment mode (cloud-hosted or self-hosted), installing a WooCommerce POS plugin that wraps the Stripe Terminal SDK, connecting it to Stripe, configuring at least one register station, assigning a certified reader to that station, then running a first sale and confirming the receipt — because WooCommerce ships no native register, the plugin supplies the point-of-sale layer that turns your existing store and Stripe account into a working in-person checkout. The whole thing is configuration, not development. This guide walks each step in order, with the decisions you actually have to make called out where they matter.
Key Takeaways
- Setup is five stages: pick a deployment mode, install the POS plugin, connect Stripe, configure a register station, and run a test sale.
- Choose cloud-hosted for speed or self-hosted for full data control — both run on your existing WooCommerce store.
- The POS plugin installs like any WordPress plugin; Stripe connects through a guided Stripe Connect flow.
- Each register station carries its own outlet, tax behavior, receipt template, and assigned reader.
- Your first test sale proves the whole loop: cart → Terminal payment → paid WooCommerce order with stock decremented.
- Receipts print, email, or both; most setup snags are connectivity or reader pairing.
We have built WooCommerce point-of-sale on Stripe Terminal for eight years — for boutiques, cafes, pop-ups, kiosks, and multi-location retailers across more than 30 countries — and the pattern is always the same: the payment itself is the easy part, and the setup people underestimate is the register around it. Which stations exist, which reader belongs to which station, how tax and receipts behave at the counter. That is the part this guide is about. If you only need the fastest possible connection, read our 30-minute WooCommerce-to-Stripe-Terminal setup walkthrough instead; this piece is the fuller POS setup, including the deployment-mode decision, multi-station configuration, and receipt printing.
This is a step-by-step guide in our WooCommerce Stripe Terminal library. For the architecture, hardware, and pricing context behind these steps, read the complete Stripe Terminal for WooCommerce implementation guide. For how the payment rail itself works underneath any register, see how Stripe Terminal works as a point-of-sale system. Once you are live, the Stripe Terminal refunds and PIN authorization workflow is the next thing most operators wire up.
What is a WooCommerce POS with Stripe Terminal?
A WooCommerce POS with Stripe Terminal is your existing WooCommerce store used as an in-person cash register, where Stripe Terminal hardware — a certified reader or Tap to Pay on a phone — captures the card and Stripe processes it at card-present rates, while a POS plugin provides the register interface, cart, tax, and order sync back into WooCommerce.
The value is unification. Your online store and your counter run on the same product catalog, the same inventory counts, the same Stripe account, and the same order list. A sale rung up on the S700 at your front desk decrements the same stock and lands in the same WooCommerce orders screen as a web sale. That single source of truth is the reason to build the register on top of WooCommerce rather than bolting on a separate POS that you then have to reconcile.
Stripe Terminal supplies the certified hardware and the Terminal SDK; Jovvie supplies the register. You do not write code against the SDK — the plugin does that for you, requesting connection tokens, registering readers, and creating WooCommerce orders when a payment succeeds.
Cloud-hosted or self-hosted: which WooCommerce POS deployment should you choose?
Choose cloud-hosted if you want the fastest setup, managed uptime, and automatic updates; choose self-hosted if you need the register to run entirely on your own WordPress infrastructure for control, compliance, or offline-tolerant performance reasons. This is the first real decision, and it shapes everything after it, so make it deliberately before you install anything.
The two modes run the same Stripe Terminal payment flow and produce the same WooCommerce orders. The difference is where the register application lives and who is responsible for keeping it fast and current.
| Decision factor | Cloud-hosted | Self-hosted |
|---|---|---|
| Where the register runs | Jovvie’s managed servers | Your existing WordPress hosting |
| Setup speed | Fastest — no server tuning | Depends on your hosting quality |
| Updates | Automatic, always current | You control when to update |
| Performance under load | Managed, guaranteed uptime | Only as fast as your host |
| Control over data & compliance | Managed by the platform | Full control on your infrastructure |
| Best for | Most retailers, pop-ups, multi-location | Complex/regulated setups, heavy customization |
| Ongoing responsibility | Platform handles security & scaling | You handle security, scaling, uptime |
For most operators the honest answer is cloud-hosted: it removes the two things that most often break a WooCommerce POS — an underpowered shared-hosting plan that stalls at the counter, and a plugin that drifts out of date. Self-hosted is the right call when you have a capable managed WordPress host and a specific reason to keep the register on your own infrastructure — data-residency requirements, deep customization, or an existing DevOps practice you would rather not duplicate. If you are unsure, start cloud-hosted; you are not locked in, and the register behaves identically either way.
One caveat worth being platform-neutral about: if your store runs on entry-level shared hosting and you have no appetite to upgrade it, do not force a self-hosted register onto it. A POS that hesitates while a customer waits is worse than one you do not fully control. Pick cloud-hosted, or upgrade the host first.
How do you install the WooCommerce POS plugin?
You install the POS plugin from your WordPress dashboard the same way you install any plugin — upload the ZIP or install from the directory, then activate — which takes about two minutes and adds a POS menu to your sidebar.
Before you begin, confirm the prerequisites are in place, because having them ready is what keeps this smooth:
- A live WooCommerce store on WordPress with products and prices already set up. WooCommerce 8.0+ is recommended; if you use High-Performance Order Storage (HPOS), confirm your POS plugin supports it — Jovvie does.
- A valid SSL certificate. Stripe requires HTTPS end to end; the register will not connect over plain HTTP.
- A Stripe account that can accept payments in your country. Check regional availability on the Stripe Terminal overview.
- A supported reader (see the reader-assignment section below), or a Tap-to-Pay-capable phone.
- The POS plugin — Jovvie, in this guide.
To install:
- In WordPress admin, go to Plugins → Add New.
- Click Upload Plugin and select the Jovvie ZIP (or search the directory), then Install Now.
- Click Activate.
- Confirm a new POS item appears in the WordPress sidebar.
If you chose cloud-hosted, activation connects the register to the managed environment during onboarding; if self-hosted, the register runs from this WordPress install directly. Either way, the next step is connecting Stripe.
How do you connect the plugin to Stripe?
You connect to Stripe through a guided Stripe Connect onboarding flow launched from the plugin’s payment settings — click Connect, authorize on Stripe’s hosted page, and you are returned to WooCommerce authenticated, with no raw API keys to copy.
This step is what lets the register request the connection tokens the Terminal SDK needs and register readers on your behalf. In your WordPress admin:
- Open POS → Settings → Gateways (or the payments section of the plugin settings).
- Enable Stripe Terminal as a payment gateway.
- Click Connect to Stripe. You are redirected to a Stripe-hosted page.
- Sign in to the Stripe account you already use for your WooCommerce online checkout — this is the one setting people get wrong. Connecting the same account means in-person and online sales settle into one balance, one payout schedule, and one reporting view.
- Authorize the connection. Stripe returns you to WordPress showing a connected status.
Test mode is your friend here. Stripe provides a test environment so you can complete every step below — station config, reader assignment, a simulated first sale — before a real card is ever tapped. Do the dry run in test mode, then flip to live.
How do you configure a register station?
You configure a station by creating a named register in the POS settings and attaching the outlet, tax behavior, receipt template, and payment gateways it should use — a station is the logical “till” that a reader and a cashier operate, and Stripe’s Terminal model maps each station to a Stripe Location so readers register to the right place.
Stations are how a WooCommerce POS scales from one counter to many. Even a single-counter shop needs one station; a multi-location retailer needs one per outlet, and often several per outlet.
To set up a station:
- In POS → Settings, open Stations (or Outlets/Registers, depending on your version) and click Add Station.
- Name it something a cashier will recognize — “Front Counter,” “Booth 2,” “Register A.”
- Assign the outlet/location. This becomes the Stripe Location the station’s readers register under, which keeps reader inventory and reporting organized by physical site.
- Set tax behavior. Confirm whether the station uses your store-wide WooCommerce tax classes or a station-level tax rate (useful when a pop-up operates in a different tax jurisdiction than your registered store address).
- Choose the receipt template the station prints or emails (configured in the receipt section below).
- Select the enabled payment gateways — Stripe Terminal for cards, plus cash or other tenders if you accept them.
- Save. The station is now available to assign a reader to and to open on a device.
A quick multi-location tip: name stations and locations consistently from day one (“Downtown — Front,” “Downtown — Kiosk,” “Airport — Front”). Reader inventory, payouts, and reconciliation all read cleaner later when the naming is disciplined from the start.
How do you assign a Stripe Terminal reader to a station?
You assign a reader by registering it to the station’s Stripe Location and then pairing it to the station inside the POS — registration tells Stripe which physical site the reader belongs to, and pairing tells the register which reader to send payments to.
First, pick the reader that fits the station. Current Stripe Terminal hardware and typical roles:
| Reader | Price (USD) | Best for |
|---|---|---|
| Tap to Pay (iPhone/Android) | No hardware cost | Mobile sales, pop-ups, line-busting, field |
| Stripe Reader M2 | $59 | Handheld counter or mobile, budget setups |
| BBPOS WisePad 3 | $59 | Handheld with PIN entry |
| BBPOS WisePOS E | $249 | Fixed counter, screen-enabled |
| Stripe Reader S700 | $349 | Flagship smart countertop, tap/chip/swipe |
Prices per Stripe’s published hardware pricing; confirm current figures on stripe.com/terminal before ordering. For a full head-to-head, see the 2026 Stripe Terminal hardware reader guide.
To assign a physical reader (M2, WisePad 3, WisePOS E, S700):
- Power on the reader and connect it to the same network the register device uses (or pair over Bluetooth for the M2/WisePad).
- In POS → Settings → Stations → [your station] → Readers, click Register a reader.
- Enter the reader’s registration code (shown on the reader’s screen, or generated by holding the button per Stripe’s reader setup docs).
- The reader registers to the station’s Stripe Location. It now appears as available.
- Assign it to the station so the register routes this station’s payments to this reader.
To use Tap to Pay instead, no hardware registration is needed — enable Tap to Pay in the station’s reader settings on a supported iPhone or Android device, accept the on-device terms, and the phone itself becomes the reader. Tap to Pay is the fastest way to test the full flow before hardware arrives.
If a reader shows offline, the usual causes are a network mismatch (reader and register on different Wi-Fi/VLANs), an out-of-date reader, or a reader registered to a different Location than the station you are opening. Check those three first.
Station configured — time to take your first payment.
Jovvie runs the whole WooCommerce register on Stripe Terminal, so online and in-person sales share one catalog and one set of orders.
Start your free trial →How do you run your first sale?
You run a first sale by opening the station on your register device, adding products to the cart, selecting Stripe Terminal as the payment method, and prompting the customer to tap, insert, or swipe on the assigned reader — the register creates the WooCommerce order and decrements inventory automatically when Stripe confirms the payment.
Do this once in Stripe test mode before going live. Step by step:
- On the register device (tablet, laptop, or phone), open the POS and select your station. If prompted, confirm the paired reader.
- Add products by searching the catalog or scanning a barcode. The cart shows line items, quantities, and tax computed from the station’s tax settings.
- Apply any discount or note, then click Checkout.
- Select Stripe Terminal (card) as the payment method. The register sends the amount to the assigned reader.
- The reader displays the total and prompts the customer to tap, insert, or swipe. PIN entry appears when the card or amount requires it.
- On approval, the register creates the WooCommerce order, marks it paid, and decrements stock. The customer sees a confirmation.
- Offer a receipt (next section).
That is a complete card-present sale. Because the order is a normal WooCommerce order, it appears in WooCommerce → Orders alongside your online sales, reconciles in the same Stripe balance, and feeds the same reports. Card-present transactions price at Stripe’s in-person rate rather than online rates — confirm your current rate on Stripe’s pricing page, and see the complete implementation guide for how in-person pricing compares to online.
How do you set up receipt printing?
You set up receipts by choosing the station’s receipt method — printed, emailed, or both — and configuring the template with your business details, then connecting a receipt printer if you want physical receipts. Digital receipts work out of the box; a printer is optional hardware.
To configure:
- In POS → Settings → Stations → [station] → Receipts, choose Email, Print, or Both.
- Edit the receipt template — business name, address, tax/VAT ID, return policy, and logo. This is what the customer sees, so make it accurate.
- For emailed receipts, confirm the customer email prompt appears at checkout and that your store’s transactional email is deliverable (WooCommerce uses your WordPress mail configuration).
- For printed receipts, connect a supported thermal receipt printer. If you use a networked printer via BizPrint, point the station at the printer in the print settings; the S700 and WisePOS E can also drive certain printers directly.
- Run a test print or send a test email from the template screen before your first real customer.
A practical note on hardware: an 80mm thermal receipt printer over network or USB is the reliable default for a fixed counter. For mobile Tap to Pay setups, lean on emailed or SMS receipts — carrying a printer defeats the point of a phone-only register.
What can go wrong, and how do you fix it?
Most WooCommerce POS setup issues trace back to four causes: HTTPS not fully enforced, the wrong Stripe account connected, a reader registered to the wrong Location, or a network split between reader and register. Check those before anything exotic.
- “Stripe won’t connect” / stuck on connect: confirm a valid SSL certificate site-wide and that you authorized the connection with the correct Stripe account. Reconnect from test mode first.
- Reader shows offline: put the reader and register device on the same network, update the reader firmware, and confirm the reader is registered to the station’s Location, not a different one.
- Sale succeeds but no WooCommerce order appears: usually a webhook or gateway-enable issue — confirm Stripe Terminal is enabled as a gateway on the station and that your site can receive Stripe webhooks.
- Tax looks wrong at the counter: check whether the station uses store-wide WooCommerce tax classes or a station-level rate; a pop-up in another jurisdiction needs the station-level override.
- Receipts not sending: test your WordPress transactional email; for print, run the printer’s test page and confirm the station points at it.
Frequently asked questions
Does WooCommerce have a built-in POS for Stripe Terminal?
No. WooCommerce has no native point-of-sale or Terminal register. You add a POS plugin (such as Jovvie) that wraps the Stripe Terminal SDK and supplies the register interface, cart, tax, receipts, and order sync. Stripe provides the hardware and payment rail; the plugin provides the till.
Do I need Stripe Connect to use Stripe Terminal with WooCommerce?
The plugin uses Stripe’s platform flow to create connection tokens and register readers on your behalf, which is why onboarding runs through a guided Stripe connection rather than pasting API keys. You connect your own Stripe account; you do not need to become a Stripe platform yourself. See Use Terminal with Connect for the underlying model.
Can I use Tap to Pay instead of buying a reader?
Yes. Tap to Pay on iPhone or Android turns a supported phone into the reader with no hardware purchase — ideal for pop-ups, line-busting, and field sales. Enable it in the station’s reader settings and accept the on-device terms. For a fixed counter with volume, a dedicated reader like the S700 or WisePOS E is more ergonomic.
Will in-person sales sync with my online WooCommerce inventory?
Yes, when you connect the same Stripe account and run the register on your WooCommerce store, each in-person sale creates a normal WooCommerce order and decrements the same stock as online sales. That shared catalog and inventory is the main reason to build the POS on WooCommerce rather than a separate system.
How much does it cost to accept card-present payments?
Stripe charges an in-person (card-present) processing rate per transaction, which differs from online rates — confirm the current figure on Stripe’s pricing page. On top of processing, budget for reader hardware (from $59 for the M2, or $0 with Tap to Pay) and your POS plugin. See the complete implementation guide for a full cost breakdown.
Cloud-hosted or self-hosted — can I switch later?
Yes. The two deployment modes run the same payment flow and produce the same WooCommerce orders, so you are not locked in. Most operators start cloud-hosted for speed and managed uptime, then move to self-hosted only if a specific control or compliance need appears.
Ready to run your counter and your website on one system? Start a free Jovvie trial and set up your first WooCommerce POS station with Stripe Terminal today — cloud-hosted in minutes, or self-hosted on your own infrastructure. Want us to look at your setup first? Book a demo and we will walk your stations, readers, and receipts with you.
Sources: Stripe Terminal documentation, Terminal overview & availability, Select and set up a reader, Locations, Connection tokens, Use Terminal with Connect, Stripe Terminal hardware & pricing.
Run Stripe Terminal on WooCommerce with Jovvie
Jovvie is the WooCommerce-native point of sale built on Stripe Terminal — take in-person payments, sync every sale to your store, and keep one system of record. Start free, no credit card required.
