
Don't want to setup Jovvie POS yourself? Click Here.

We’ll setup jovvie for you!
Included with your trial is FREE setup, our team will securely temporarily access your WordPress site and configure Jovvie for you – at no cost!
STEP 1: Install & Activate Point of Sale Plugins
Once you’ve started a Trial, download plugins and follow these steps:
Install Two (2) Required Plugins:
-
Jovvie Point of Sale (Required)
-
Jovvie Point of Sale Self-Hosted (Required)
Three (3) Optional Add-on Plugins:
-
Jovvie POS Staff (Recommended)
-
Jovvie POS Pay by WC Bridge (Optional)
WordPress Plugin Install Instructions:
- Download plugins from order confirmation page, or your email.
- Go to WordPress Admin, click Plugins, then Add New.
- Click Upload Plugin, then Choose File and Install Now.
- Once Install complete, go to Plugin page and click Activate.
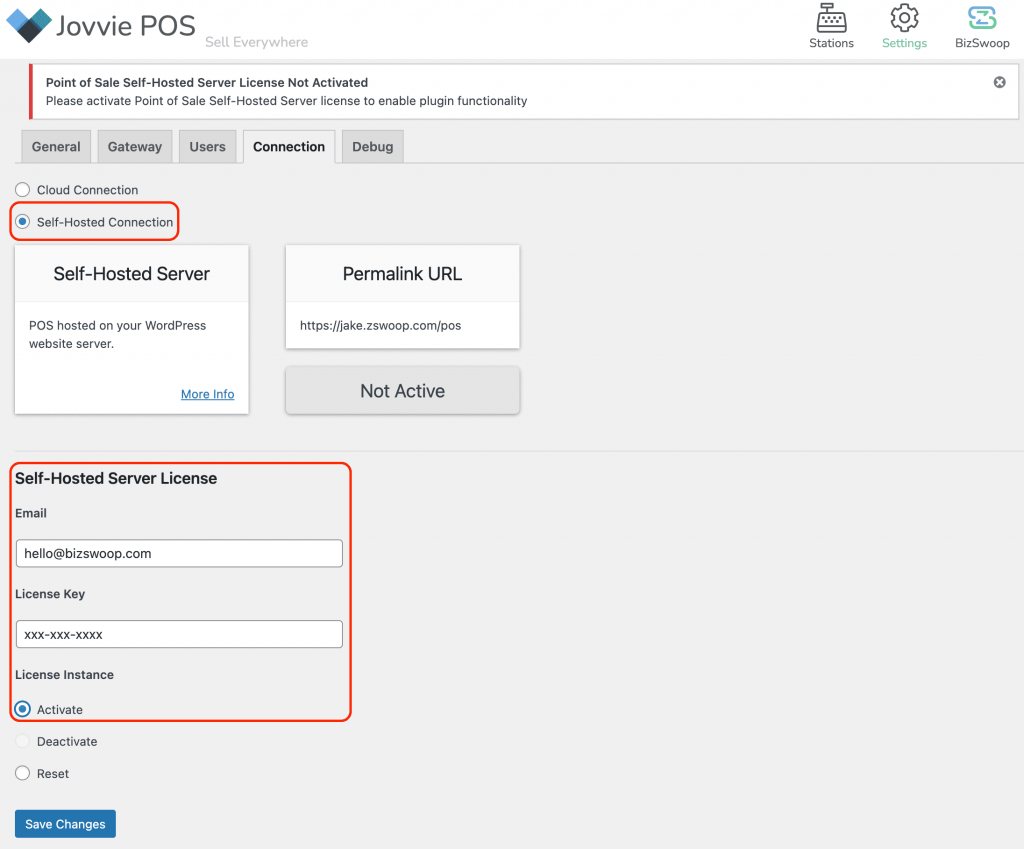
STEP 2: Activate POS License Key
IMPORTANT: Find the license key in your account.
- In your WordPress Admin, navigate to POS -> Settings -> Connection.
- Select Self-Hosted connection.
- Input your admin email and license key information. Click save changes.
STEP 3: Assign a Team Member To Start Using POS
Go to Point of Sale -> Settings -> Users:
- Select your WordPress user under the manager list. By Default: You get 1 manager and 1 cashier account.
- If you have the Staff add-on configured, you don’t need to select a user here. See below to setup Staff users.

Activate Staff Add-on (Optional):
- Included in your subscription with add-on, you can manage your whole team and create kiosks with multiple users.
- To use, Install and activate the Staff add-on plugin (found in your downloads page).
- Once activated, users access can be managed on a station level
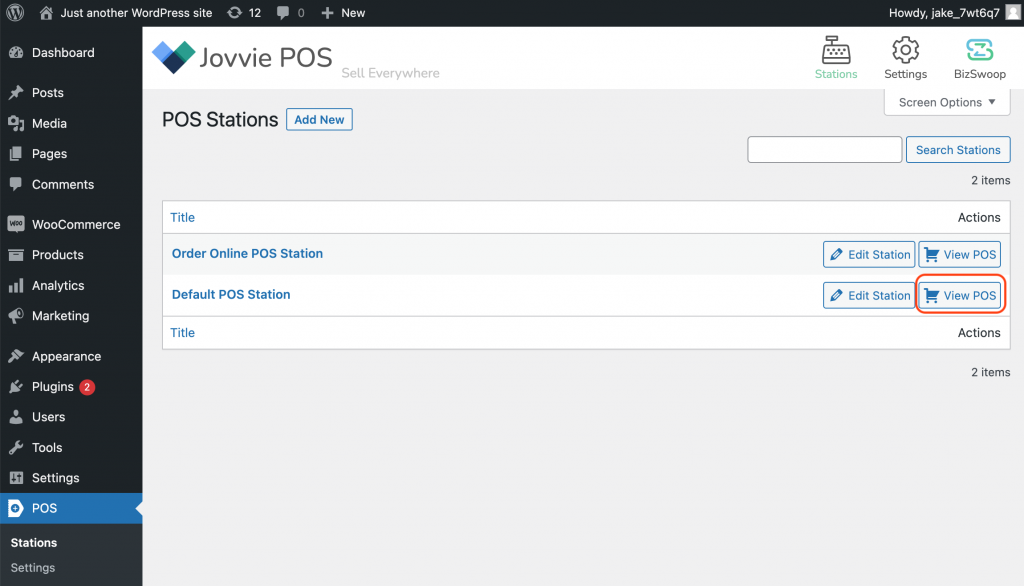
STEP 4: You’re ready to load a Jovvie POS Station! 🎉
Congrats! No further setup is required to load your products and start selling.
- Click View POS on “Primary POS Station”.
- The “Primary POS Station” is your core Point of Sale Station. The settings are fully editable. Any new station you create will inherit the Tax & Location information from this station.
- The “Order Online POS Station” is used to view/edit orders that have been placed using your WooCommerce Storefront Checkout Page. This POS station uses the “Default WooCommerce settings” for Tax and location. These settings are uneditable.
Congrats on your new Point of Sale system!

Yay! You are now connected and setup on POS Self-Hosted Connection. You can now process orders.

Happy Selling.
STEP 5 (Optional): Activate Payment: Pay by WC
The add-on is included at no additional cost and can be downloaded from your confirmation email.
- Pay by WC: This is a bridge add-on to allow your WooCommerce payment gateways to be enabled in Jovvie Point of Sale.

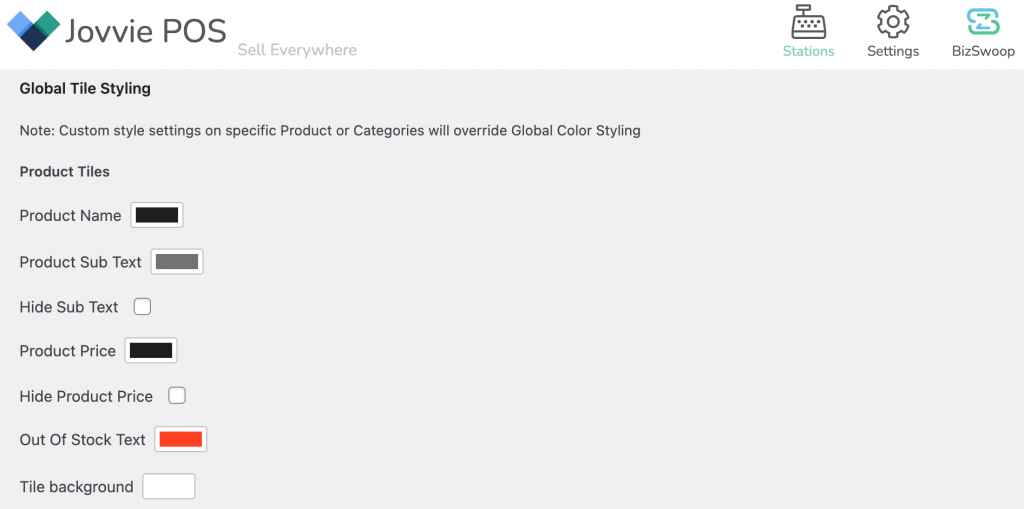
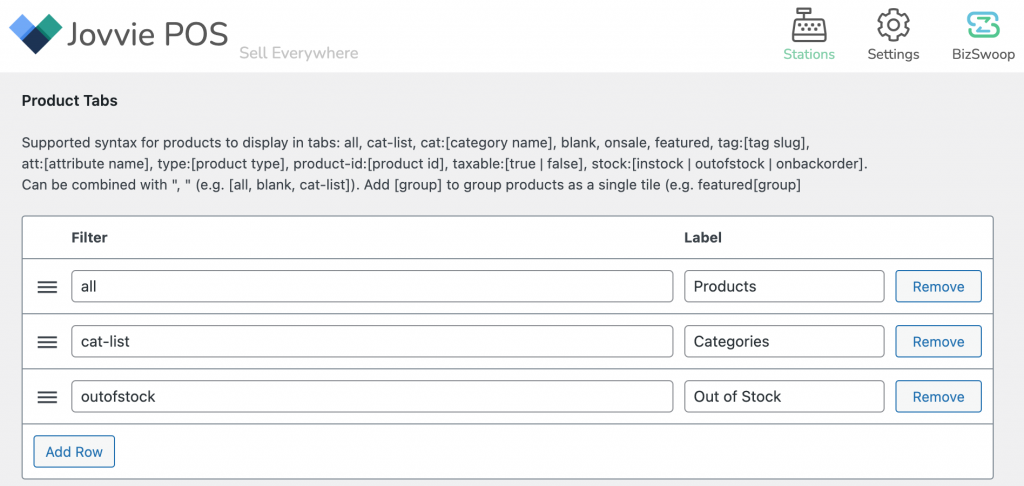
STEP 6 (Optional): Edit Additional Settings 🎉
Explore more settings under “Edit Station” button.
*All product names, trademarks and registered trademarks are property of their respective owners.